Overview
Our Push Notification system has plenty of options for customization that helps you target users the right way. The 5-step push send process is quick and straightforward, and you can do it right through your dashboard.
In this article, you will learn all about this feature and how to set it up in your dashboard.
Information
Note: With our North Park update, we have released the ability to send Single or Multi-User push notifications. More information about this at the end of the article.
Things to Keep in Mind
- Your native app must be live to send push notifications. There is no way for users to receive them without having the live app installed on their device.
- For Web Apps, your users must accept push notifications when they visit your PWA page. They do not need to have the app installed, nor do they need to have it or the browser running.
- When an app is installed, users can choose to enable or opt-out of push notifications. If they opt out, they will not receive any from your app.
- If you want to receive push notifications successfully, it is essential to enable both the Push Notifications and Location Services, which allows you to receive location-based messages.
- The Messages feature will serve as a log of push notifications received. Add it to your app so users can reference them later!
- If you encounter any errors when sending a push notification, do not hesitate to reach out to us!
Process
To get started, follow the steps below:
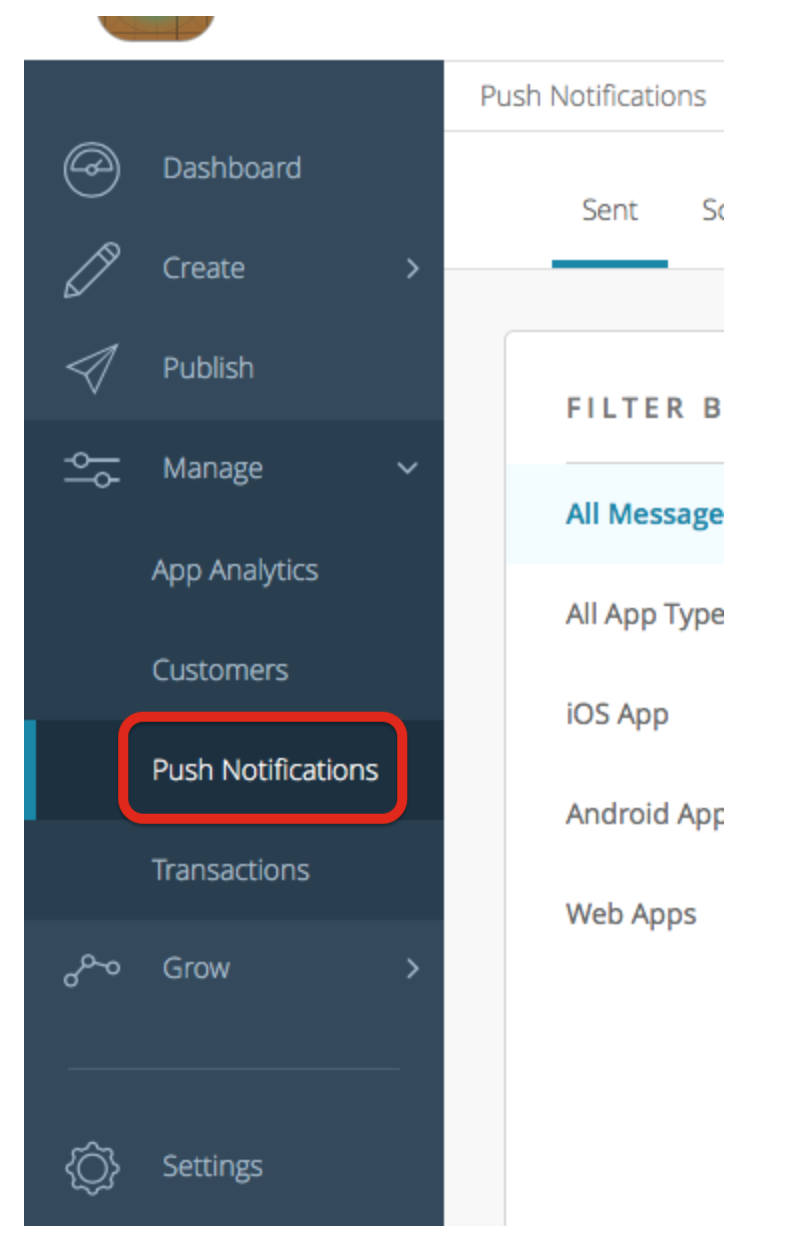
- Log in to your app and head to the Manage section.
- Click the Push Notifications on the left sidebar.
Push Notifications Message Center
When landing in the Message Center:
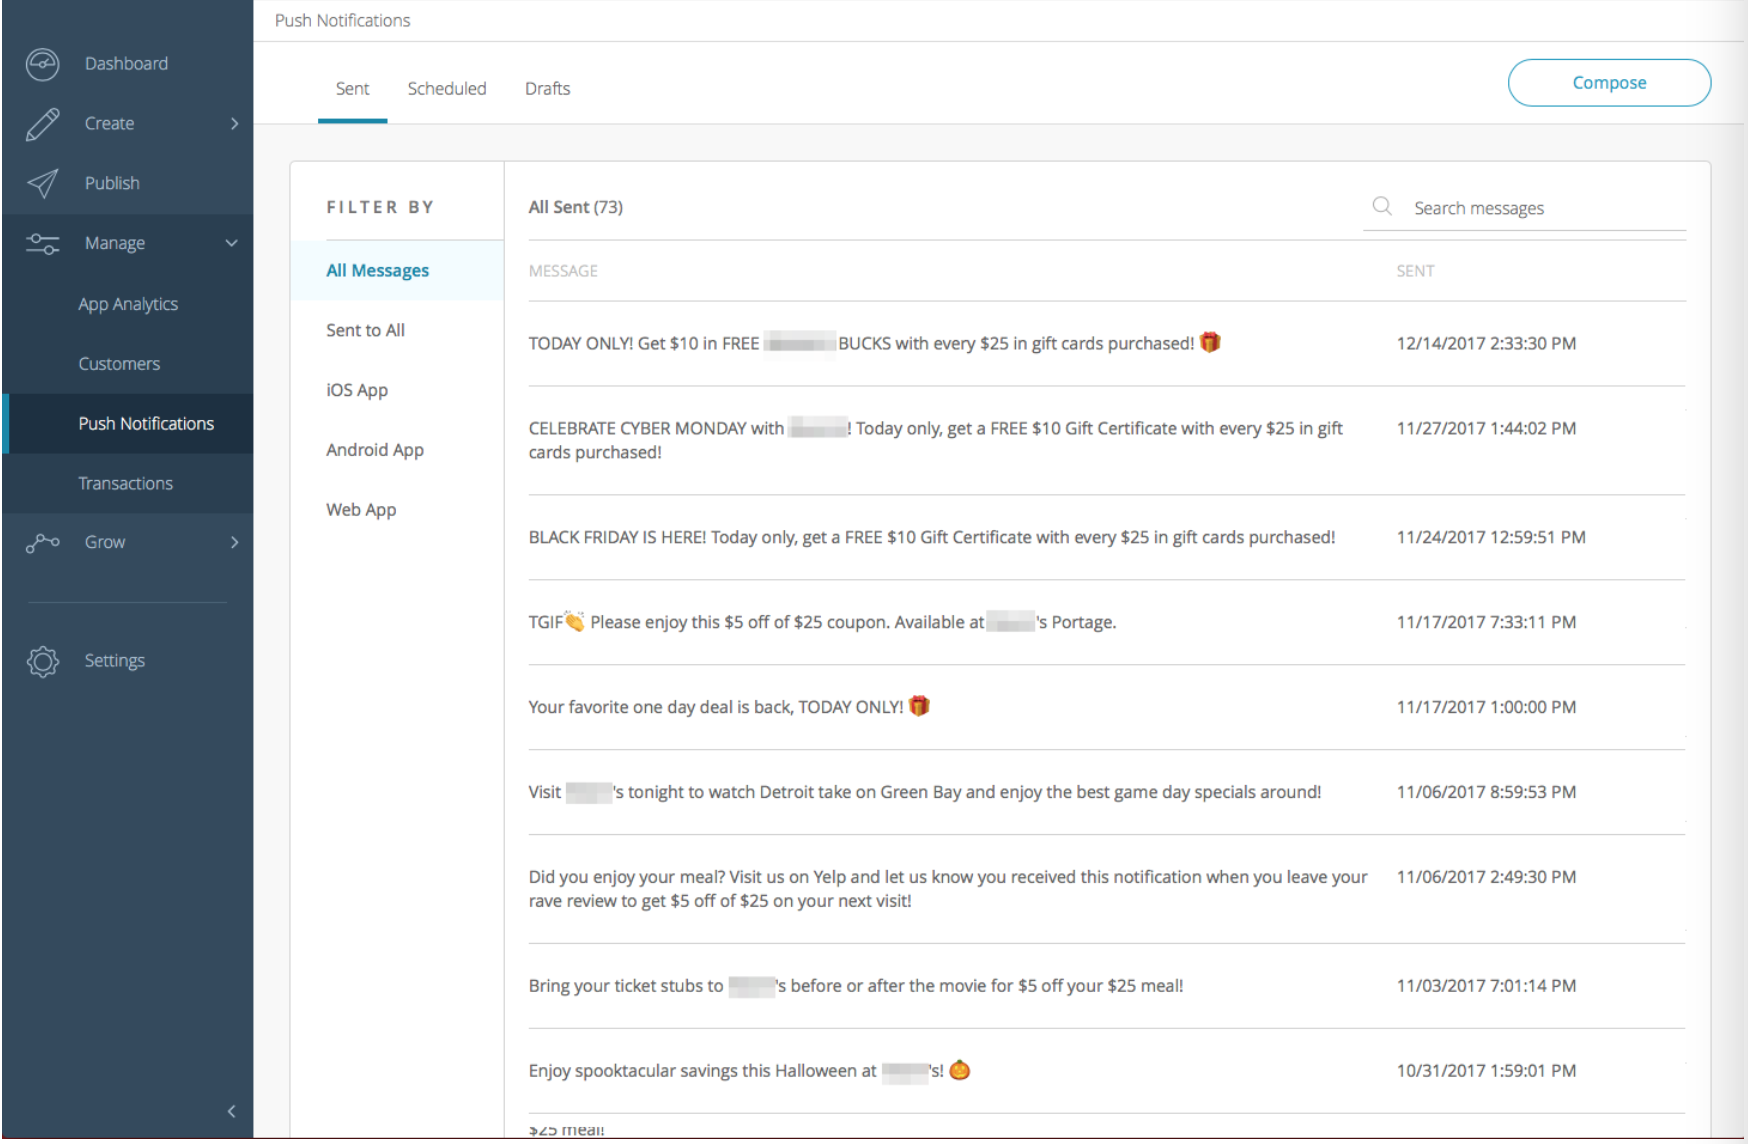
- You will notice a tabbed navigation menu with Sent, Scheduled, and Drafts options. These will help you quickly navigate to those push messages that you wish to view or manage.
- You will find all of the messages in this section. On the left of this list view, you have filters to adjust which App Type these messages were sent to.
- From the Sent view, you can delete the messages so they will no longer show on your customers’ apps.
- From the Scheduled view, you can either delete a message, so it no longer sends, or edit the message before it sends.
- From the Drafts view, you can now pick up a draft message where you left off to update it or select when you wish to send it.
The setup process comprises of 5 steps:
- Configure Message
- Configure the Targeted audience
- Configure Location
- Configure Message linking ability
- Set up Send and schedule
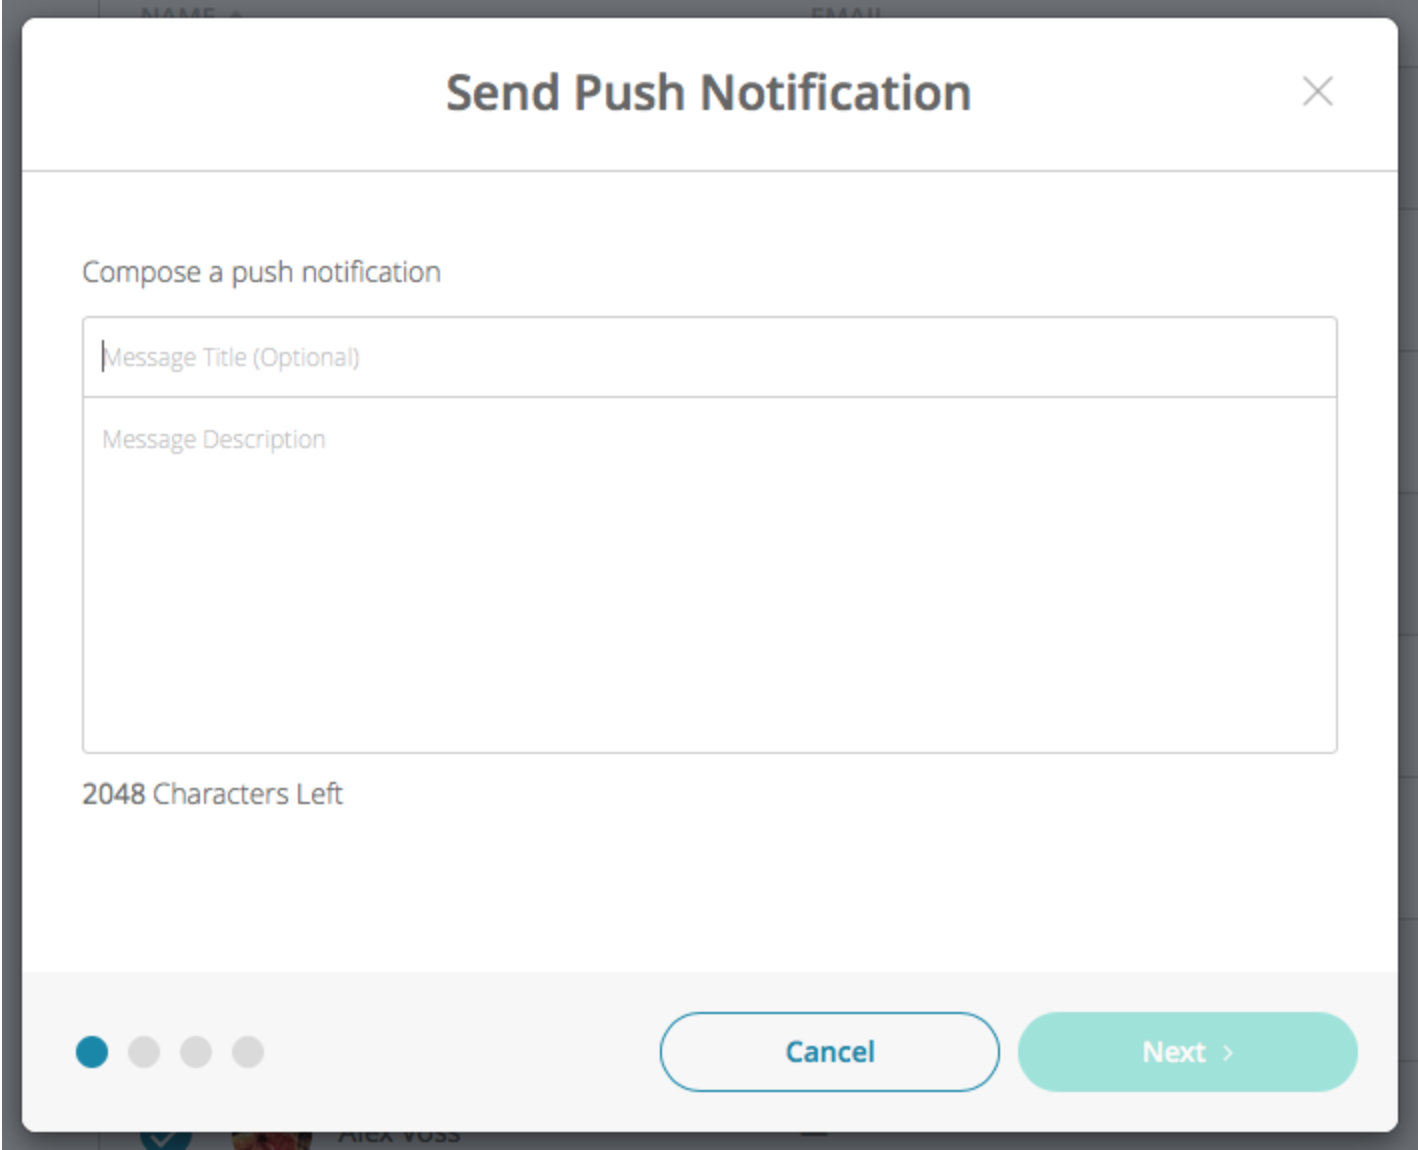
Step 1: Configure Message
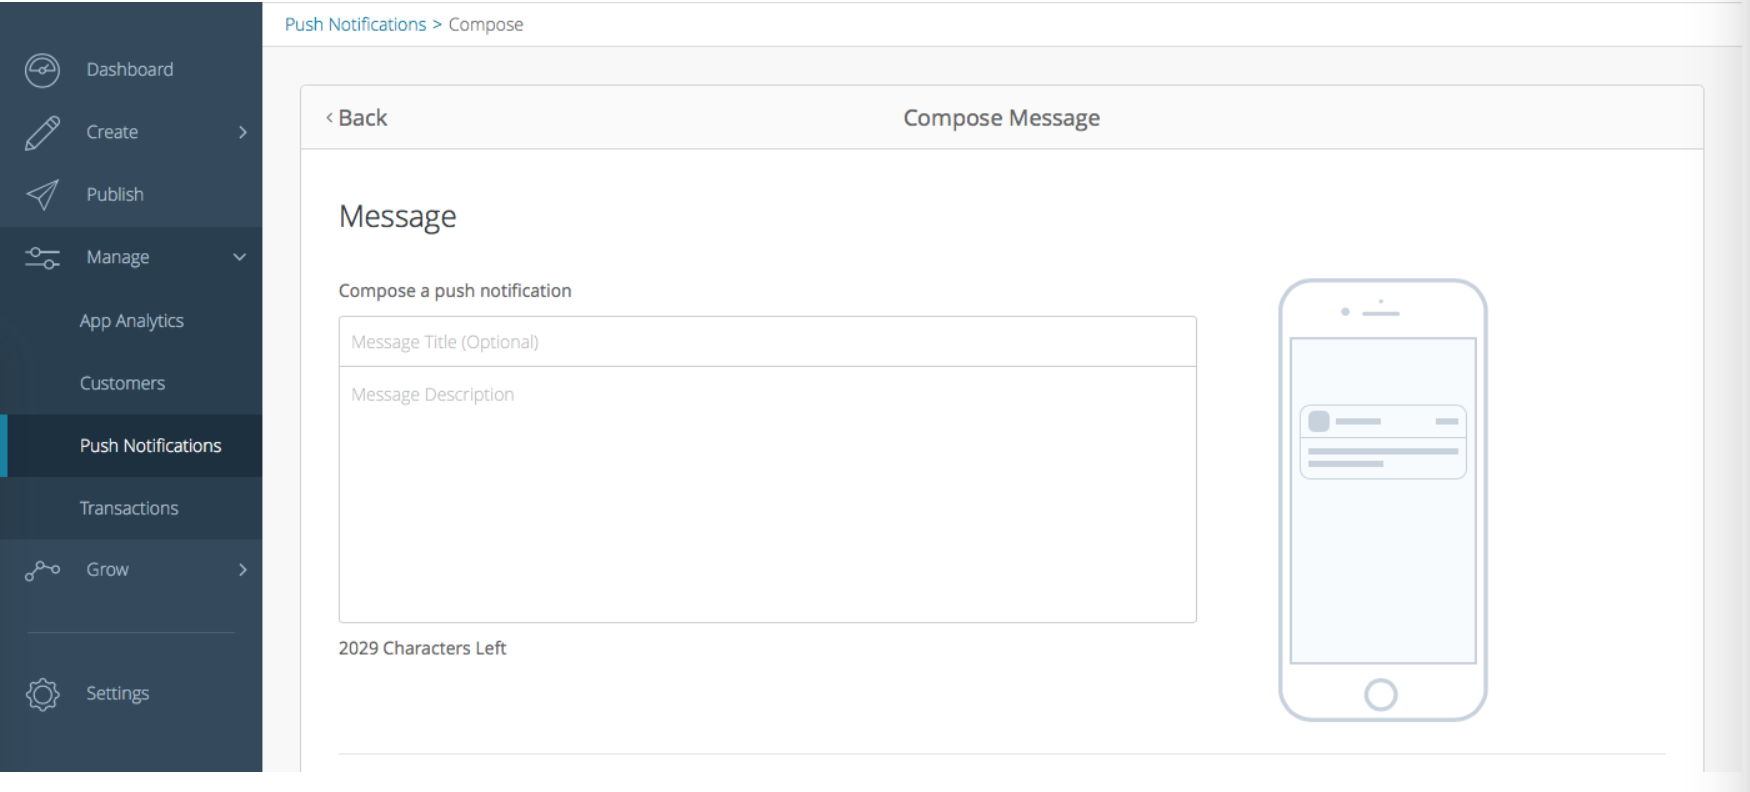
- In the Message Center page, click Compose.
- Enter a Message Title if you wish. It will be slightly larger and bold to signify the title or subject of the message.
- Enter the text of the message. Apple limits push notifications to be less than 2kb in size, so we have built-in restrictions here.
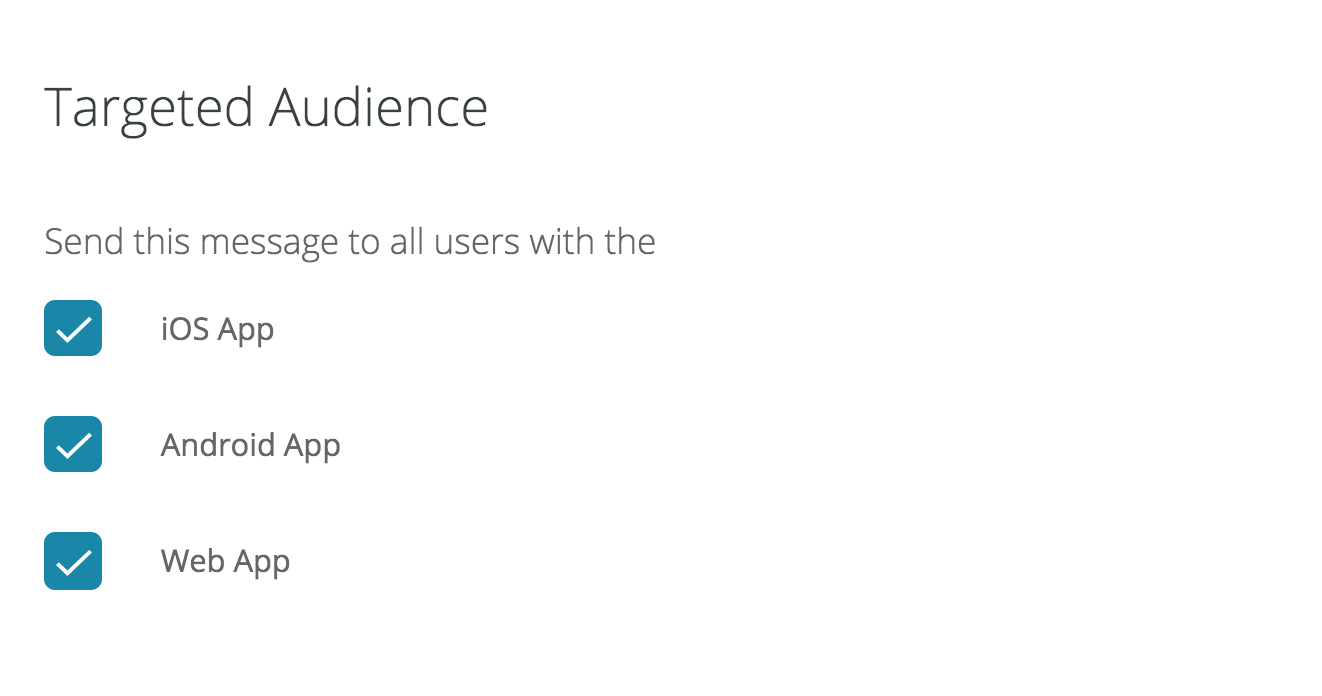
Step 2: Configure the Targeted Audience

Subscriptions and User Groups Logic
- If you wish to send a message to all users to your mobile apps, simply select all of the Target Audience.
- You will not need to apply any additional filters, and the message will be sent to everyone.
- Applications on Orange or newer source code will be affected with Subscriptions and Users/Groups selected.
To further segment your push notifications please read the following:
Subscriptions (not yet available on PWA)
- When Subscriptions are enabled, you can send push notifications assigned to one or multiple subscriptions.
- For users who have a selected subscription turned off on their device, they will not receive the push note alert. However, they will still see the message in their messages tab.
- If you choose not to select any subscriptions, the push notification will go out to ALL users, even if they have all subscriptions turned off (this, of course, does not override the device targets or user groups selections).
User Groups
- When Groups are enabled, you can send push notifications to specific groups or users in a group.
- When selecting one or multiple groups from the group dropdown, you will see the users in those groups are auto-selected in the user selection.
- Now you can either leave as is, or further modify which users will receive your message by adding/removing users.
- When sending a push notification using User Groups, those users that were not selected here will NOT receive the push note, and it will NOT be displayed in the messages list.
- Linked tabs that are sent to users who do not have access to these tabs will receive the message, but they will not be able to tap (open) the tab.

Note:
Subscriptions and User Groups can be used independently or in unison, along with all of the location features as well.
Step 3: Configure Location (not yet available on PWA)
- Further filter who sees your push notification by clicking the Apply Location Filters toggle.
- There are two types of location filters: Radius and Geo-fence. When you select a filter and a location, you will see the XX Users Found In This Area number update just below the map.
- A Located App User is someone who had location services for your app enabled and was last known to be within your radius or geo-fenced area.
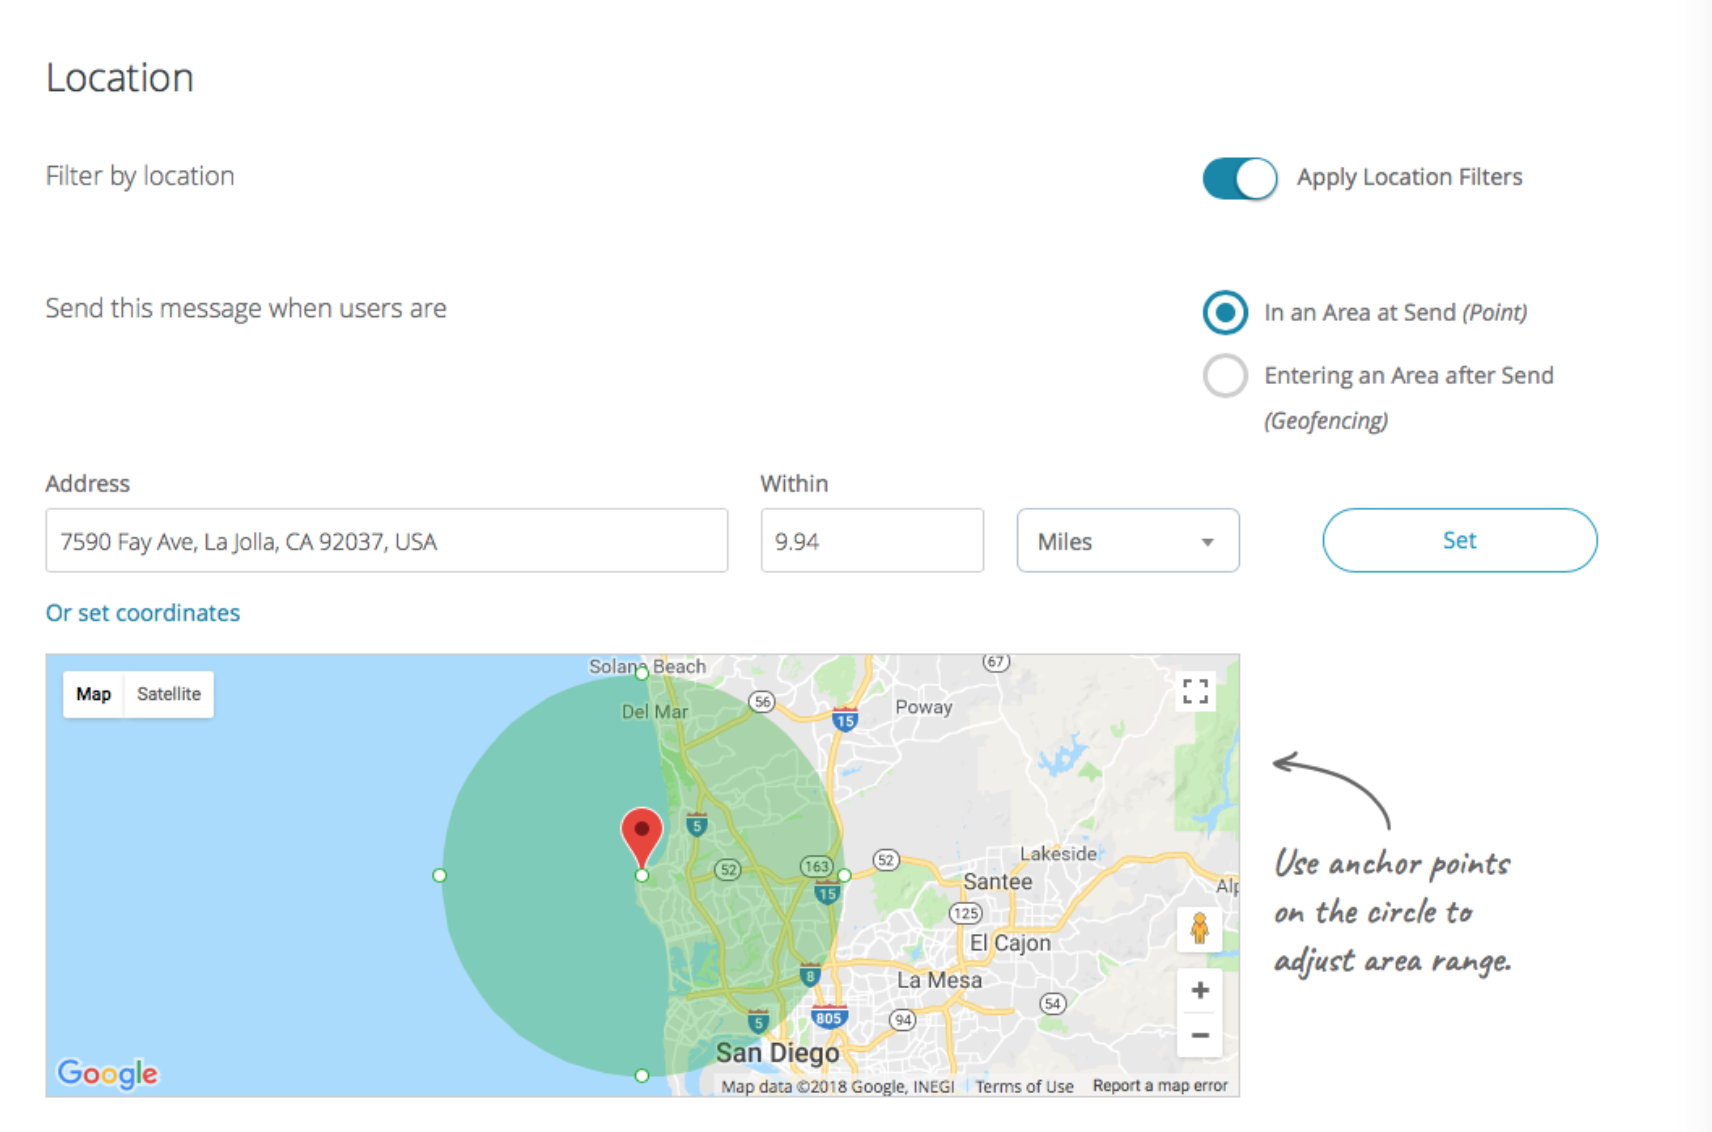
In an Area at Send (Point)
- Allows you to set a radius around the location you select.
- You can input the latitude and longitude, type in the address bar to look up a spot, or just drag the pin on the map.
- Adjust the size of the zone with the Radius field or by dragging the anchor points on the circle, and use the unit drop-down to select kilometers or miles.
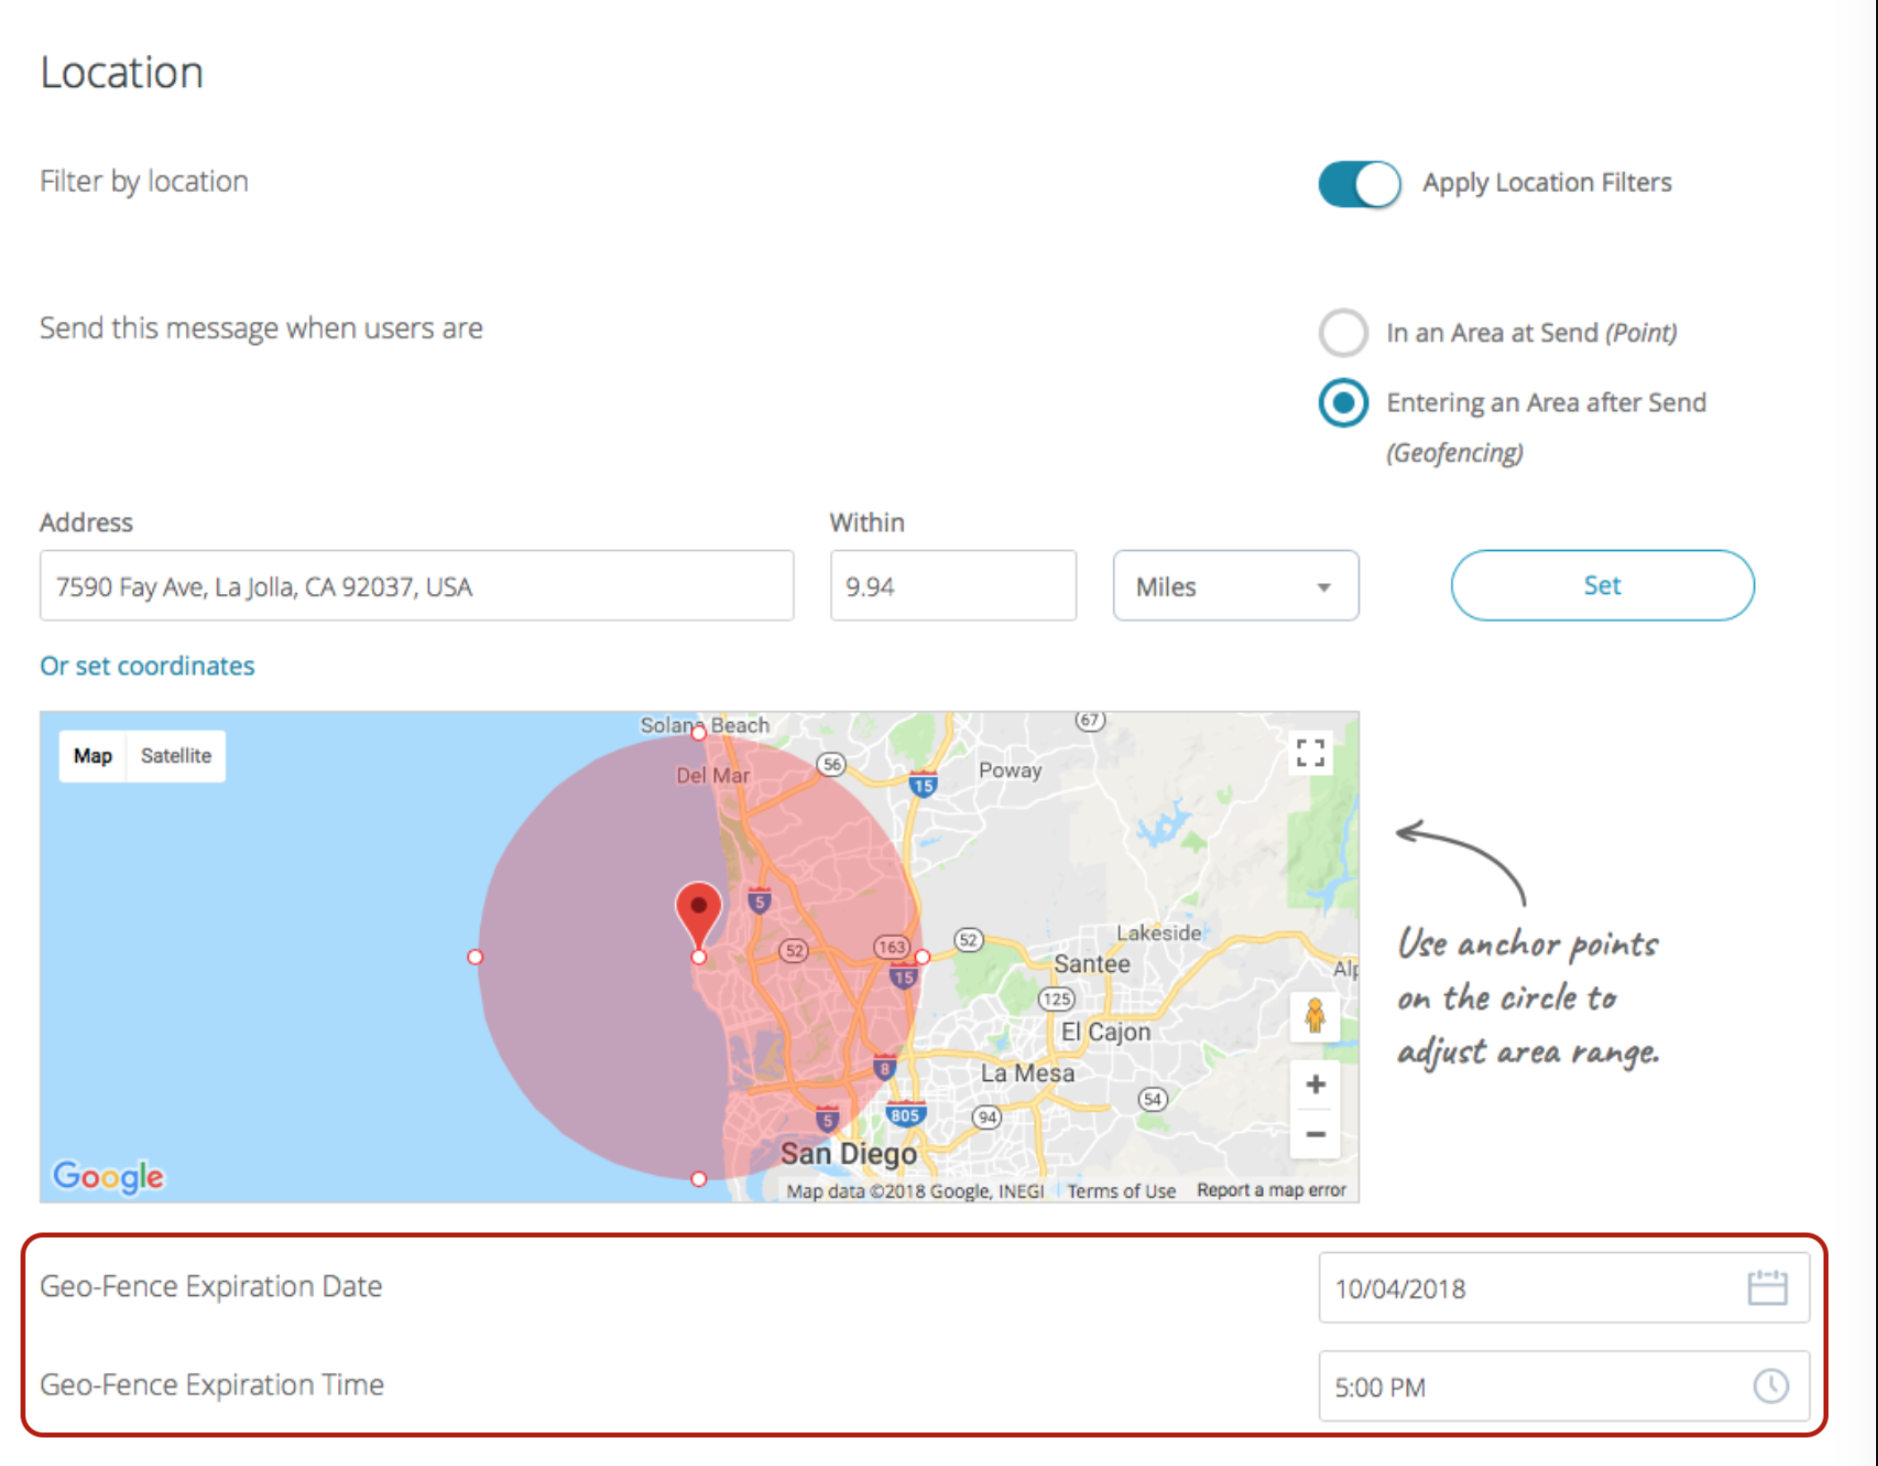
Entering an Area after Send (Geofencing)
- Allows you to set up a ‘monitored’ area.
- When a user enters this area during the active period, they will receive the push notification.
- Just like with the Point option, you can input the latitude and longitude, type in the address bar to look up a spot, or just drag the pin on the map.
- Adjust the size of the zone with the Radius field or by dragging the anchor points on the circle, and use the unit drop-down to select kilometers or miles.
You will notice that the Geo-Fence has an expiration date and time for you to select. This allows you to configure how long you wish to monitor this location. This also allows you to set up month-long specials for those driving by, for example.
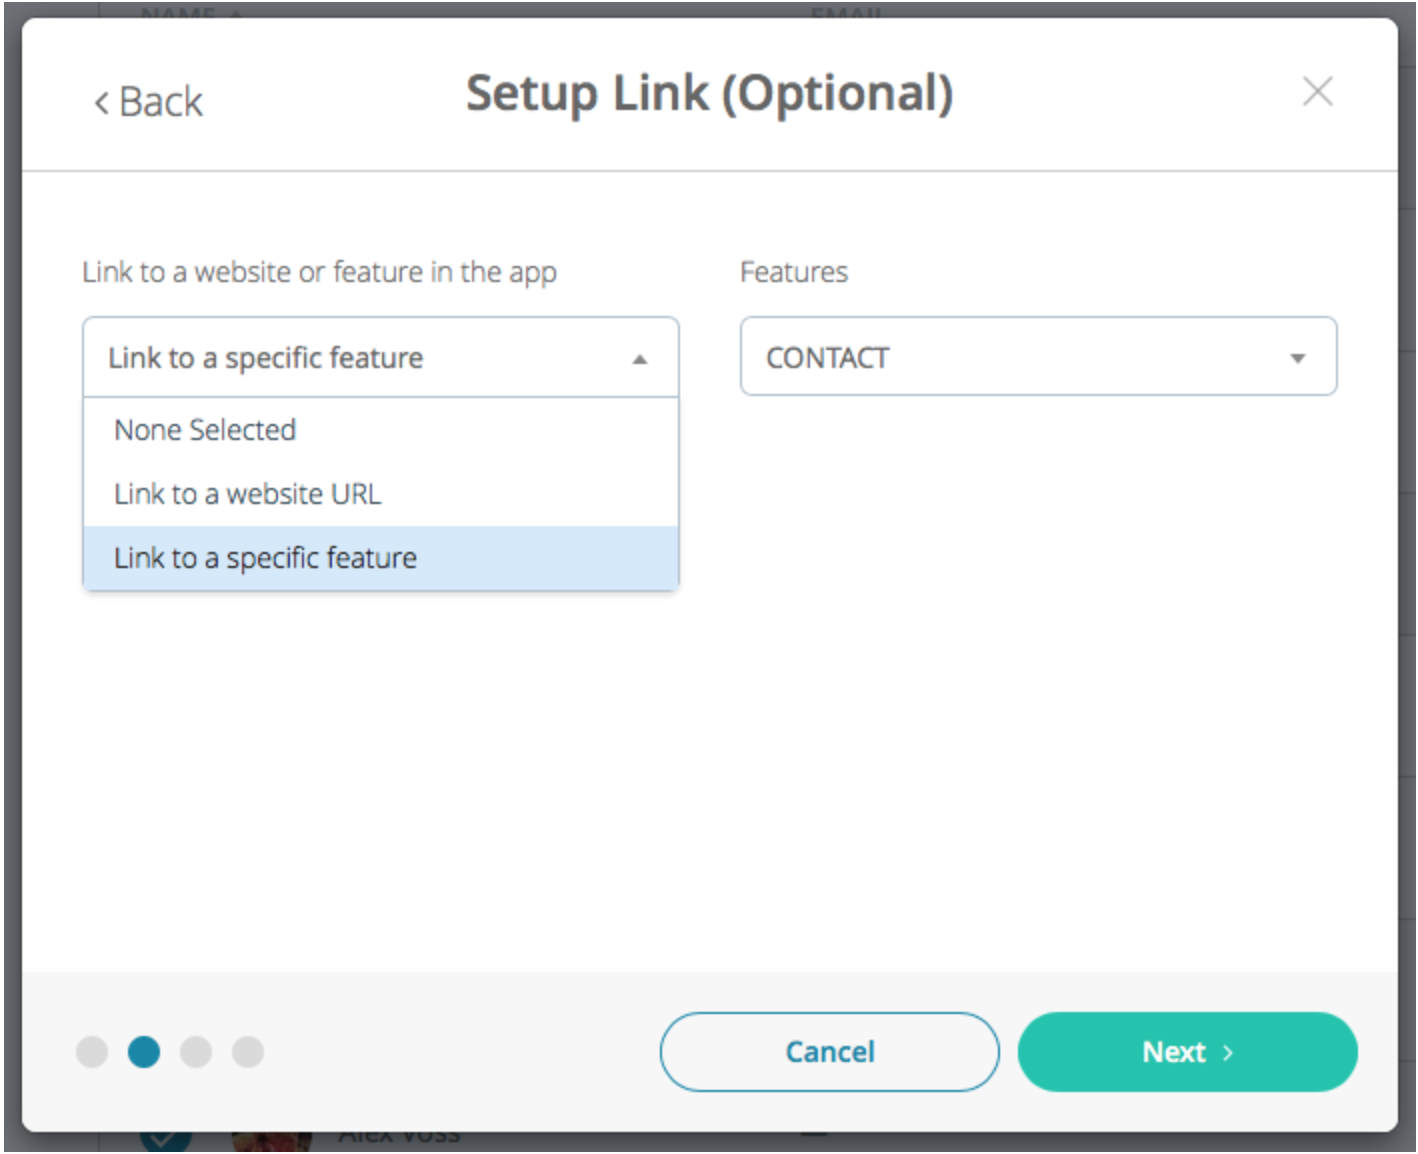
Step 4: Configure Message Linking ability (not yet available on PWA)
- Here you can add different abilities to your push notification with the Setup Link section.
- Link to a Website URL
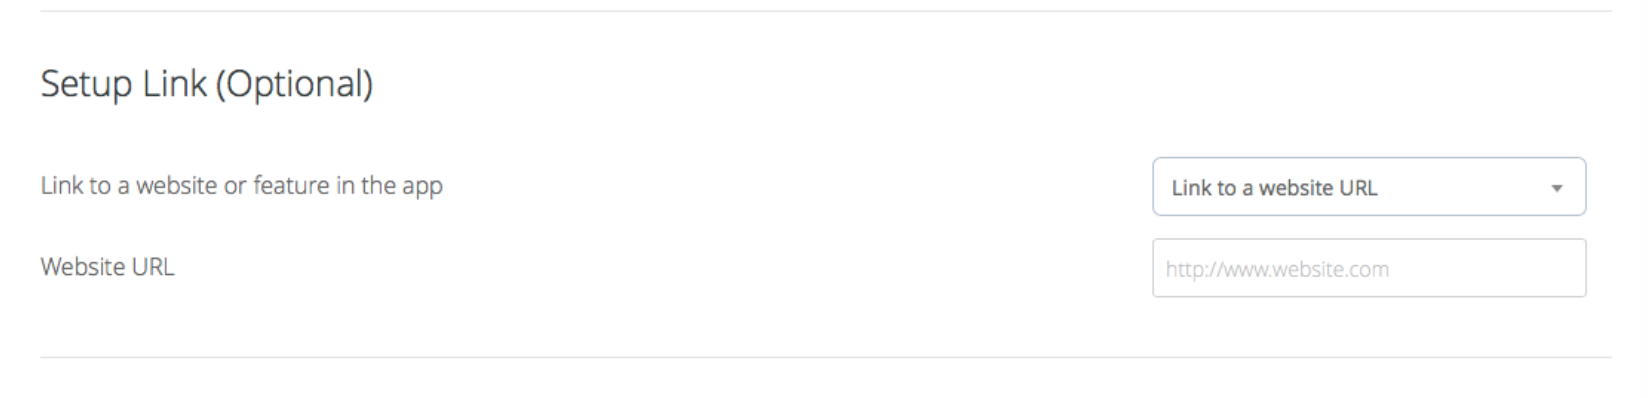
- Lets you link your push notification to a site.
- When a user clicks the push notification, they will be directed to that URL.
- Link to a Specific Feature
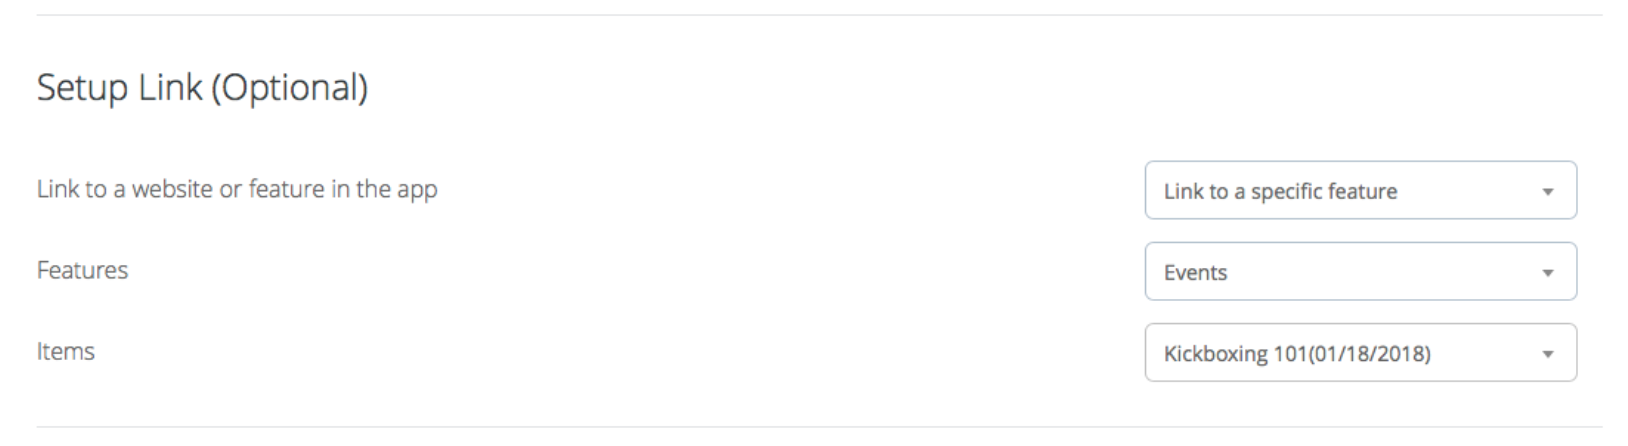
- Allows you to do just that – link to a specific feature.
- You can choose a tab within your app from the dropdown, and even specific items within those tabs (like an event in the Events feature), when applicable.
- When a user clicks the push notification, they will be taken to that specific location within your app.
- Link to an Offer
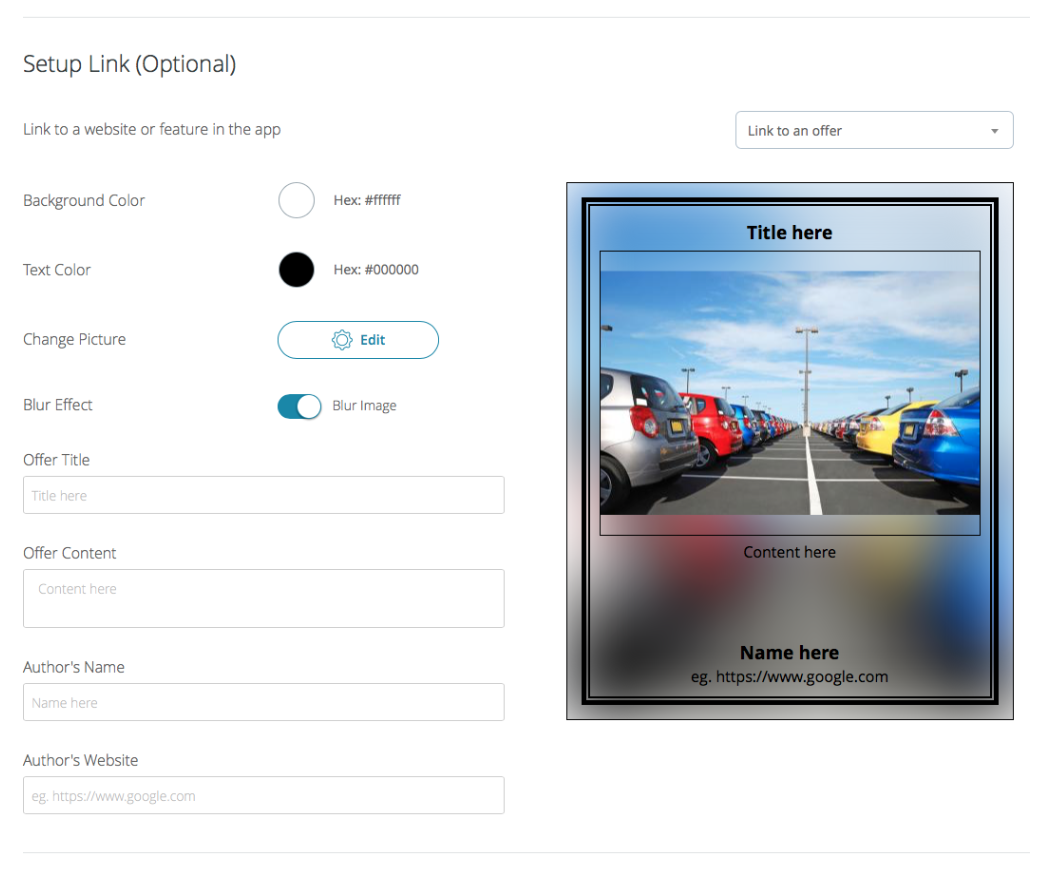
- Adds a template-based message to your push notification (you must have a Messages tab active within your app to use this feature).
- Select an industry from the Category column, then a specific template from the Offers column, and customize the design with the Style column.
- You can then change the Offer Title, picture, and content. When a user clicks the push notification, the template will be launched within the Messages tab.
Notes:
- If you delete a previously used offer image from this window, the image will no longer be hosted on our servers.
- This will prevent it from loading when users click and view the old push notification from their Messages tab.
- For this reason, we do not recommend deleting images that you have used in a prior push notification.
- Post to Social Media
If you wish to have your message also sent to either your Facebook or Twitter account, you can connect and select them here.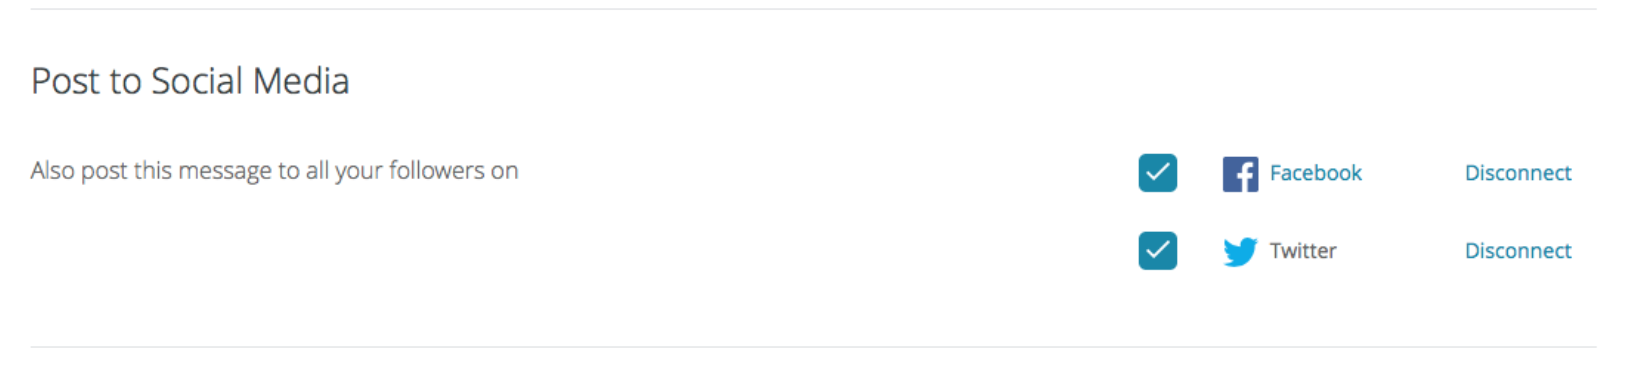
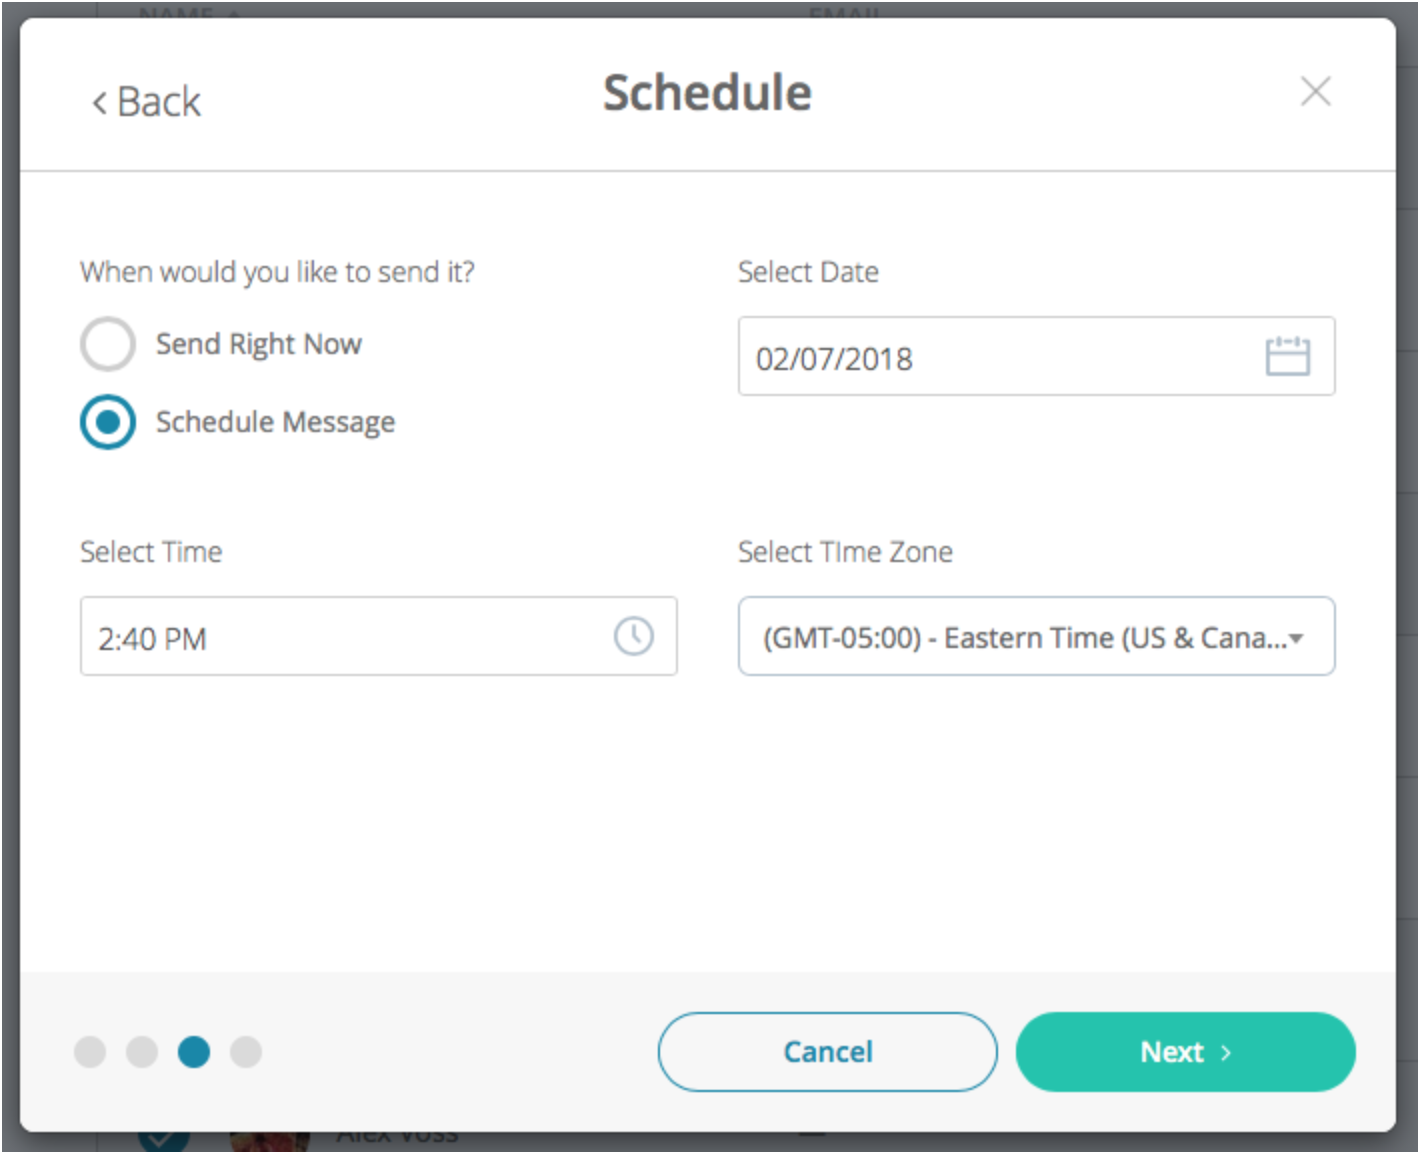
Step 5: Set up Send and Schedule
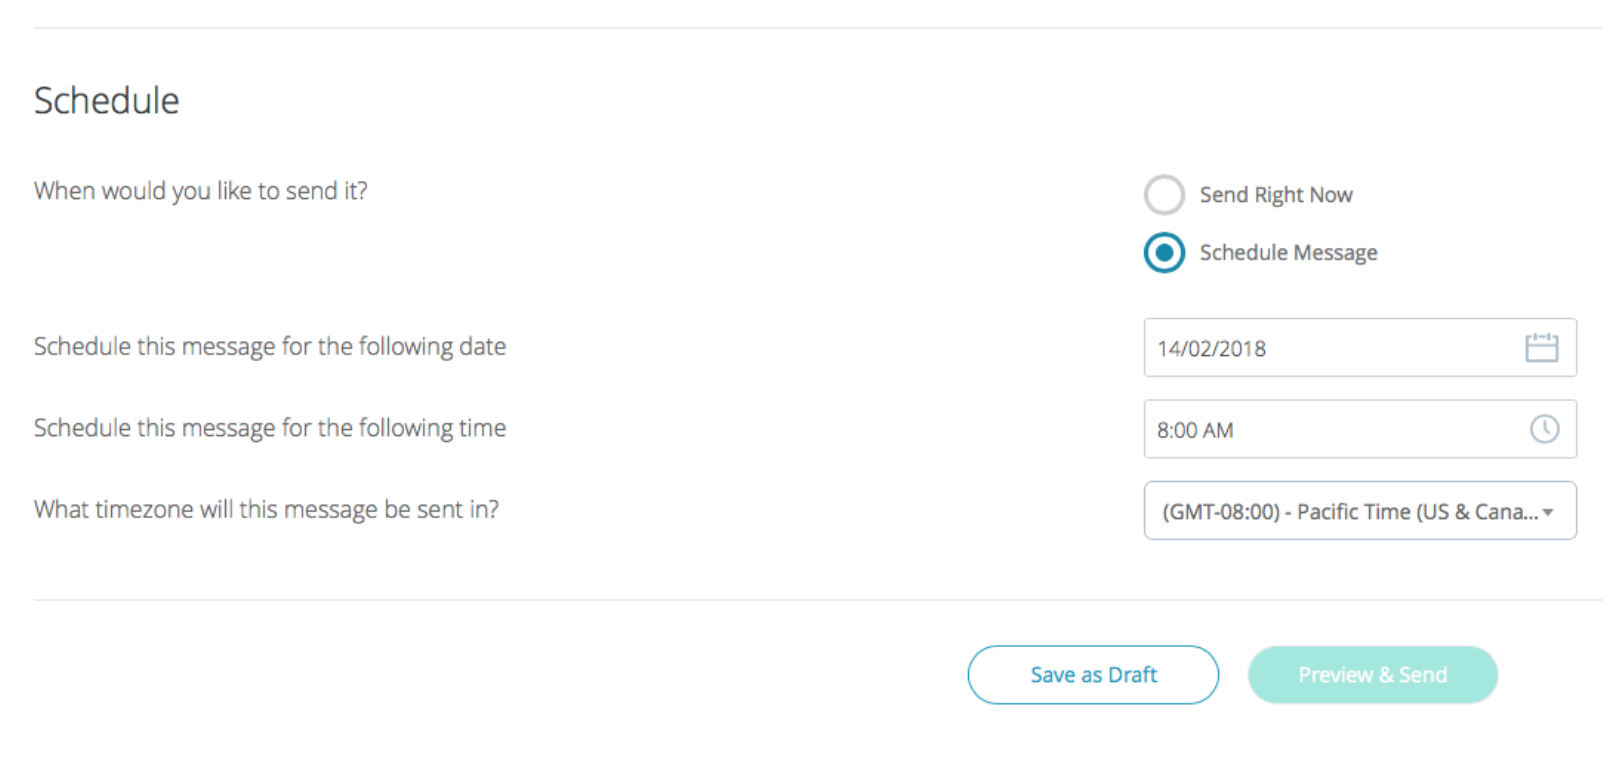
This is your final step, where you determine when your push notification will be sent out to users. Click Send Now to deliver your message immediately, or Schedule For Later to schedule it for later.
Schedule For Later
Allows you to schedule your message based on the applicable time zone.
- Select the time zone from the drop-down menu, then select the desired date and time to schedule it.
- Once you are ready to go, just click the Send Message button!
If you wish to save your work to revisit later, much like an email draft, you can simply click Save as Draft, and we will store this push notification under the Drafts section in your Push Notifications Message Center. At any time, you can come back to this message to continue work or to finally schedule and send.
Single or Multi-User Push Notifications
Now with North Park, sending push messages to individual users or multiple users at once is possible.
For Single User
To do so, you will first need to:
- Navigate to the Customers section in the CMS dashboard.
- From here, you have a couple of options.
- First, go over the single user process.
From the Customers List, you will want to click on a customer; this will bring you to the customers. - Click on a customer to see that customer’s detail view.
- In the top cell, just under the user’s name and email address, click the three-dot menu button.
- Click Send > Push Notification.
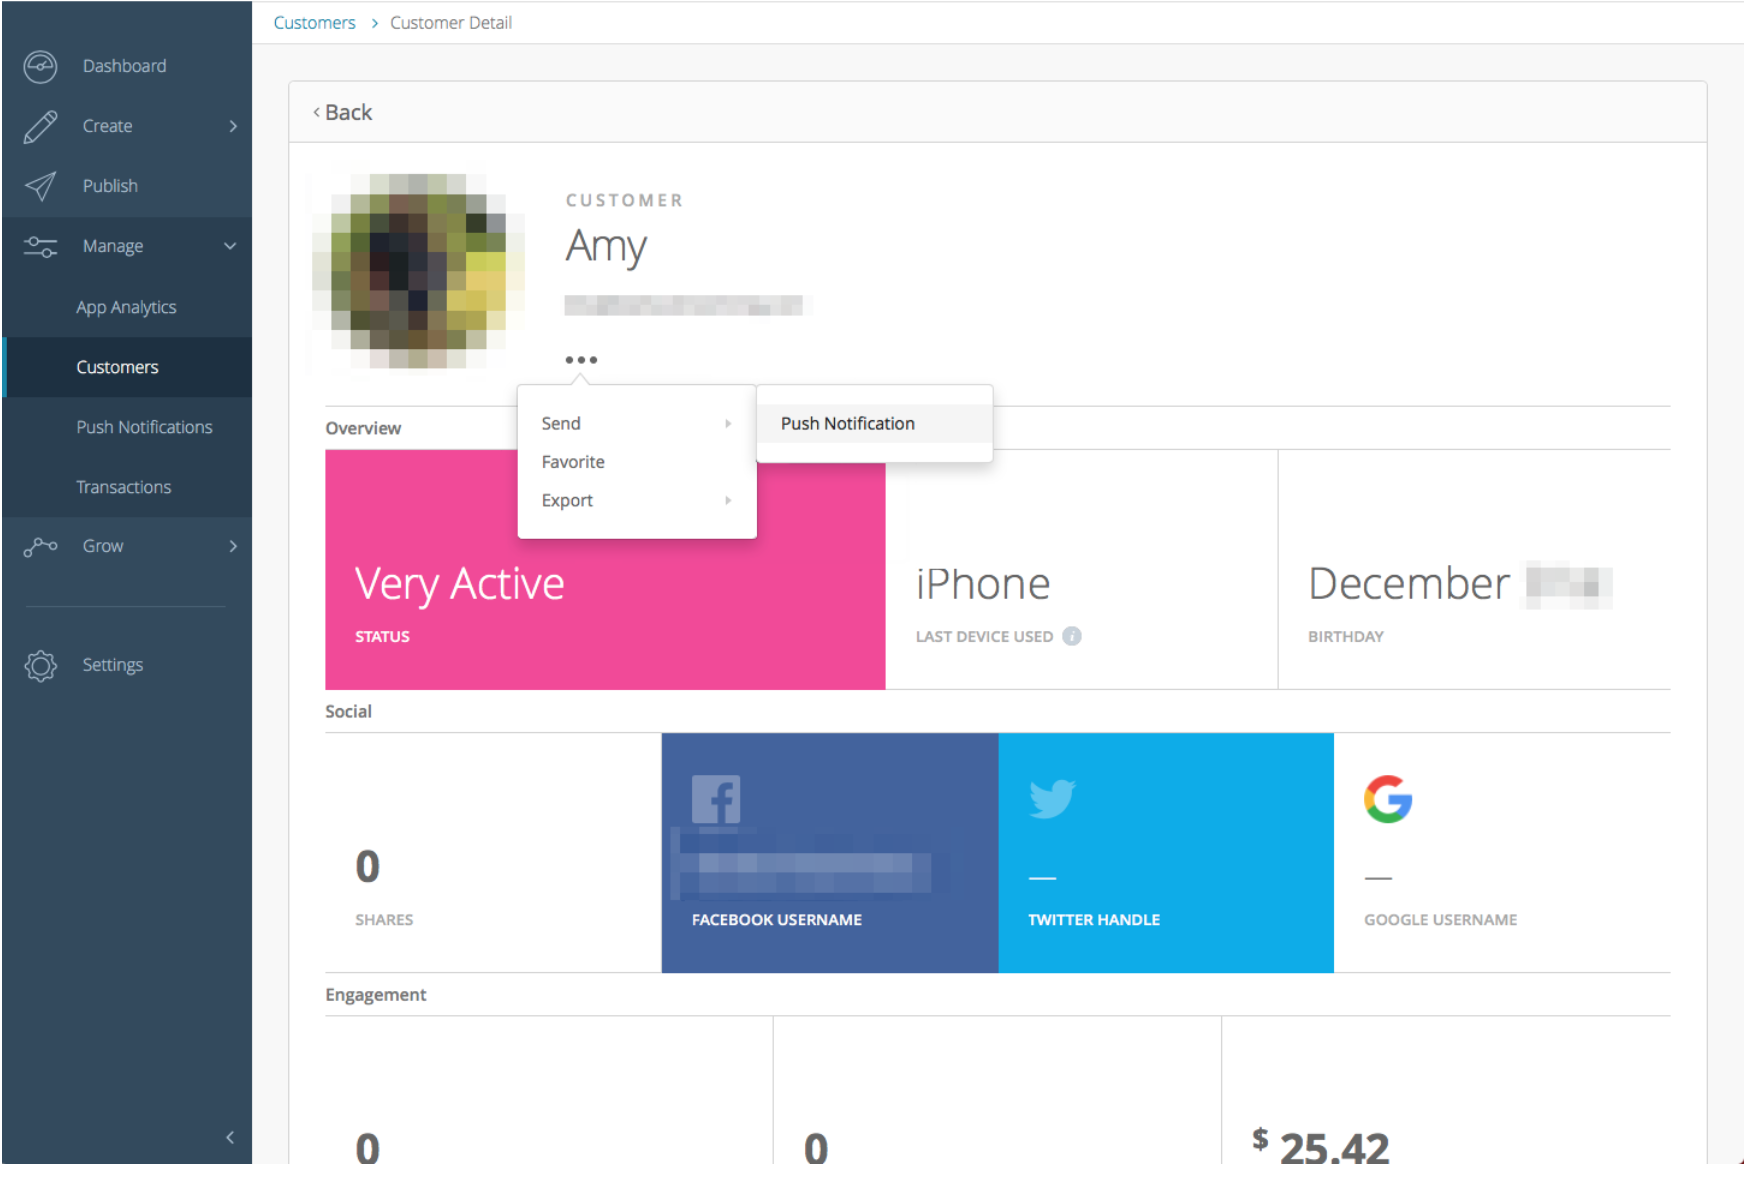
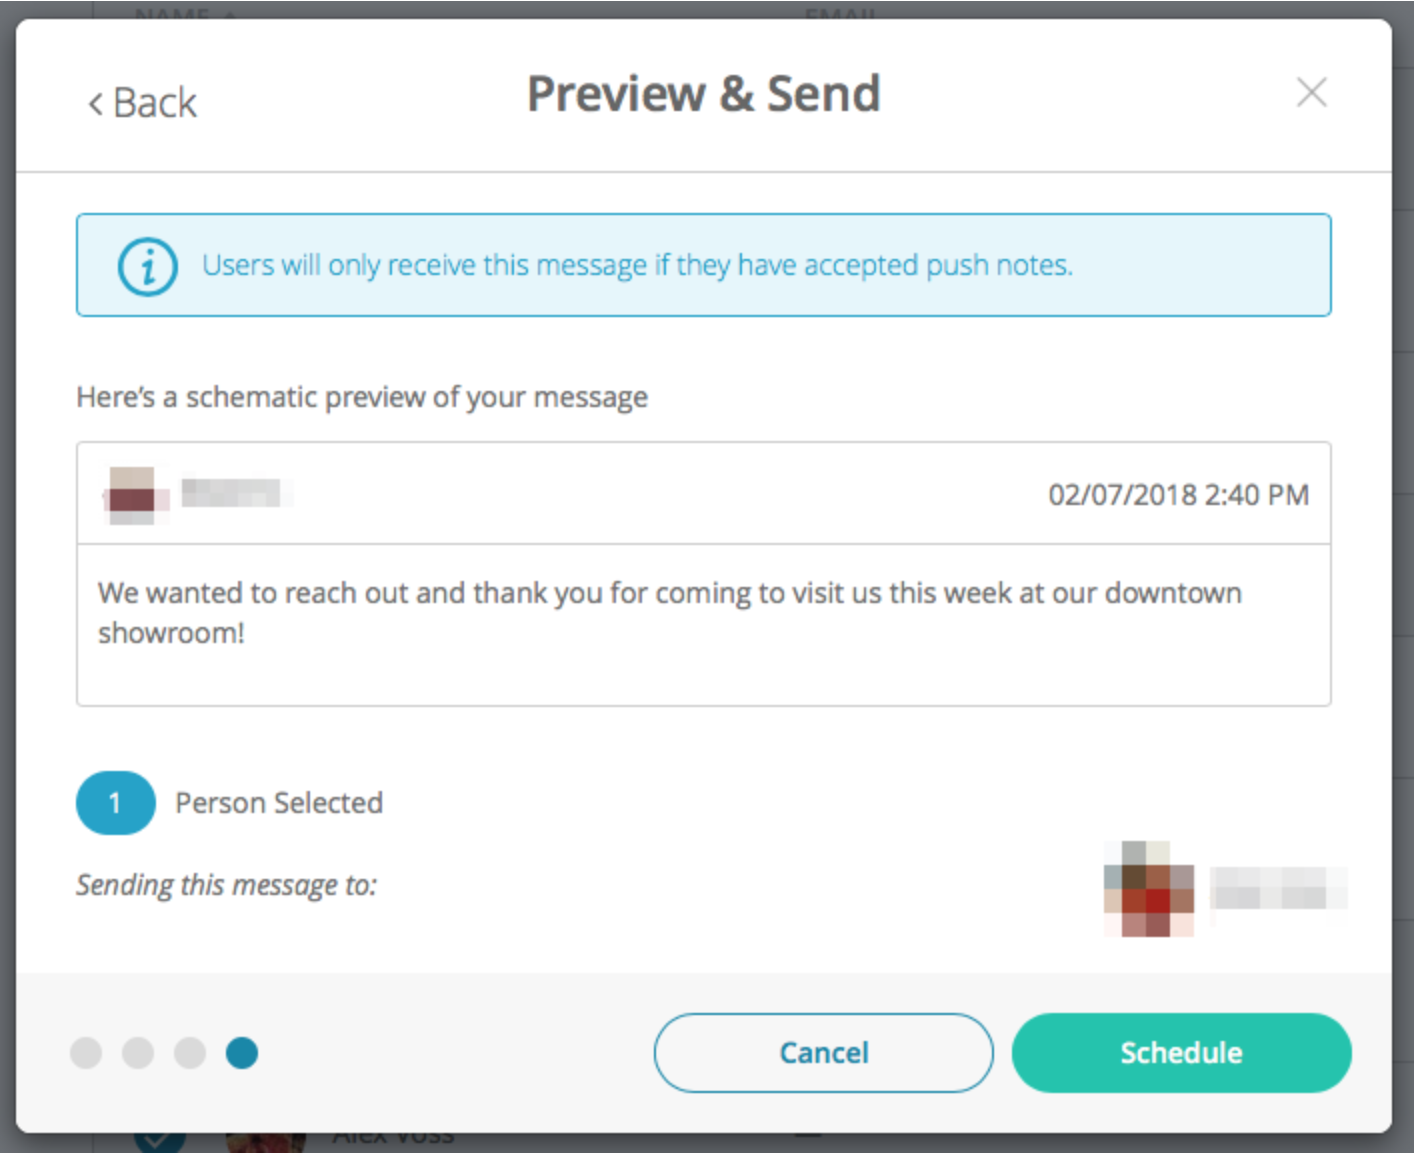
- You will then see a modular workflow of the push notifications feature.Note: Because you have selected the exact user you wish to send this to, you will not need the Target Audience section or the location options.
- First, go over the single user process.
Here are some screenshots of this workflow.
For Multi-User
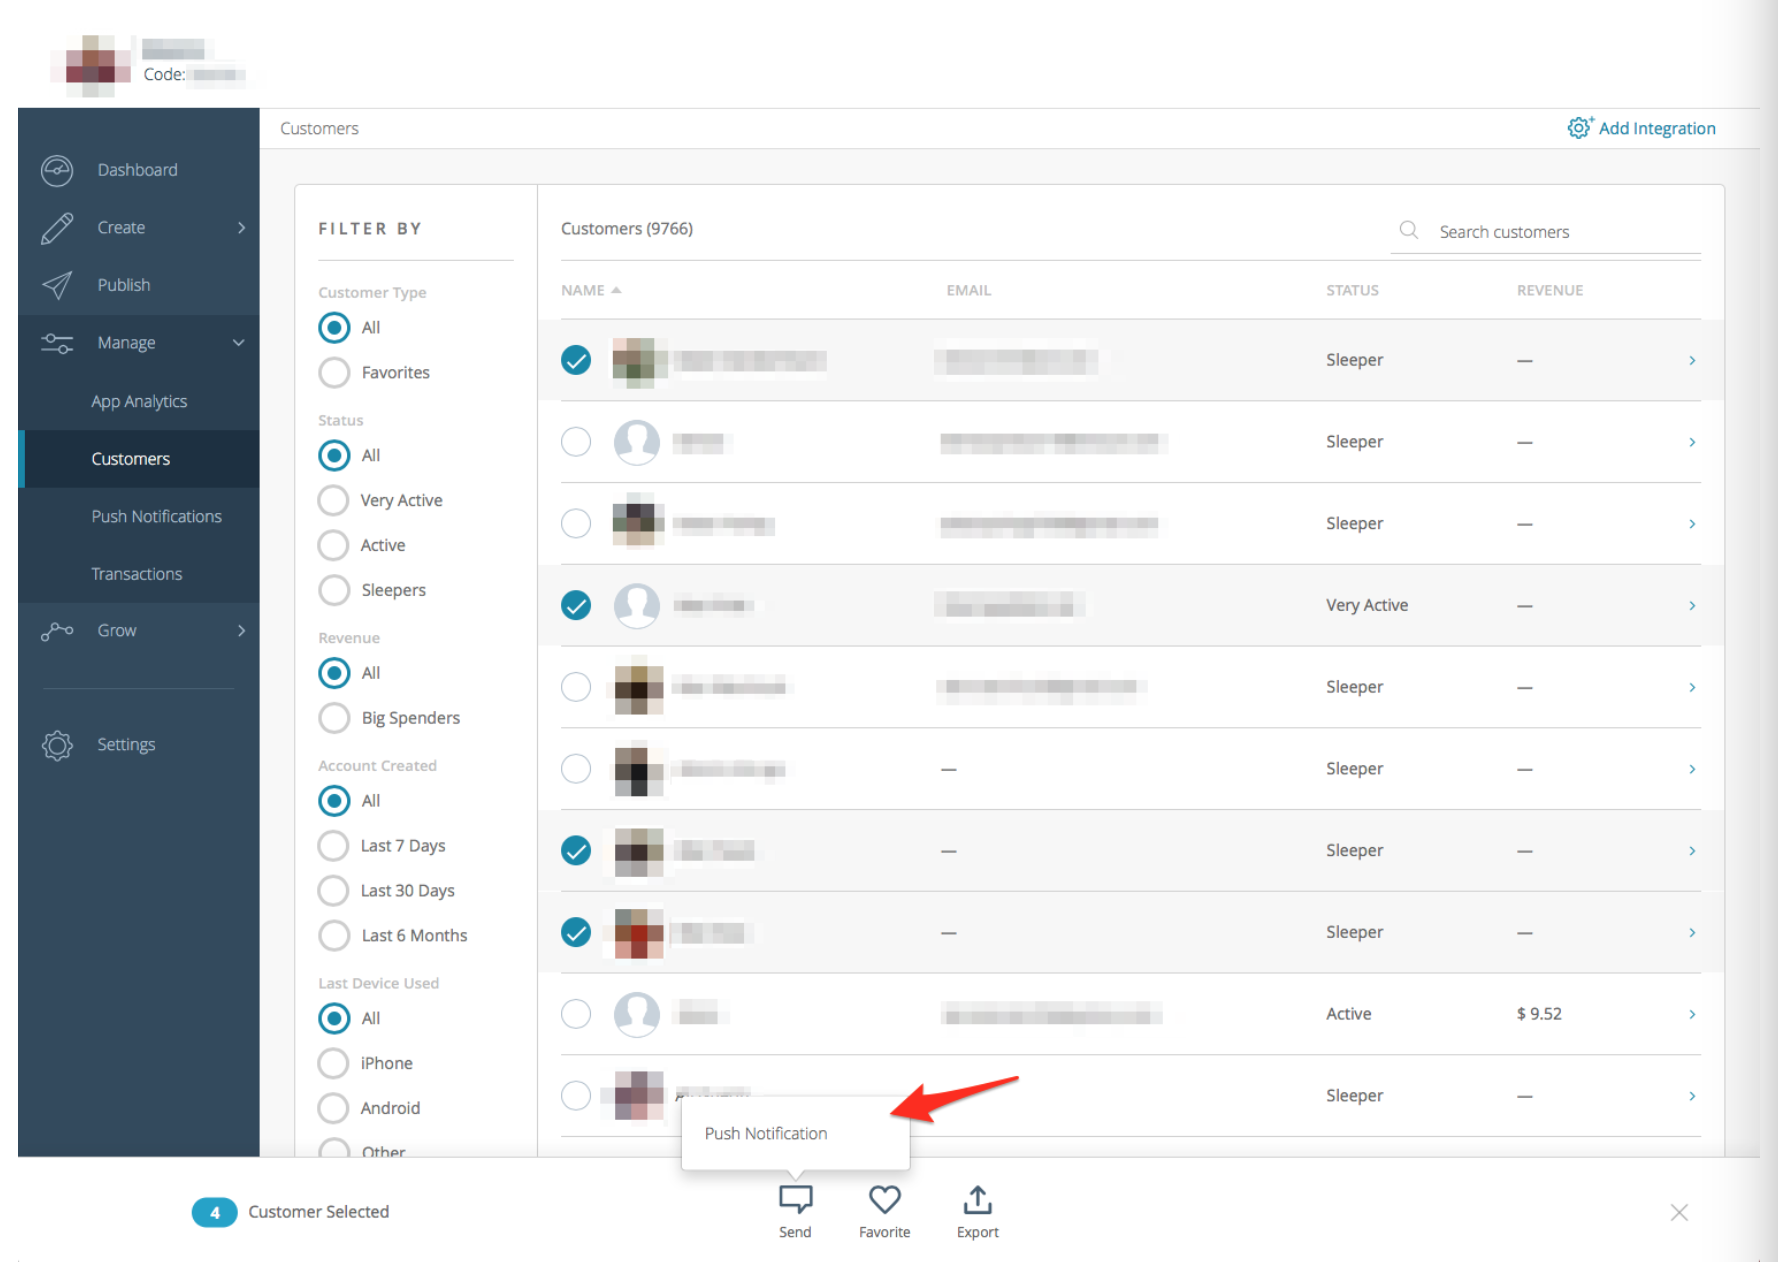
- Navigate to the Customer List view. You can also send a message from here.
- Hover over a customer on the list. You will notice to the left of the name you have the ability to select users.
- Once selected, an action bar will appear on the bottom of the screen.
- You will also notice that there is now a select option to the left of all customers on the list as well as a Select All option at the top.
- You can send a push notification to however many users you select here.
- Check the summary of how many users you had selected and are sending the notification to.