Overview
The Contact feature is perhaps the most essential feature on our platform. It displays general information like business location, website URL, contact info (phone and email), and operating hours. We recommend completing the Contact feature’s content before you move on to other features. You can now select between a Location or Directory/Person feature type.
Note: The Home feature was the original version of the Contact feature. It is no longer an operational feature within our apps, so if you previously used a Home feature, we recommend transitioning over to Contact, which will actually appear within your apps and serve the same purpose (plus more).
This article provides the steps on how to set up the Contact feature in your app.
Information
This feature is available on the following platforms:
- iOS
- Android
- HTML5
This feature is recommended for the following industries:
- Community/Directory
- Retail/Restaurant Chains
- Small Businesses
Monetization ideas:
- Use the Contact feature as a Sponsors page (where you list advertisers).
- Just adding this feature for your own business provides ROI opportunity because you give users essential contact info all in one place.
Related features:
Process
To begin the setup process, follow the steps below:
- Navigate to the Build section of your dashboard.
- Click Add Feature.
- Choose the Contact feature from the menu, then click Select.
- Name your feature, then click Add. Your new feature will now appear in the left-side menu.
- Click on the feature to open its options.
Content
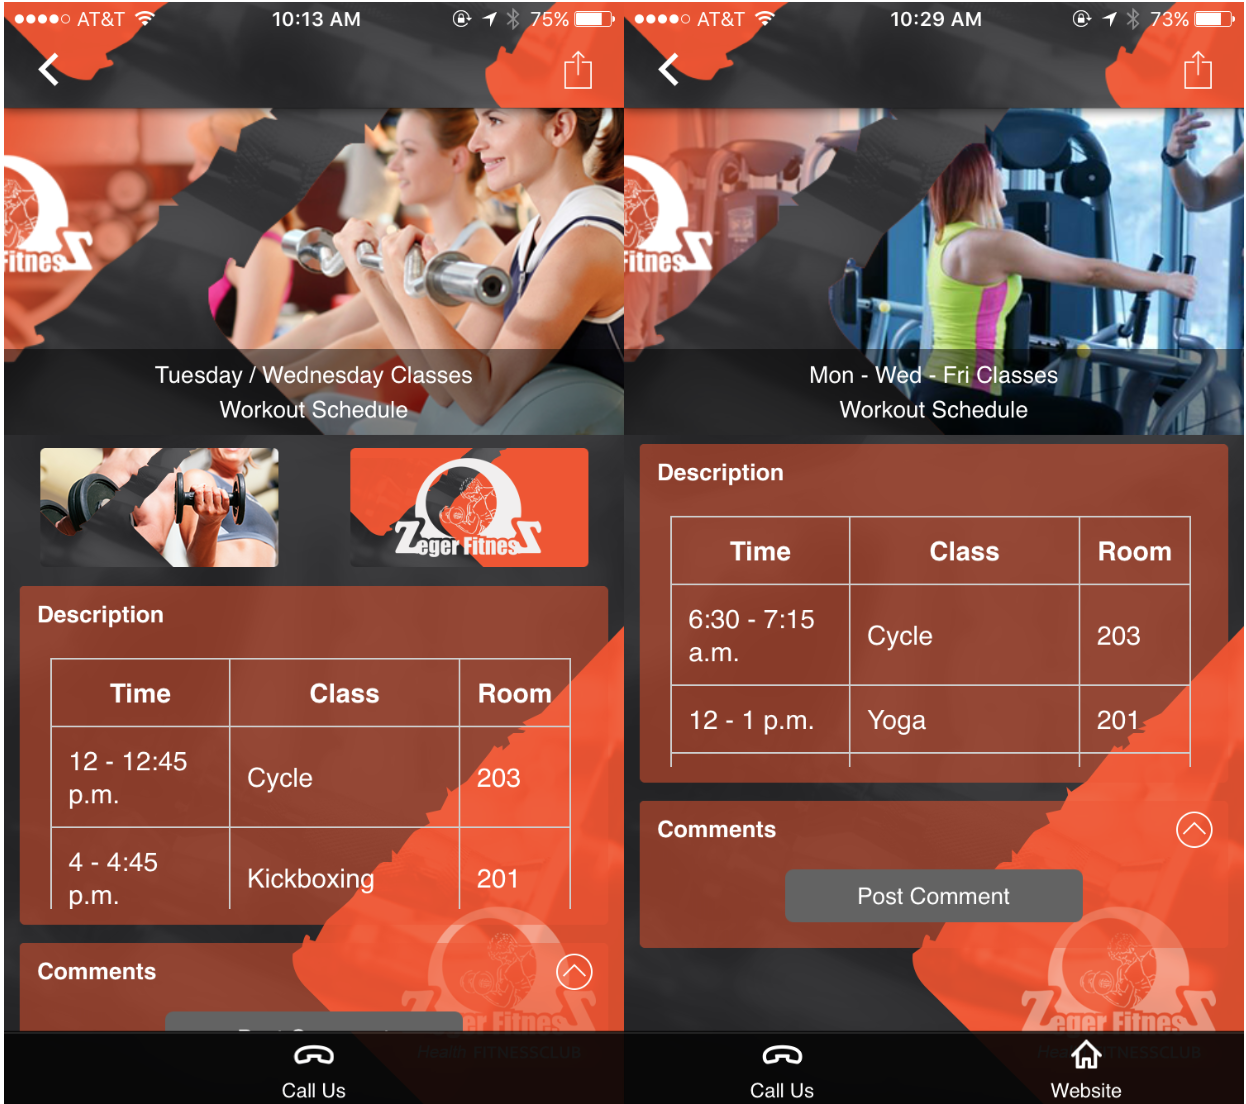
Here you can rename the feature and add locations or contact persons.
Note: For all optional fields, if left blank or hidden, the attributing button or field will not be displayed in the app.
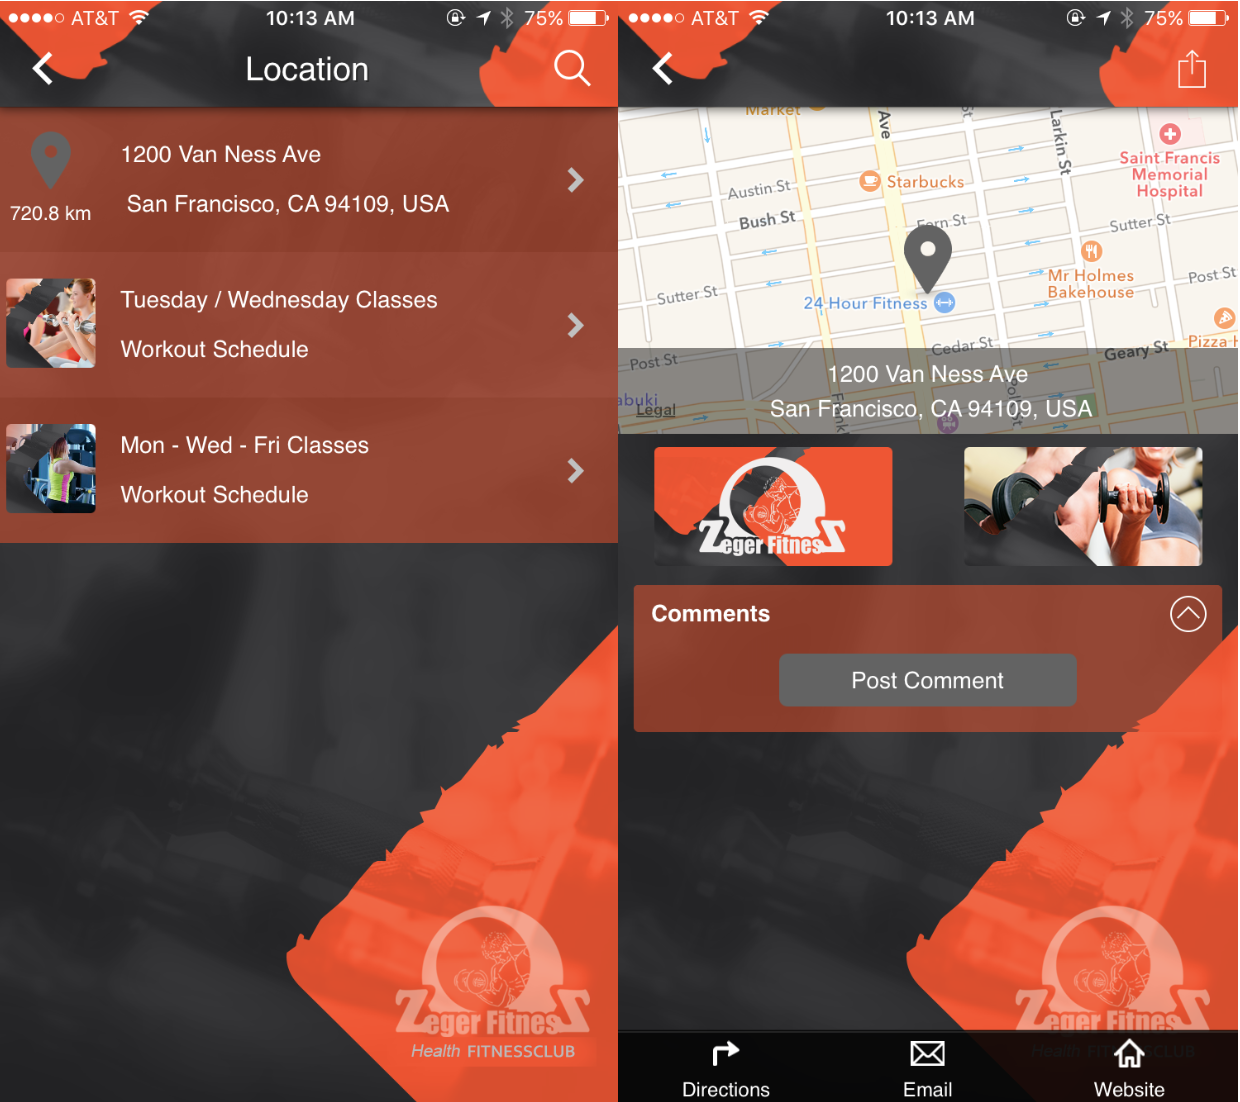
- Under Screen Info, change your Screen / Feature Name or leave as-is. This is the name that will appear in the app’s feature menu (e.g. Location instead of Contact).
- Under Contact, click Add Contact. Complete the fields below, then click Add. Repeat this process for each location/directory.
- For Location:
Field Description Header Text Line 1 and Header Text Line 2
(requires Hazel or later)- Use these fields to name your location whatever you like (e.g. Mission Location and San Francisco).
- They will serve as the top and bottom lines of the location name.
Website (Optional field) - Enter the URL for the location’s website.
- This must start with the http:// prefix.
- If the client or business does not have an official website, a Yelp or Facebook page will work just as well.
Email
(Optional field)- Input a valid email address for this location.
- When users click the one-touch Email button, this email address will auto-populate in the To field.
Telephone (Optional field) - Input a valid phone number for this location. When users click the one-touch Call button, this is the phone number it will dial.
Opening Times (Optional field) - Click Add Opening Times to select the location’s operating hours.
- When you are done, click the green checkmark.
- If you choose not to input opening times, the Opening Times field will not show.
- Input Day: Specify the day of the week or your preferred text (e.g. Monday, Mon – Fri, Weekdays, etc.)
- Open From: Specify the opening time (e.g. 9 am or Noon)
- Open To: Specify the closing time (e.g. 5 pm or Sunset)
Address - Search for the address in the Enter a query field or enter the coordinates in the Latitude or Longitude fields.
- When you use the coordinates option, Google Maps will pull the nearest address.
Distance Type - Specify whether the distance should appear in Kilometers or Miles.
Left Image and Right Image (Optional field) - Upload two images (288x144px in PNG format) for this location.
- These can be the logo, pictures of the location, or anything that represents the business.
- These images can also be linked to an internal app feature, or hyperlinked to a specific URL.
- For Directory / Person:
Field Description Contact Name: Name Row 1 and Name Row 2 - Enter the contact description names here; they will also be displayed on the header image overlay.
Website
(Optional field)- Enter the URL for the location’s website.
- This must start with the http:// prefix.
- If the client or business does not have an official website, a Yelp or Facebook page will work just as well.
Email
(Optional field)- Input a valid email address for this location.
- When users click the one-touch Email button, this email address will auto-populate in the To field.
Telephone
(Optional field)- Input a valid phone number for this location.
- When users click the one-touch Call button, this is the phone number it will dial.
Address
(Optional field)- Enter a specific address here or enter the specific Latitude or Longitude values in the fields below.
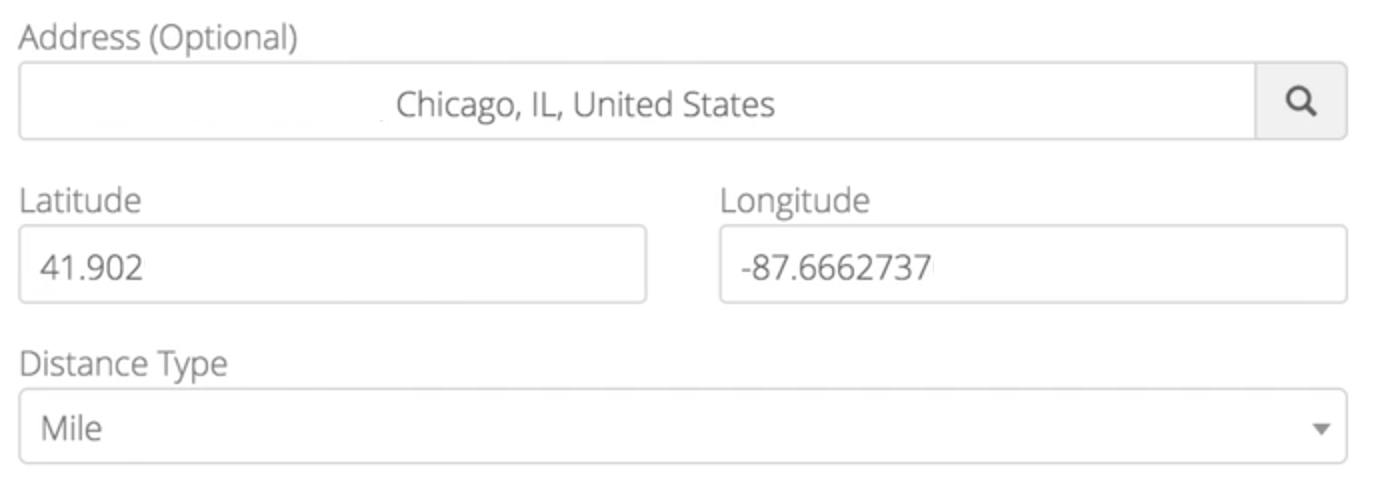
Distance Type - Select between Kilometer and Mile for how distance will be viewed in the app.
Left Image and Right Image (Optional field) - Upload two images (288x144px in PNG format) for this location.
- These can be the logo, pictures of the location, or anything that represents the business.
- These images can also be linked to an internal app feature, or hyperlinked to a specific URL.
Description Field (Optional field) - Enter text within the WYSIWYG text editor to describe the directory/person.
- For Location:
- Click Save when you are done.
Custom Design
If you would like to create a custom design for this feature instead of using the Global Design, please refer to the article Feature: Custom Design Area.
User Comments
User comments will appear here with the date, username, and comment text.
Examples
Within list view, the location contact feature will show a pin icon and the directory/person feature will show a thumbnail image of the header image pulled from the feature.