Overview
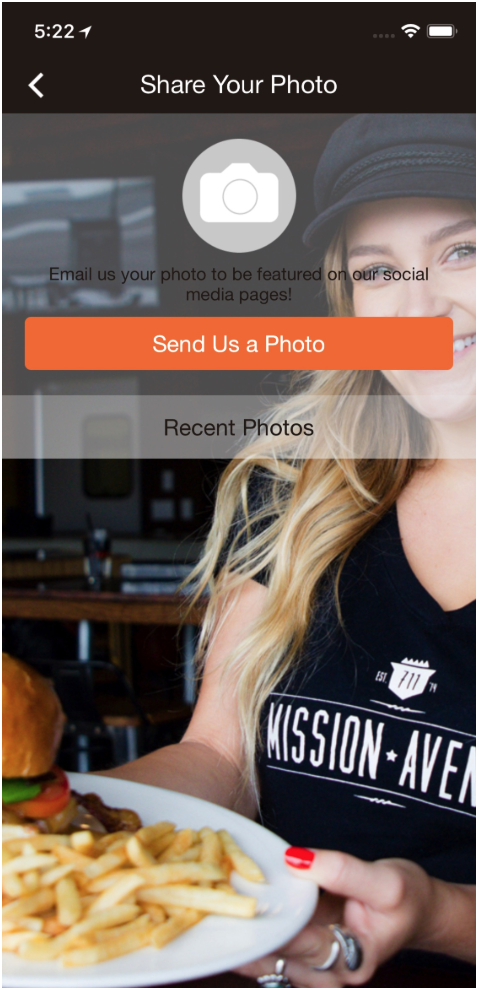
The Email Photo feature is used to share photos directly through the app. Users can email photos to a business directly through this feature. For instance, if you create an Email Photo feature called Party Cam for your club app, users could email photos of their favorite moments of the weekend, which the business can post on their Facebook page. Users can take a photo or send one from their device’s gallery in just a few steps.
Within the feature, the Recent Photos section shows users which pictures they have previously emailed. These photos are only visible to them and are stored locally on their device, meaning no one else has access to them, including the app creator. They cannot be removed from the feature unless the app is uninstalled then reinstalled.
This article provides the steps to set up this feature in your app.
Information
This feature is available on the following platforms:
- iOS
- Android
- HTML5
This feature is recommended for the following industries:
- Conference
- Bar and Club
- Band or Musical Artist
Monetization ideas:
- You can create a contest or sweepstake that requires the app user to send a photo through the Email Photo feature.
- Companies that provide custom-priced services (e.g. a house painting service) can have the app user send a photo so they can provide an estimate on the service cost.
Process
To set up the Email Photo feature, follow the steps below:
- Navigate to Edit > Build in your dashboard.
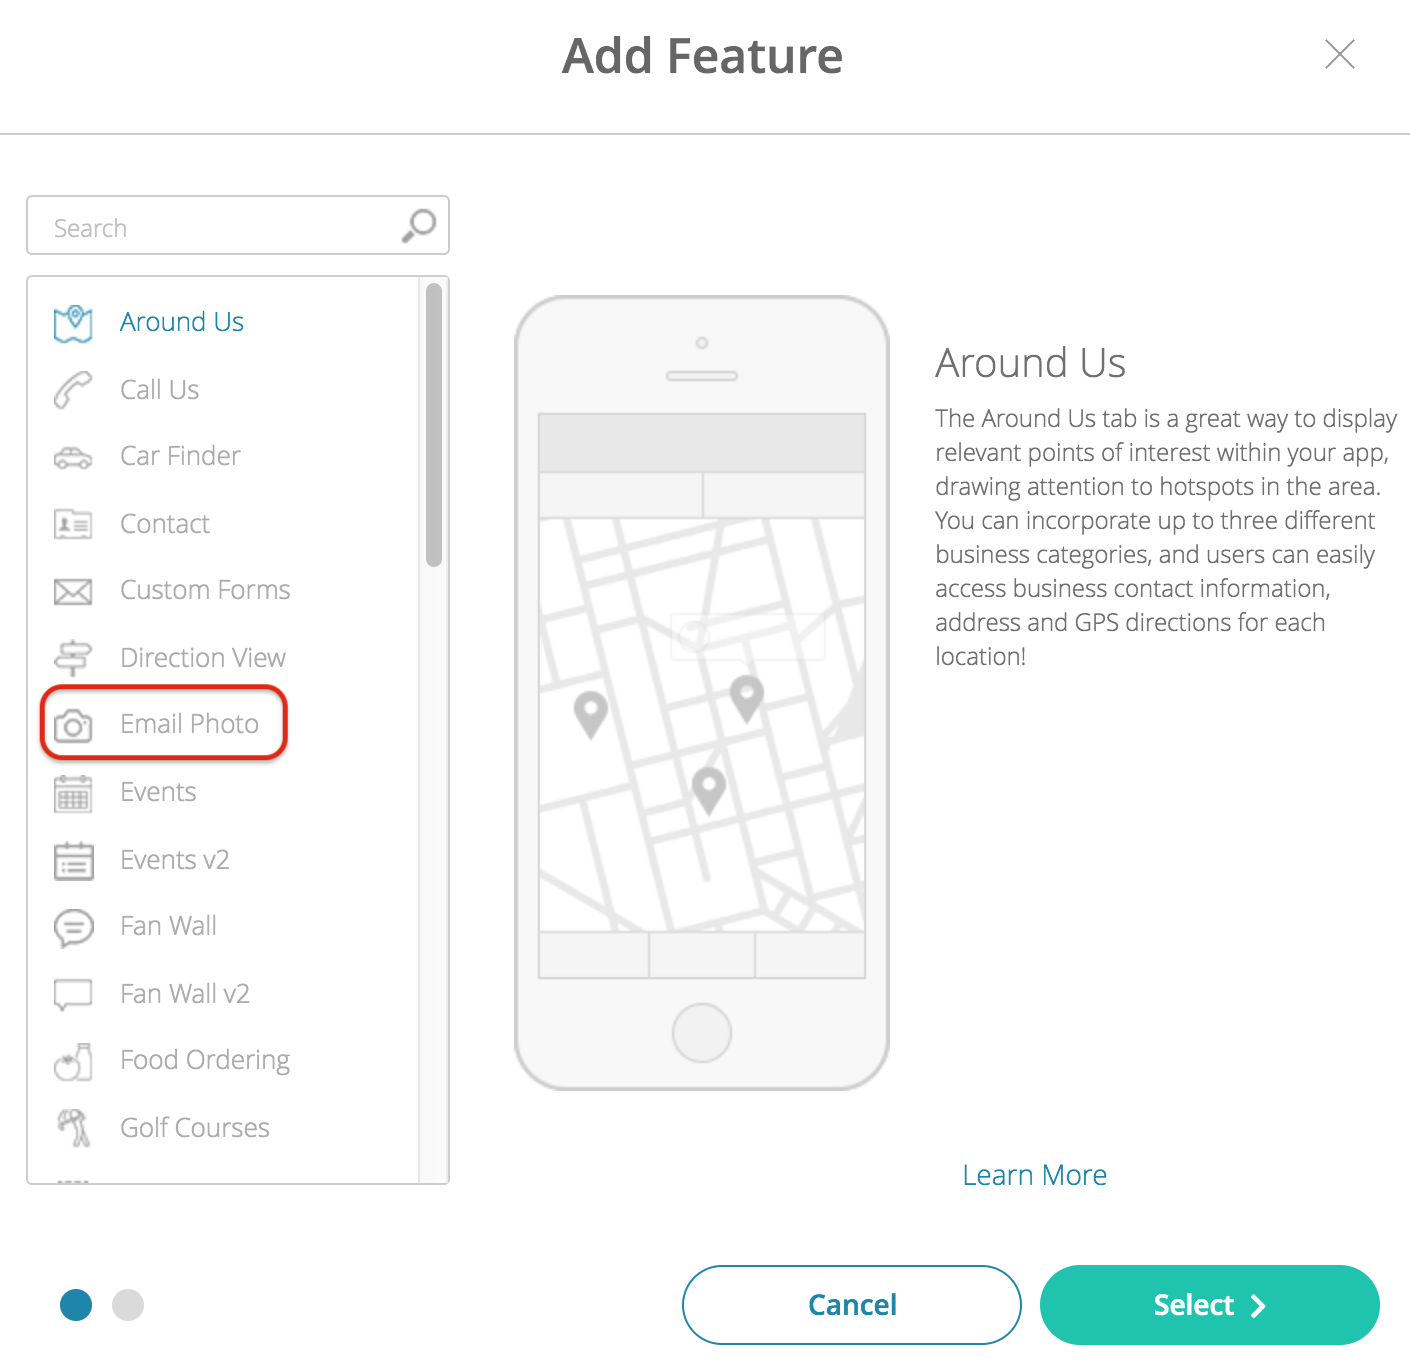
- Click Add Feature.
- Choose the Email Photo feature from the menu, then click Select.
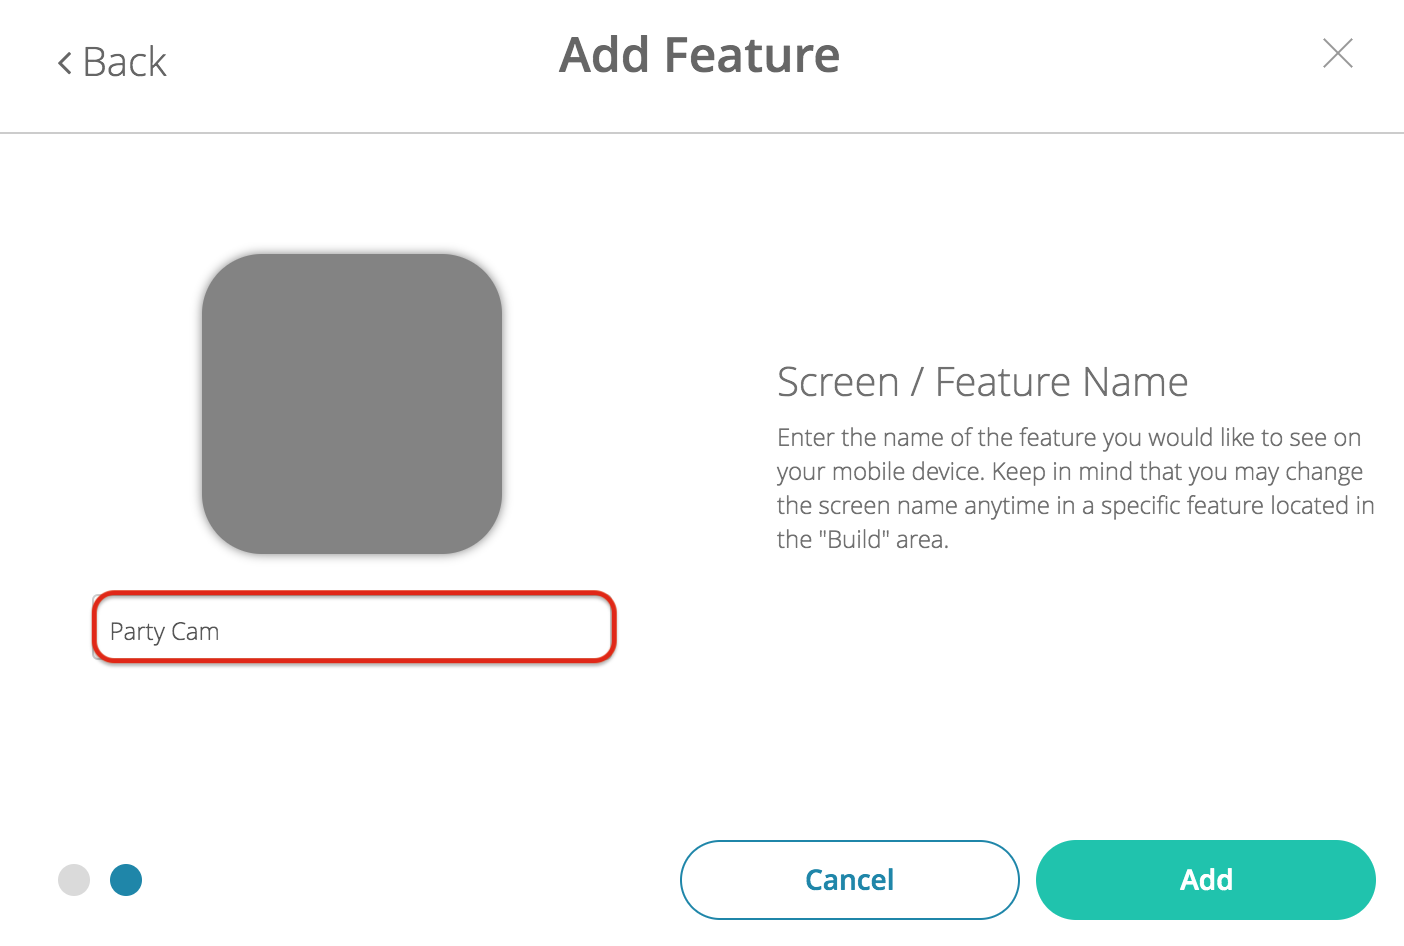
- Name your feature, then click Add. Your new feature will now appear in the left-side menu.
- Click on the feature to expand its menu. From the left-side menu you can:
- Use the checkbox to delete the feature.
- Click and drag the arrow icon to rearrange.
- Edit the feature icon by clicking it, then select a new image from the fly-up menu.
- Toggle the feature on/off.
- Jump to a specific section (e.g. Content or Custom Design) to adjust the feature settings.
Content
Here you can rename the feature and add other important information.
- Under Screen Info, change your Screen / Feature Name or leave as-is. This is the name that will appear in the app’s feature menu (e.g. Party Cam instead of Email Photo).
- Under Details, you can add information such as Description, the receiving Email address, and Subject.

- Description: Add a description to let users know what kinds of photos to send.
- Email: Input a valid email address to receive all photos.
- Subject: Select a subject for all received emails.
- Click Save at the top right when you are done.
Custom Design
If you would like to create a custom design for this feature instead of using the Global Design, please refer to the article Feature: Custom Design Area.
Example