
Overview
The Food Ordering feature is a simple and effective way for restaurants to start taking orders through their mobile app. With delivery and takeout options, payment through the app, and a customizable menu with add-ons and pricing options, you have full control.
This article provides the steps to set up this feature in your app.
Information
This feature is available on the following platforms:
- iOS
- Android
- HTML5
This feature is recommended for the following industries:
- Restaurants
Monetization ideas:
- Increase daily customers by adding an easy-to-use food ordering tool that makes delivery, take out, and dining in extremely convenient.
Related features:
Process
To set up the Food Ordering feature, follow the steps below:
- Navigate to the Build section of your dashboard.
- Click Add Feature.
- Choose the Food Ordering feature from the menu, then click Select.
- Name your feature, then click Add. Your new feature will now appear in the left-side menu.
- Click on the feature to expand its menu. From the left-side menu you can do the following:
- Use the checkbox to delete the feature.
- Click and drag the arrow icon to rearrange.
- Edit the feature icon by clicking it, then selecting a new image from the fly-up menu.
- Toggle the feature on/off.
- Jump to a specific section (e.g. Content or Custom Design) to adjust the feature settings.
Content
Here you can rename the feature, add restaurant information, update payment options, and customize the menu.
- Under Screen Info, change your Screen / Feature Name or leave as-is. This is the name that will appear in the app’s feature menu (e.g. Menu instead of Food Ordering).
- Under Ordering Services, click Locations, then Add Location. Repeat this process for each location.
Field Description Address Section 1
Address Section 2
(requires Hazel or later)Use these fields to name your location whatever you would like. They will serve as the top and bottom lines of the location name. Website Enter the URL for the restaurant’s website. This must start with the ‘http://‘ prefix. If the client or business does not have an official website, a Yelp or Facebook page will work just as well. Email Input a valid email address for this restaurant. When users click the one-touch Email button, this email address will auto-populate in the To field. Telephone Input a valid phone number for this restaurant. When users click the one-touch Call button, this is the phone number it will dial. Opening Times Click Add Opening Times to select the restaurant’s operating hours. When you are done, click the green checkmark. - Input Day: Specify the day of the week or your preferred text (e.g. Monday, Mon – Fri, Weekdays, etc.)
- Open From: Specify the opening time (e.g. 9 am or Noon)
- Open To: Specify the closing time (e.g. 5 pm or Sunset)
Address Search for the address in the Enter a query field or enter the coordinates in the Latitude/Longitude fields. When you use the coordinates option, Google Maps will pull the nearest address. Distance Type Specify whether distance should appear in Kilometers or Miles. - Click Add to add the location to the feature.
- Click Service to select the order types your business accepts and how many days in advance you accept them.
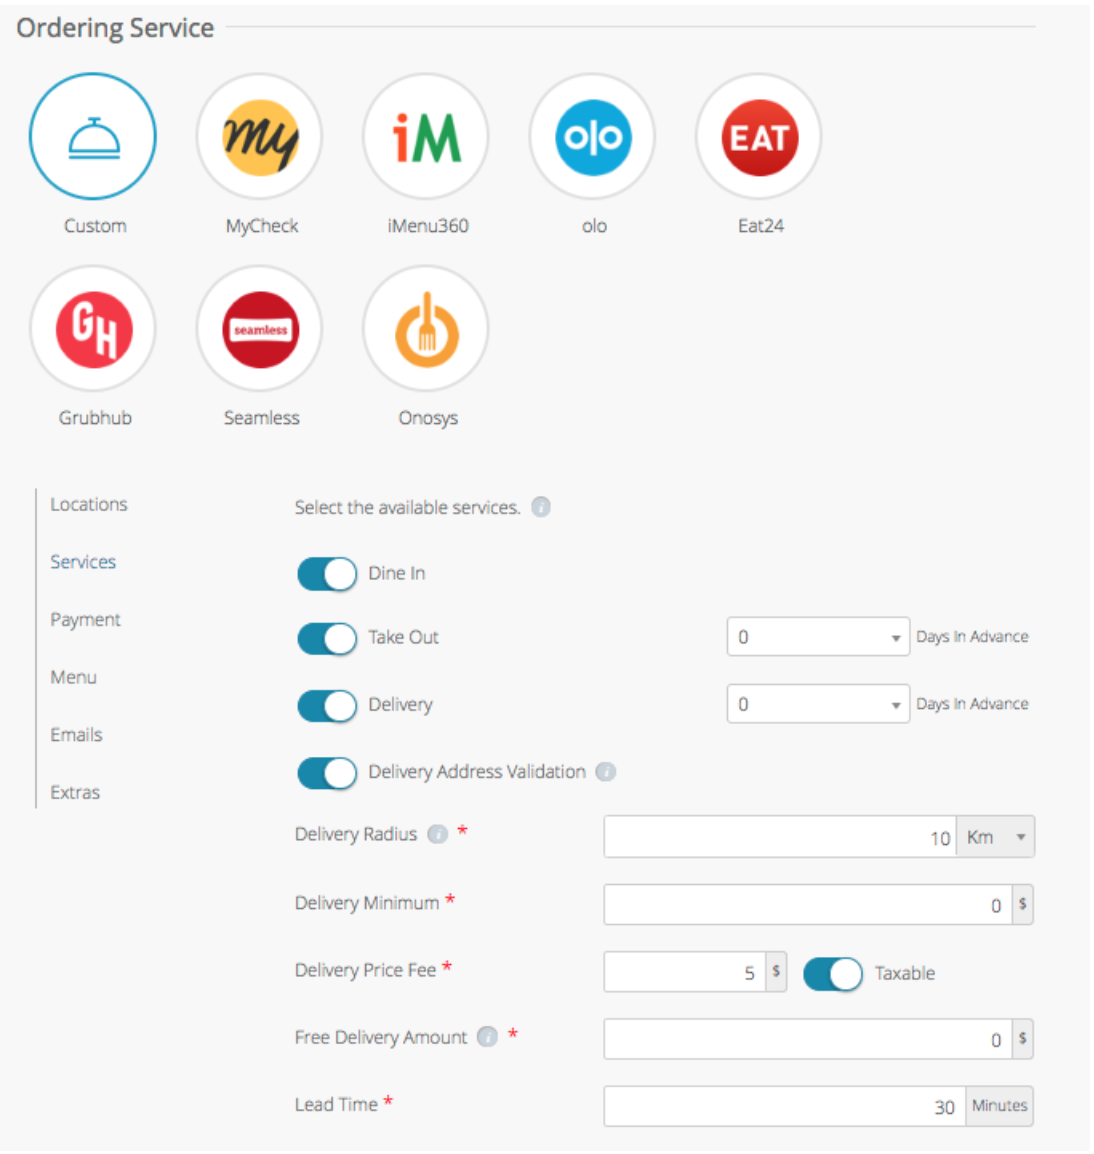
Field Description Dine In Specify if users can preorder food to be eaten in the restaurant (this is only available for same-day service). Take Out Specify if the order is available for pick-up (this is available anywhere from same-day to 6 days in advance). Delivery Specify if the order is available for delivery (this is available anywhere from same-day to 6 days in advance). Delivery Radius Specify how far away a user can be to place an order. Delivery Minimum The monetary value that will be added to delivery orders (this can be set as taxable or not). Free Delivery Amount The minimum order total for free delivery. When this total is met, the delivery fee will automatically disappear (enter 0to always charge the Delivery Fee).Lead Time The average amount of time it takes for an order to be prepared. This gives users a more accurate estimate and avoids rush orders. The Lead Time calculation works as follows (the example below uses 15-min. Lead Time):
- Opening time of 10 AM = first available “ready” time of 10:15 AM.
- If the user chooses ASAP, the system will take the current time and round up to the nearest 5 minutes, then add the Lead Time.
- The Lead Time calculation works as follows (example uses 15-min. Lead Time):
Current time is 11:12 > rounds to 11:15 = first available “ready” time of 11:30.
Note: This buffer gives users a more accurate “ready” time by allotting a few extra minutes for them to actually place the order through the app.
Convenience Fee This is the additional fee if you wish to charge. - Click Payment to enable a cash option and set up Braintree.
- Set up a Braintree account.
- Toggle on and off Cash and Tipping capability.
- Click Add New Tax Amount to set a tax rate.
Note: You can Enable or Disable a built-in tip feature (10%, 15% and 20% are the only options) that lets your users automatically add a tip amount to their order. Just toggle the Tips feature on.
- Click Menu, then Add New Category to start building the menu
- Choose a Category name (e.g. Entrees or Salads).
- Choose an image from our library or add your own in Your Images.
- Click Add to save the category.
- Under Menu, select Add New Item.
- Select Details to edit item details.
- Select Customize to add pricing for sizes and add-ons:
- Item sizes: Set different prices for small vs. large meals
- Item options: Add additional items (e.g. Extra cheese)
- Select Availability to edit the availability of the item based on locations and time of day.
- Click Add.
- Click Emails to add an admin email address and customize the Confirmation Email.
- Click Extras to connect a Google Cloud printer and preview the Web Widget.
- Click Save at the top right when you are done.
Custom Design
If you would like to create a custom design for this feature instead of using the Global Design, please refer to the article Feature: Custom Design Area.
Feature Details
See below for details on features from the user’s perspective.
Account Page
- Users can click the button at the top right of the feature to view the new Account page.
- Users can manage their favorite addresses and view their past orders here.
- More features to come in the future!
Past Orders
- On the Food Ordering landing page, users can view their last 10 orders.
- They can remove one by swiping left across that order.
- They can re-order the same things (depending on availability, time, etc.) by clicking a previous order then selecting REORDER.

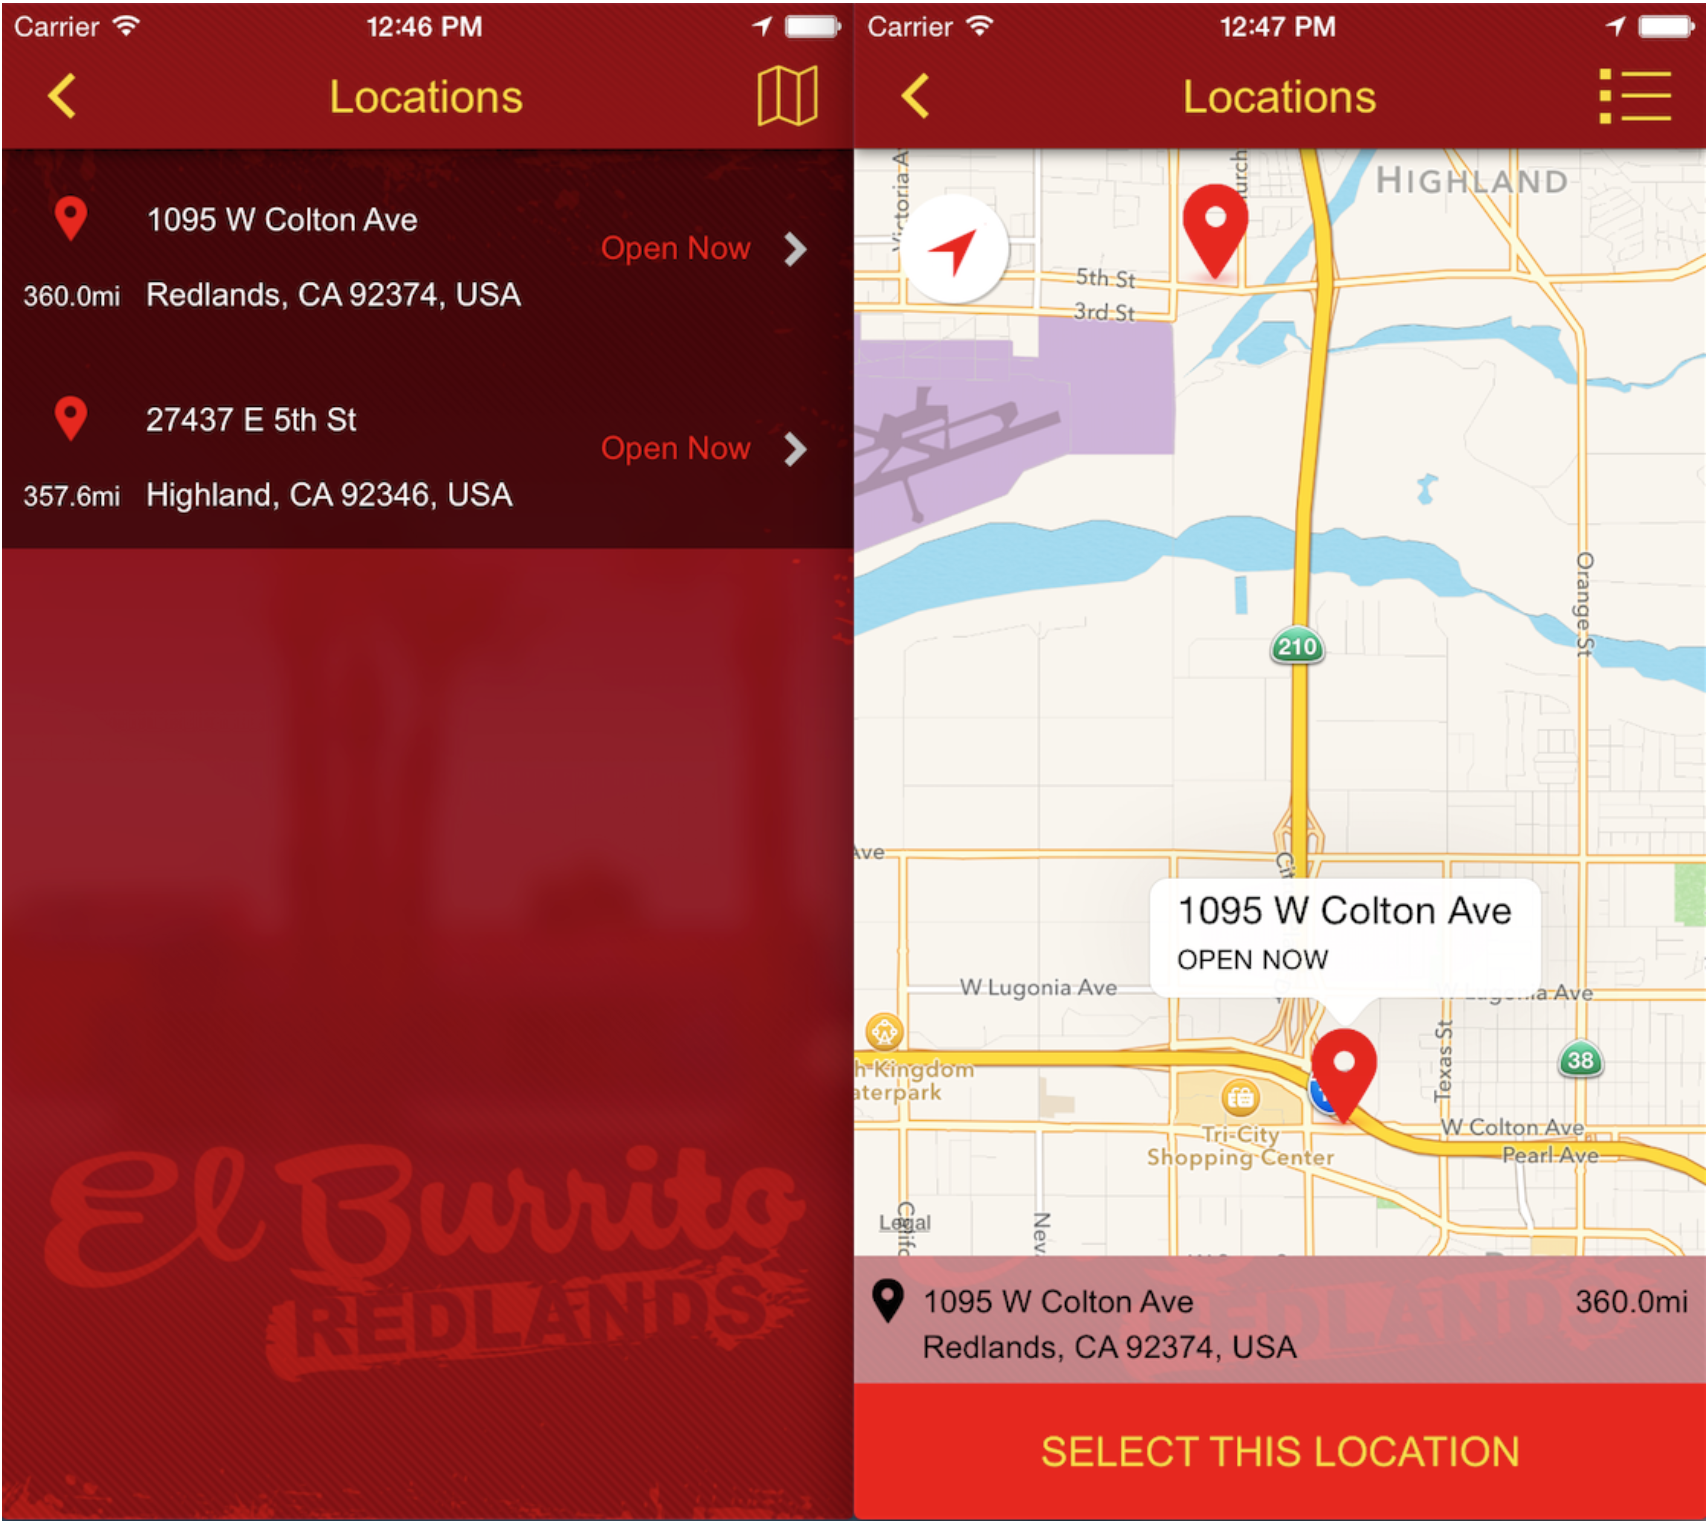
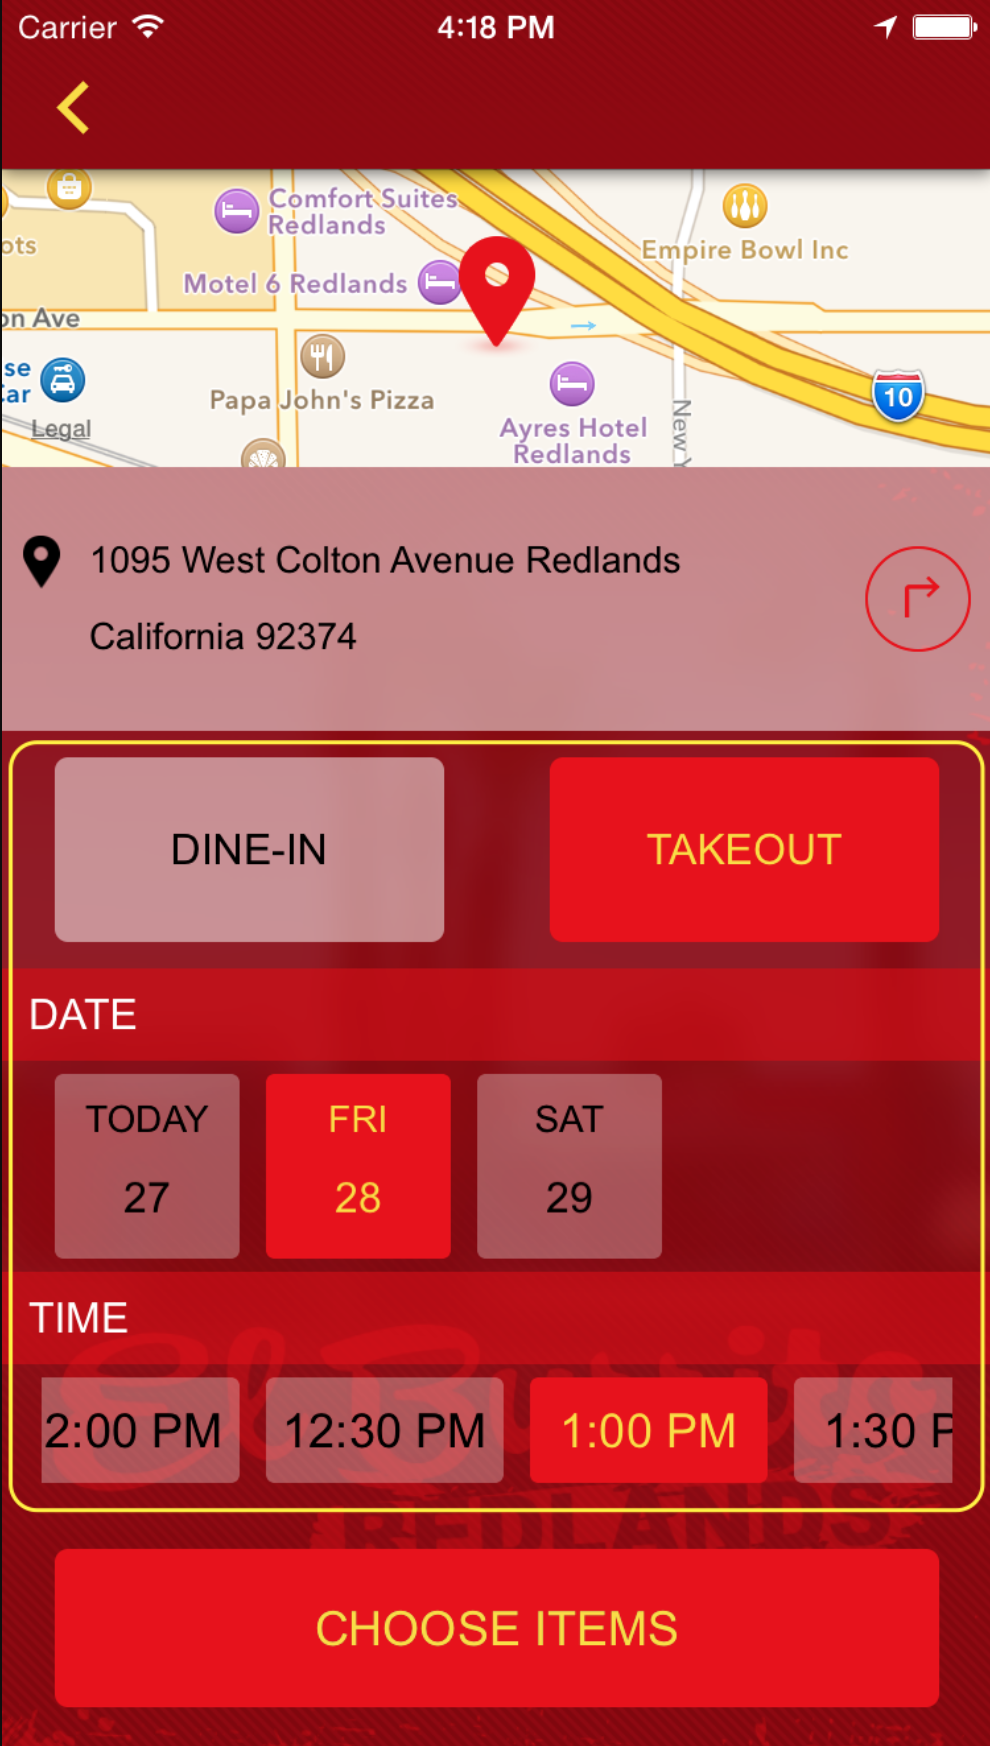
Location Selection
- Users can view all available locations in list view or map view.
- Open and Closed dialogs will display based on that specific location’s operating hours.
- If you allow orders to be placed days in advance, users will be able to select a location even when it is currently closed.
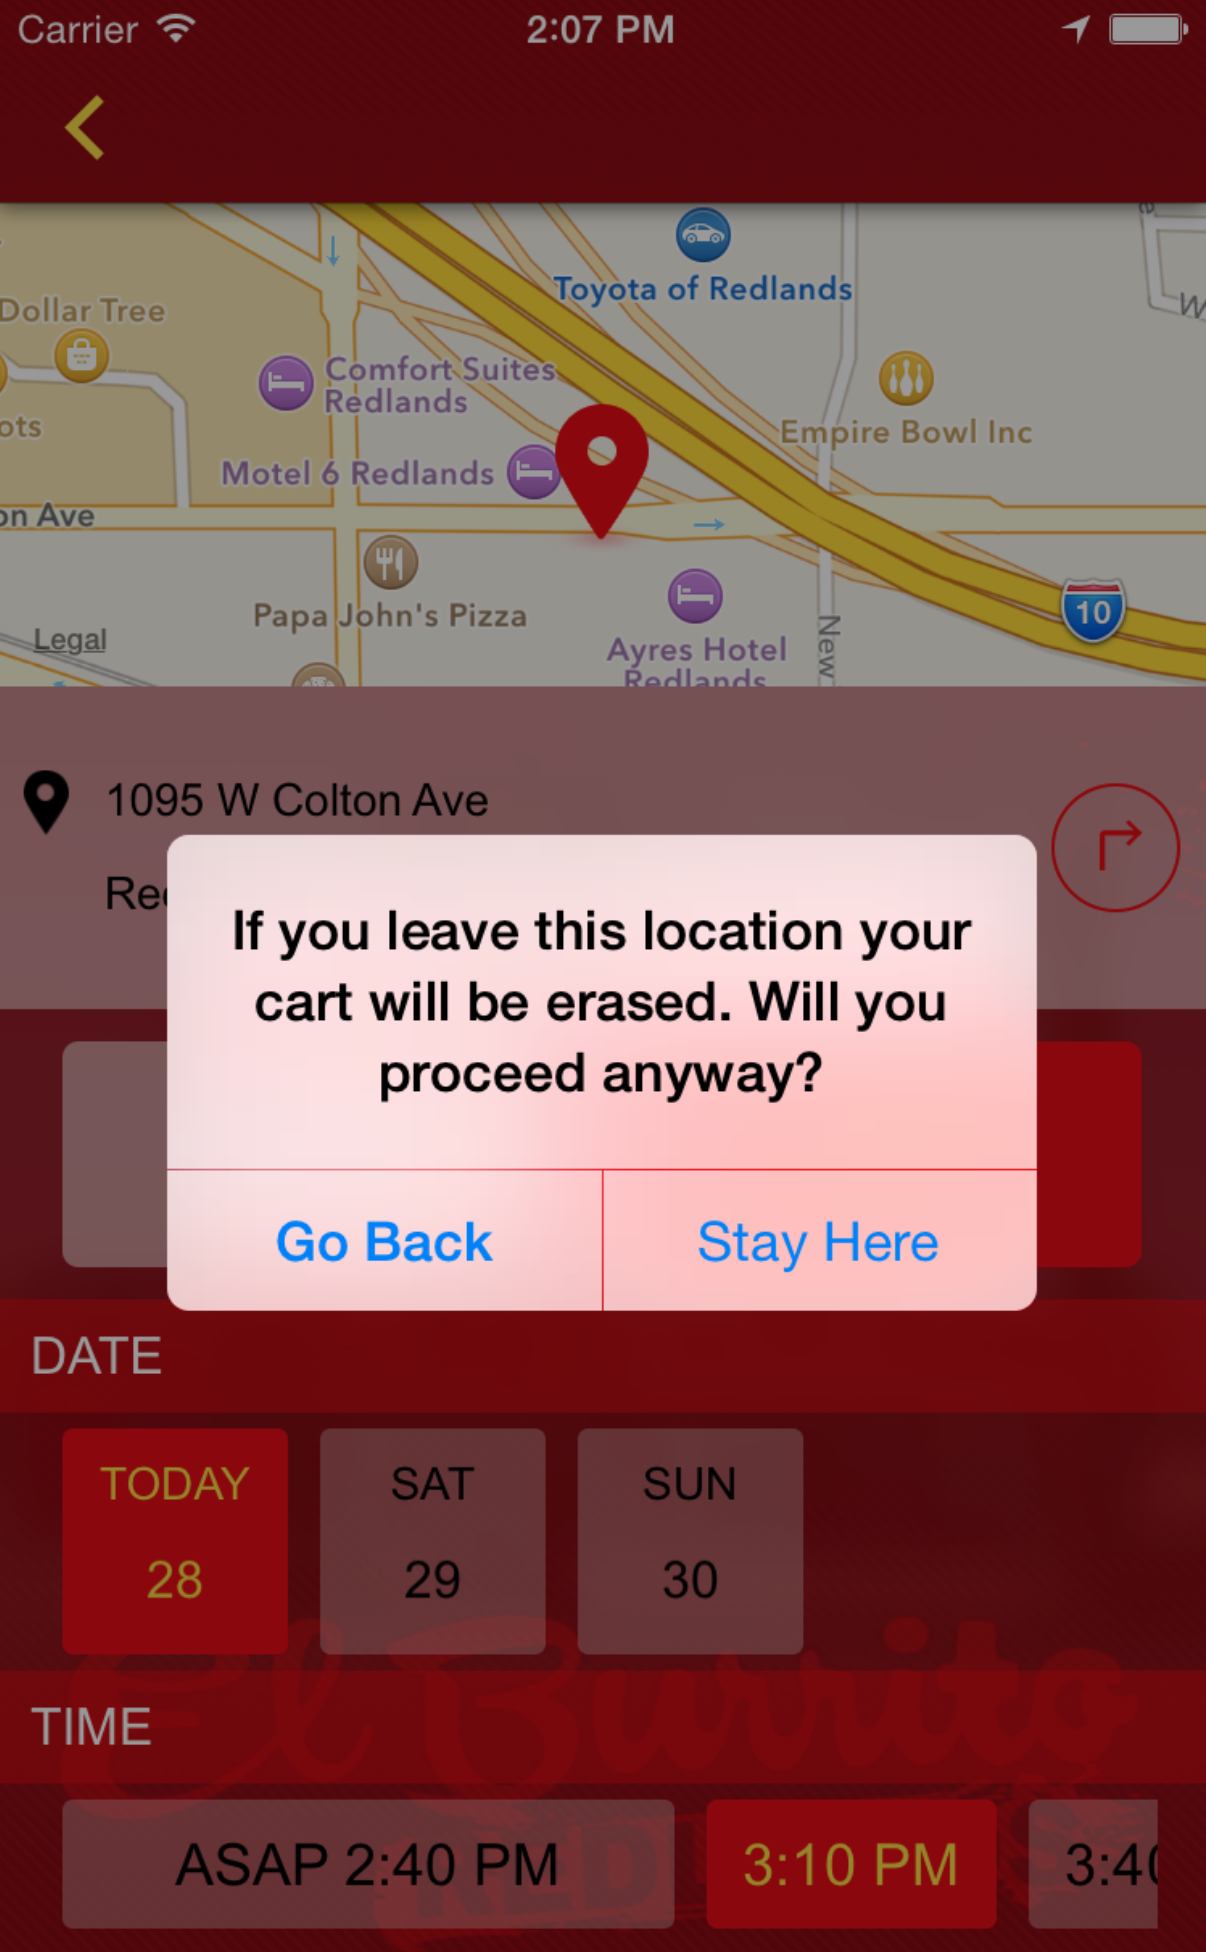
Leaving Location Prompt
- Once a location and time have been selected and an item has been added to the cart, the user will receive a prompt if they try to click the back arrow to select a different location.
- This prompt warns them that their cart will be erased.
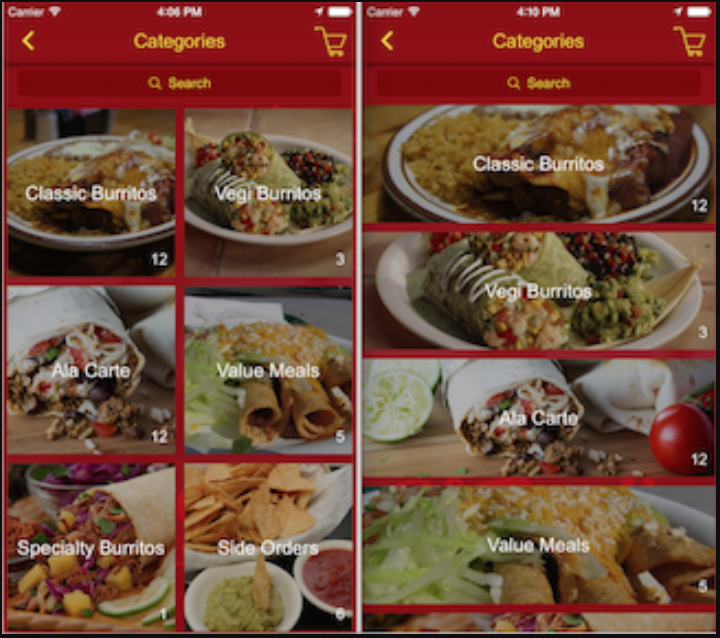
List/Grid View
- Menu Categories can be viewed in list or grid view.
- Each category includes a title, image, and the number of items within that category.
Time and Availability
- Time zones are ignored. The user is assumed to be in the same time zone as the business.
- Menu items can be location-specific. You can pick one, multiple or all locations when adding items.
- Menu items can have specific available times (think Breakfast Menu).
- GPS coordinates will be required for each location.
- You can Enable/Disable Order Types.
- Dine-in is for same-day only.
- Takeout and Delivery can be offered anywhere from same-day to 6 days in advance.
Shopping Cart
The redesigned shopping cart offers a much better UI, with logic enhancements and new capabilities that make ordering easy as pie (and sometimes ordering pie easy as pie).
Cart Animation
When items are added to the shopping cart, the cart icon will slide to the side to display the cart’s current item count and order total.
Item Quantity
Users can pick a quantity from 1-5. If they want to order more than 5, they can click the More button, which opens a dialog box for the user to input a larger number.
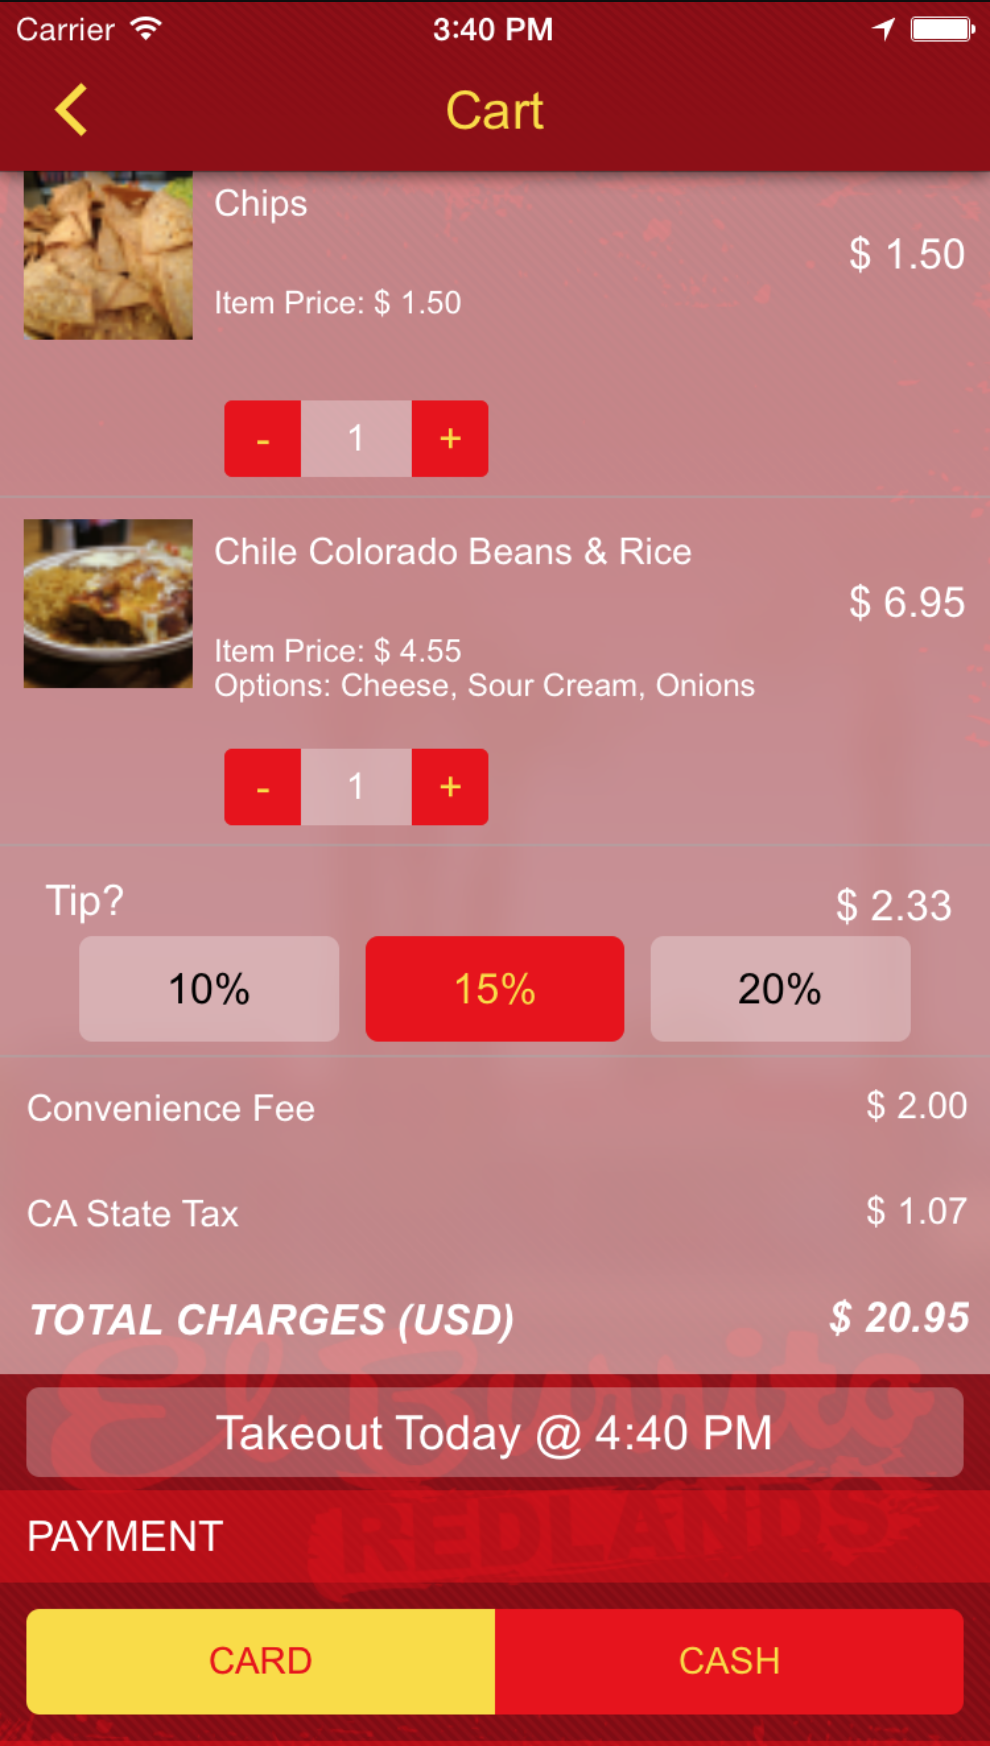
Shopping Cart Page
- The item quantity can be adjusted here. When the user sets an item quantity to zero, a prompt will ask them if they wish to remove the item from their cart.
- Tip (if enabled) percentage can be selected. Tapping the tip percentage a second time will deselect it.
- There is a summary of the order type and selected time.
- Cash and Card can be accepted (depending on your back-end settings):
- Cash: User enters the necessary information and checks out.
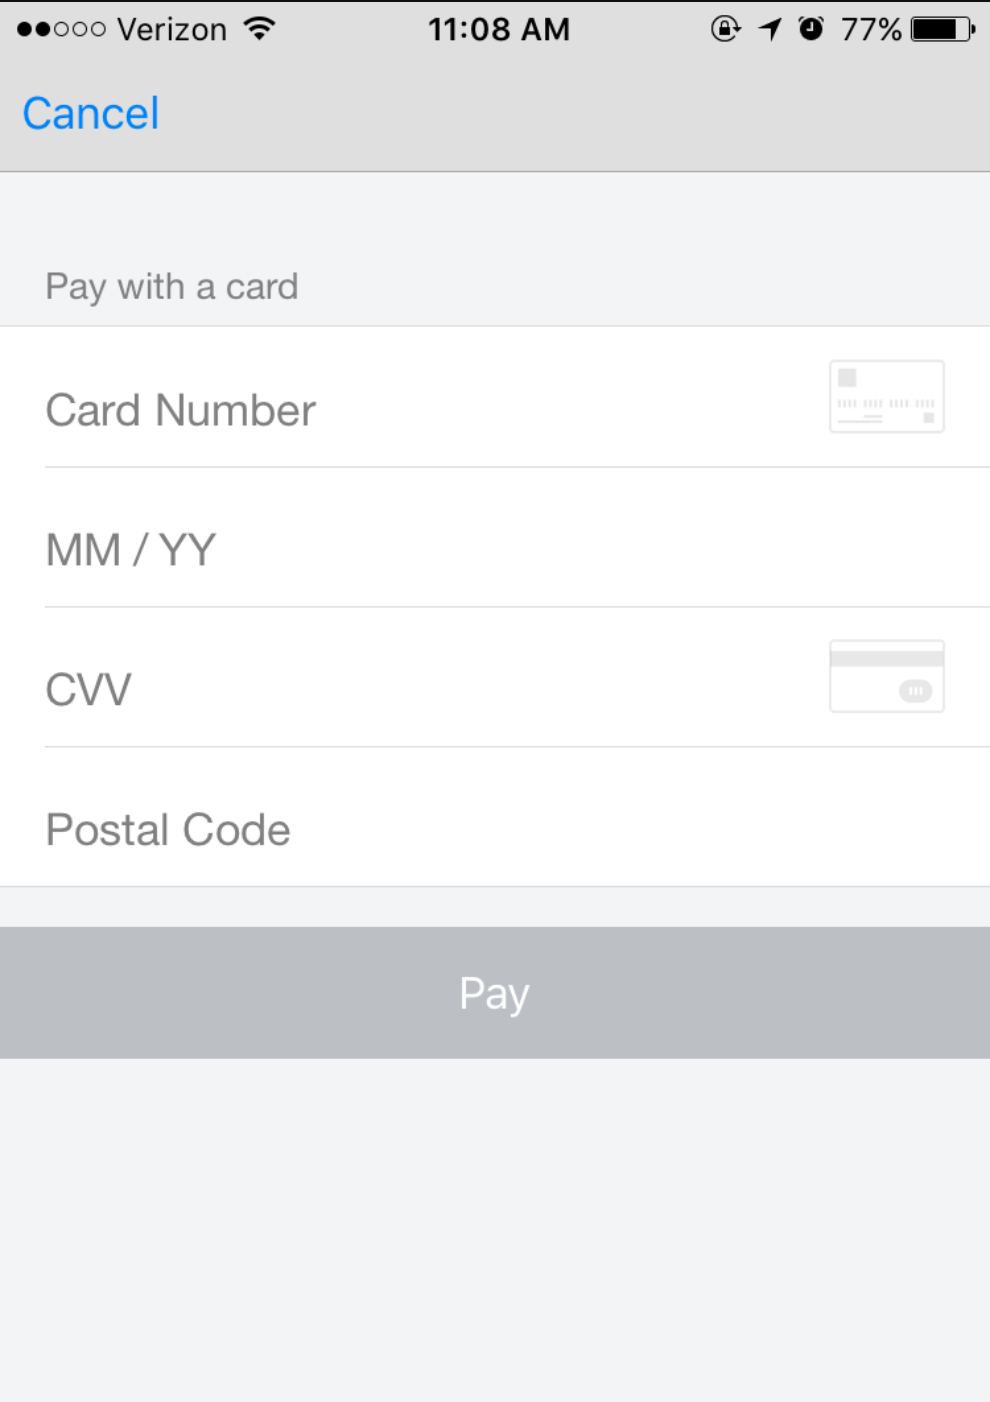
- Card:
- Users enter the necessary information. The app will then navigate to the Braintree checkout window.
- If enabled through Braintree, the purchase through PayPal button is also available.
- The card information is entered and additional validation (if required by the business) is supplied.
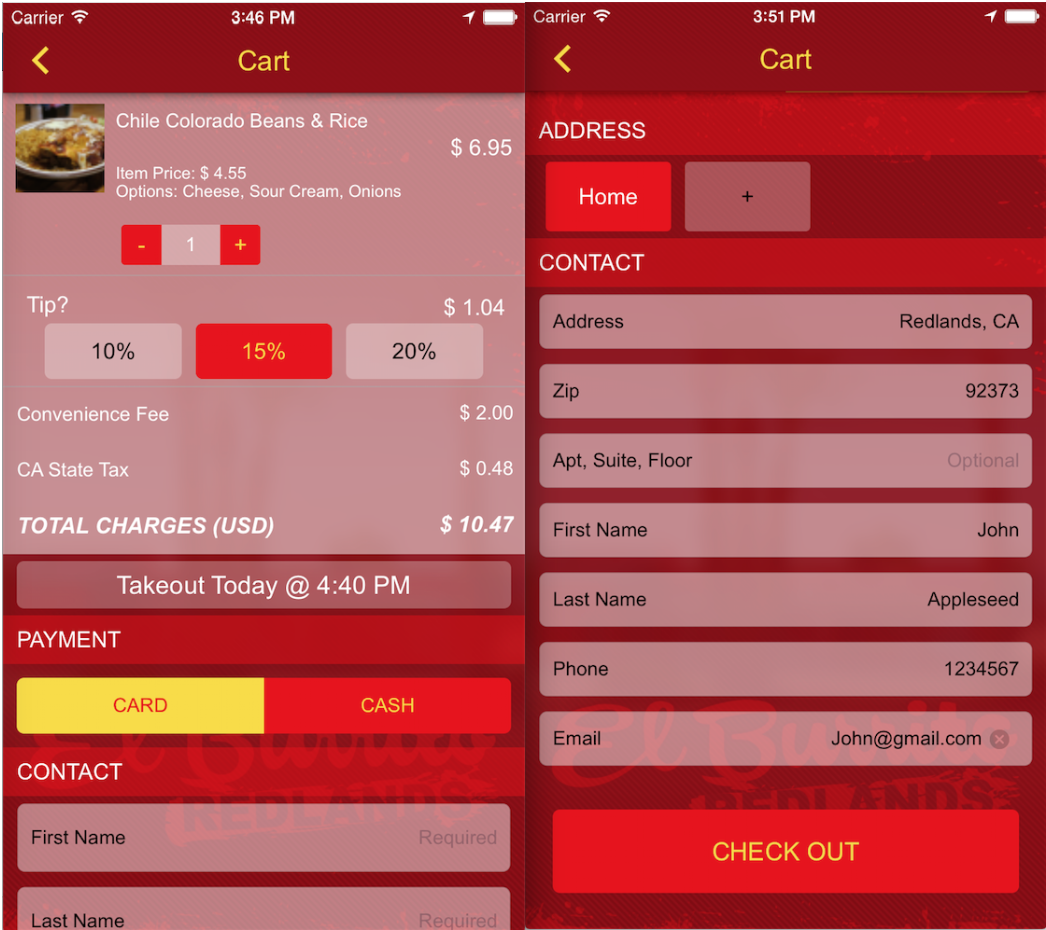
Checkout Details
- The user will see slight differences on the checkout page depending on which order option they have selected (Dine-in, Takeout, or Delivery).
- We have also updated the back-end orders page to make it a bit more search-friendly.
Dine-in and Takeout
- With both options, users can toggle on Email Receipt.
- When enabled, an email address is required.
Delivery
All fields are required.
- The Address field uses a map search that requires a valid delivery address. This is necessary for the app to determine whether or not the address is within the dictated delivery radius.
- The Address page stores the user’s favorite addresses. Users can give each location a nickname, and these nicknames appear on the cart page so they can quickly select their desired delivery location.
Reworked Review Orders Page
You can view all customer transactions and order details from this page.
(Click image to enlarge)
