Overview
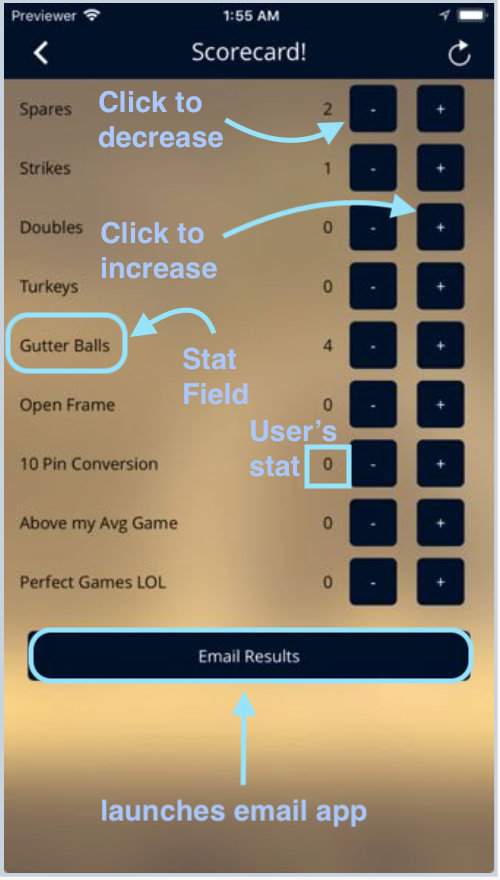
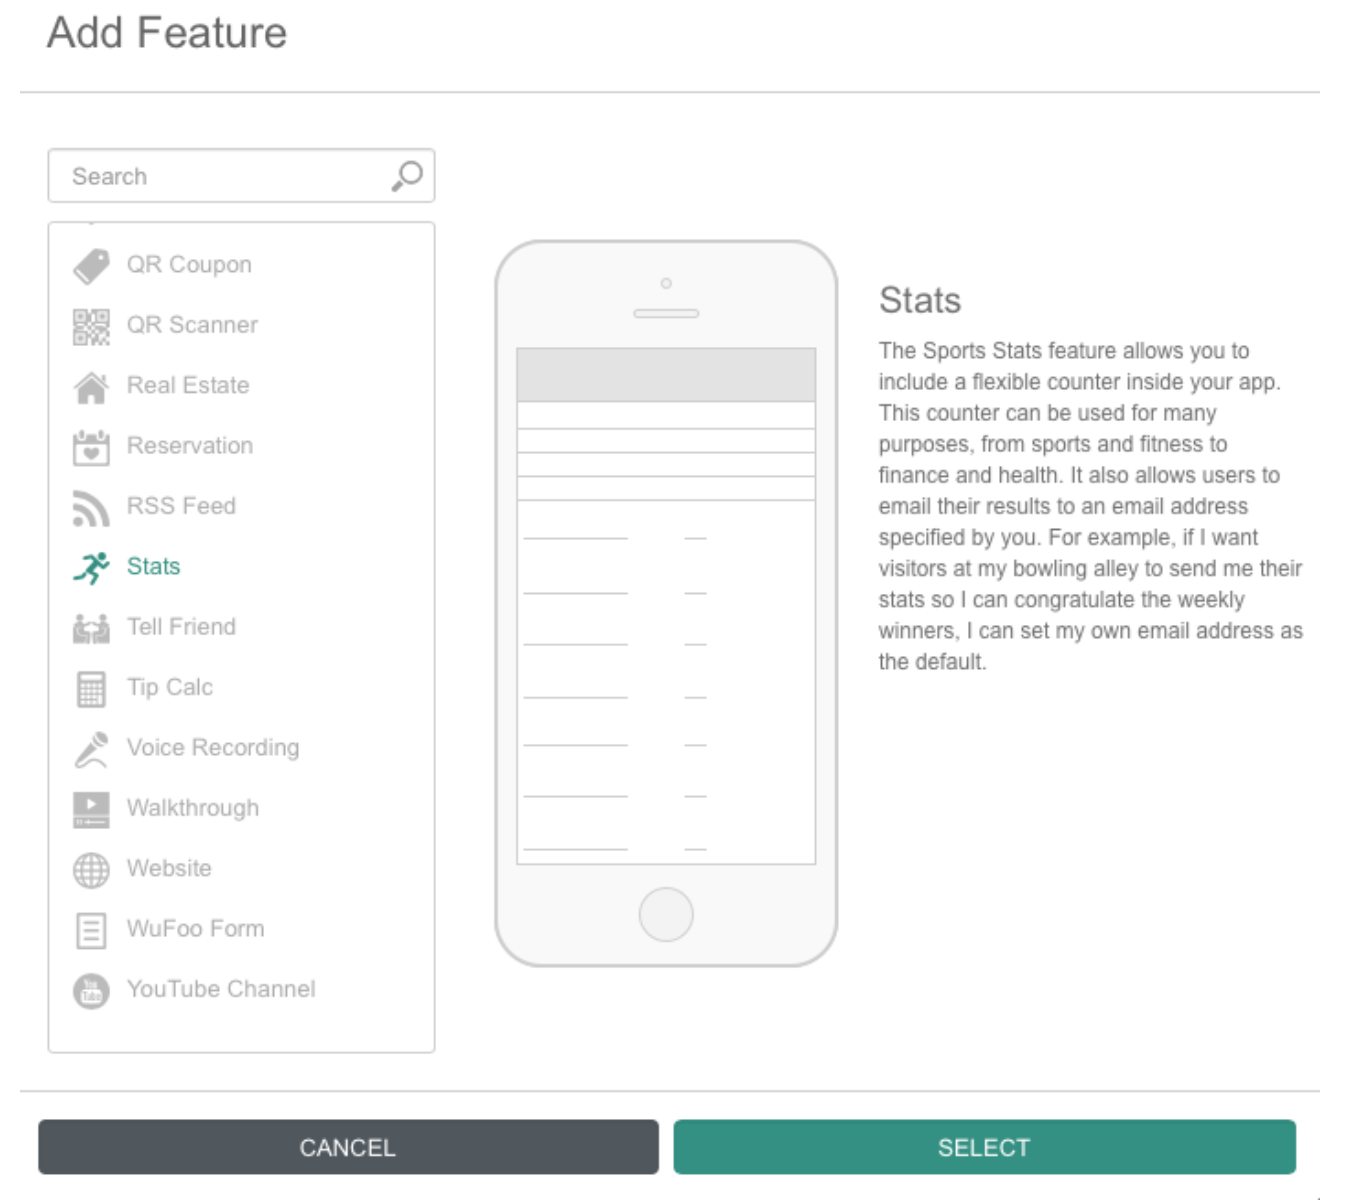
The Stats Feature is a feature that allows you to include a flexible counter inside your app. This counter can be used for many purposes, from sports and fitness to finance and health. It also allows users to email their results to an email address specified by you. For example, if I want visitors at my bowling alley to send me their stats so I can congratulate the weekly winners, I can set my own email address as the default.
In this article, you will learn how to set up this feature in your app.
Information
This feature is available on the following platforms:
- iOS
- Android
This feature is recommended for the following industries:
- Sports
- Fitness
- Health
Process
To set up the Stats feature, follow the steps below:
- Navigate to the Build section on your dashboard.
- Click Add Feature.
- Choose the Stats feature from the menu, then click SELECT.
- Name your feature, then click Add. Your new feature will now appear in the left-side menu.
- Click on the feature to expand its menu. From the left-side menu you can do the following:
- Use the checkbox to delete the feature.
- Click and drag the arrow icon to rearrange.
- Edit the feature icon by clicking it, then selecting a new image from the fly-up menu.
- Toggle the feature on/off.
- Jump to a specific section (e.g. Content or Custom Design) to adjust the feature settings.
Content
Here you can rename the feature, choose your settings, and create Stats Fields.
- Under Screen Info, change your Screen / Feature Name or leave as-is. This is the name that will appear in the app’s feature menu (e.g. Bowling Statistics instead of Stats).
- Under Settings, fill out the forms below.
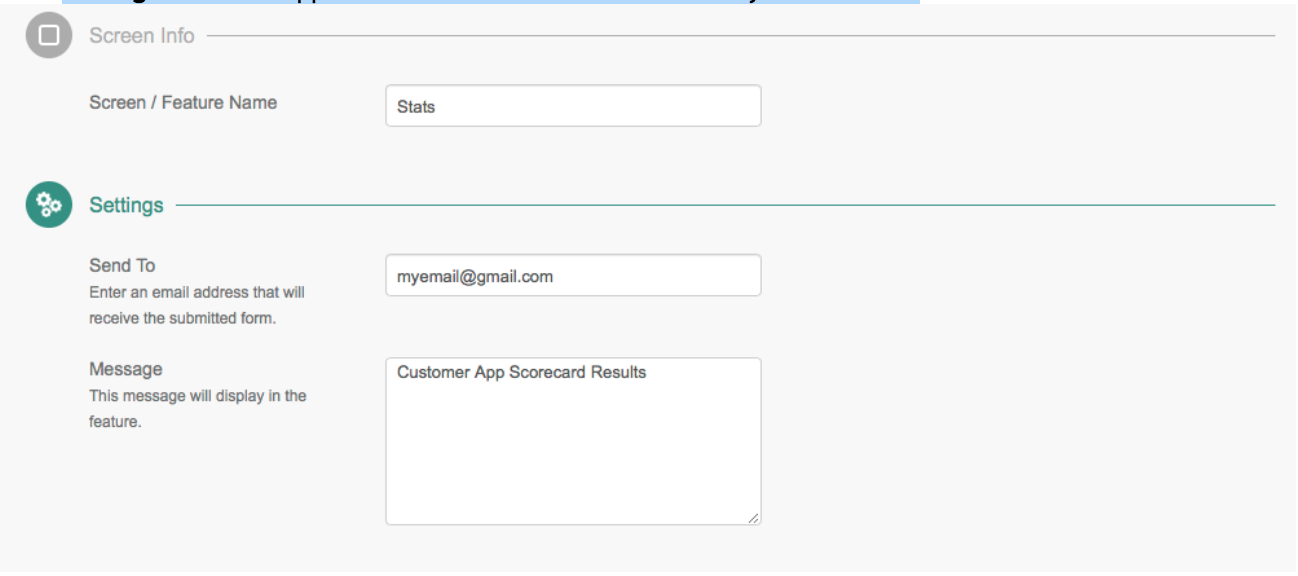
- Send To: The default email address stats will be sent to by users.
- Message: This will appear above the user’s stats in the body of the email.
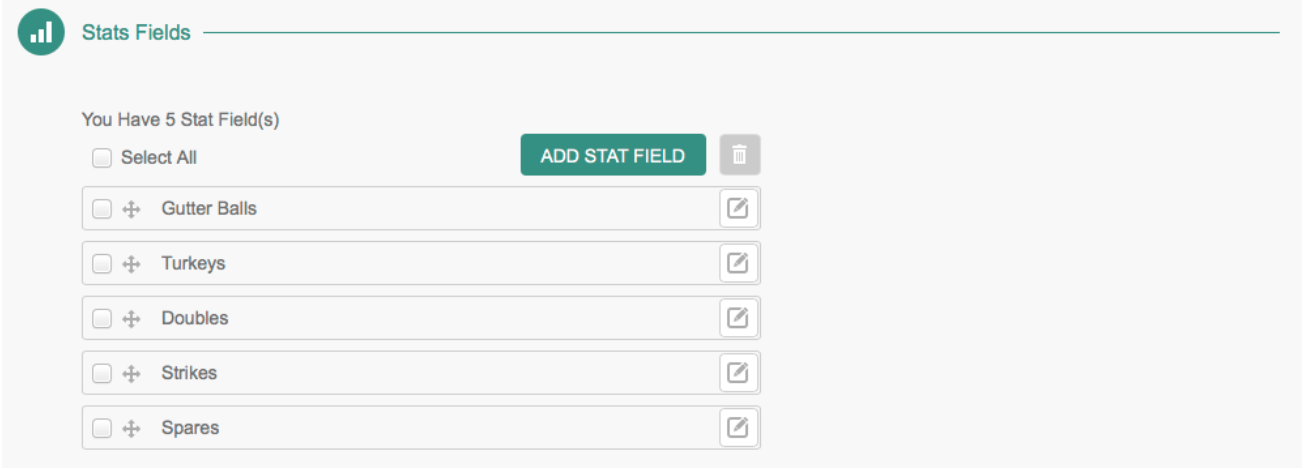
- Under Stats Fields, click ADD STAT FIELD to begin adding categories for stats.
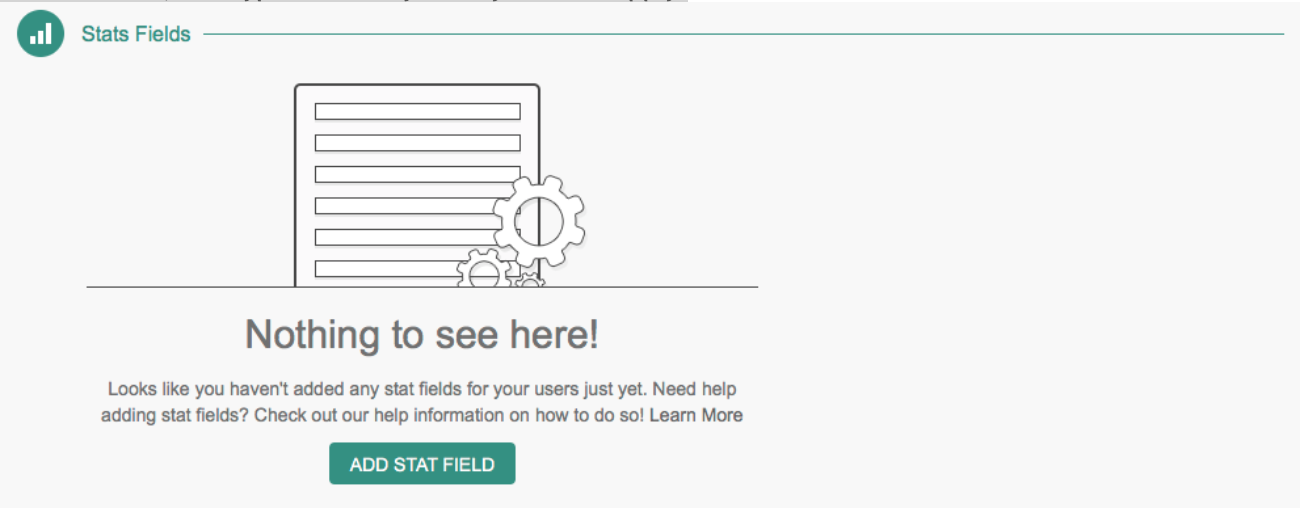
- Specify the name for this particular stat, and hit Enter on your keyboard to apply.
- Continue adding fields until you are satisfied. You will see all of them below the Stats Fields section, where you can edit their names or delete them completely.
- Click Save at the top right when you are done.
That’s it! If you choose to create a custom design for your Stats Feature, we recommend using a background image with 25% or lower opacity so scores can be easily read.
Custom Design
If you would like to create a custom design for this feature instead of using the Global Design, please refer to the article Feature: Custom Design Area.
Example