Overview
Groups (previously known as Membership) has been given a complete reworking along with some great new features!
Now available on all platforms, iOS, Android, and PWA!
Groups are now a free Add-on. This change allows us to do a couple of things. First, it enables us to better educate our users on the power and use cases that Groups can provide. Most importantly, it allows us to alter the experience inside the CMS at a higher level when the add-on is enabled.
In this article, you learn more about this feature and how to set it up for your app.
Information
- If you were previously using the old ‘single‘ mode for Membership and now see the Shared Account (Legacy) Groups screen, please jump to the Shared Account (Legacy) section of this article for more information.
- For those apps that were previously using Groups (Membership), we have already turned the Groups add-on for you.
- You can find the Add-ons section from your partner dashboard, and for a single app account, you can find it from inside the CMS on the left navigation.
This is recommended for the following industries:
- Corporations
- Schools
- Small Businesses
Monetization ideas:
- Add current members of your business to the membership setting where they can access more features of the app.
- This could be an opportunity for new users to purchase a membership. The admin downloads the email list for sign-up/purchases and uploads the list to the membership feature, then the new members receive an invite email and have exclusive membership access to the app.
Related features:
Process
- In your Partner Dashboard, head to the Add-ons section on the left menu.
- Here you will find the Groups add-on. Go ahead and give it a click to dive in.
- We recommend reading the material under Description and FAQ to ensure you know as much as possible about the feature before diving in. Do not worry; it is a quick read!
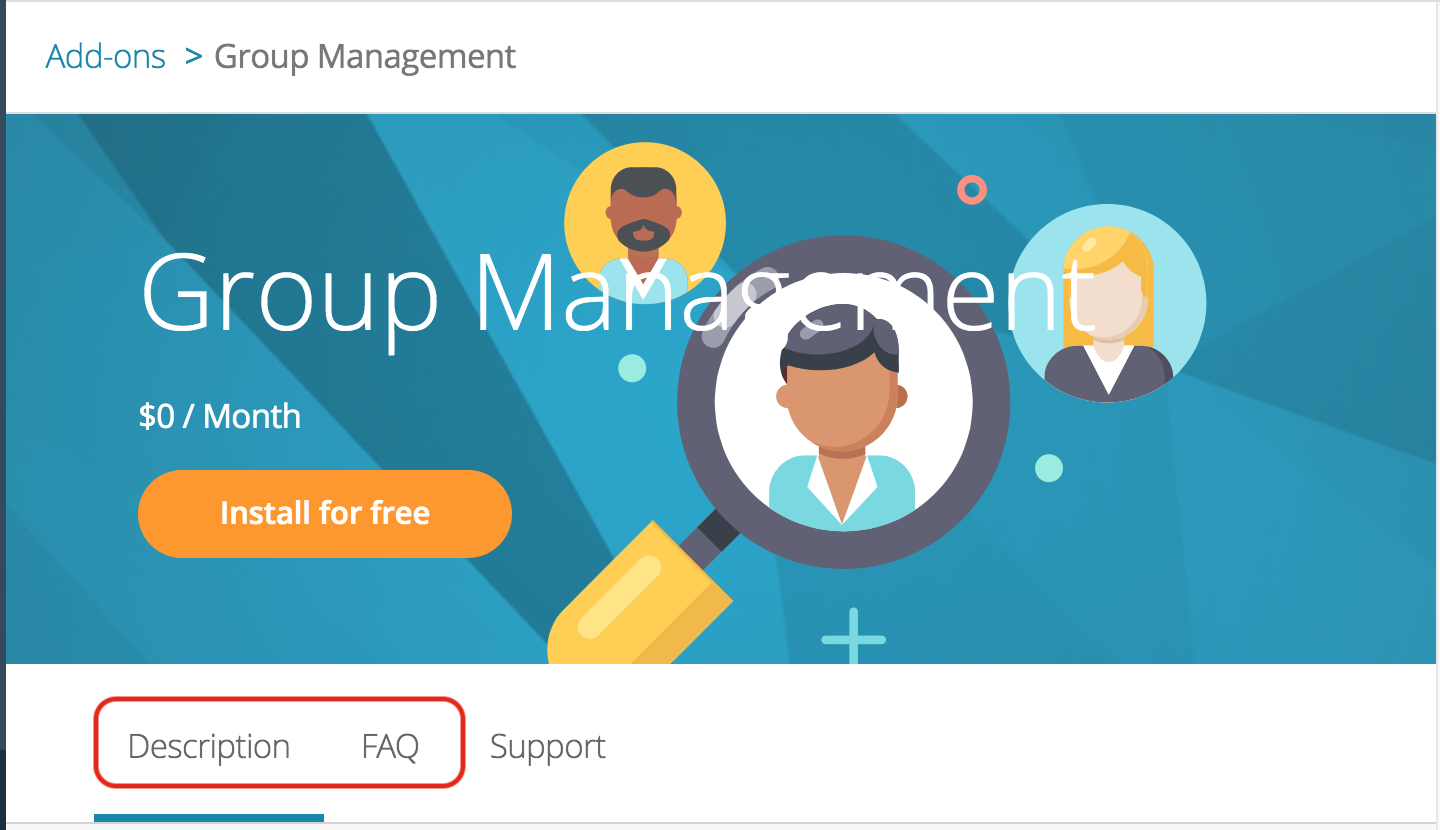
- In the banner image, you will see the Install for free button.
- Next, apply the Group Management license to the app you are working on.
- Once applied, jump back into that app through the My Apps section.
- Once you are logged in to your app, head to the Manage section in the left menu, and click on the Customers section. If this is your first time here, we suggest checking out our Using the Customers Page article once you complete this one.
- You will notice there is a new tab here titled Groups. Click it to open the Groups Management page.
Creating a Group
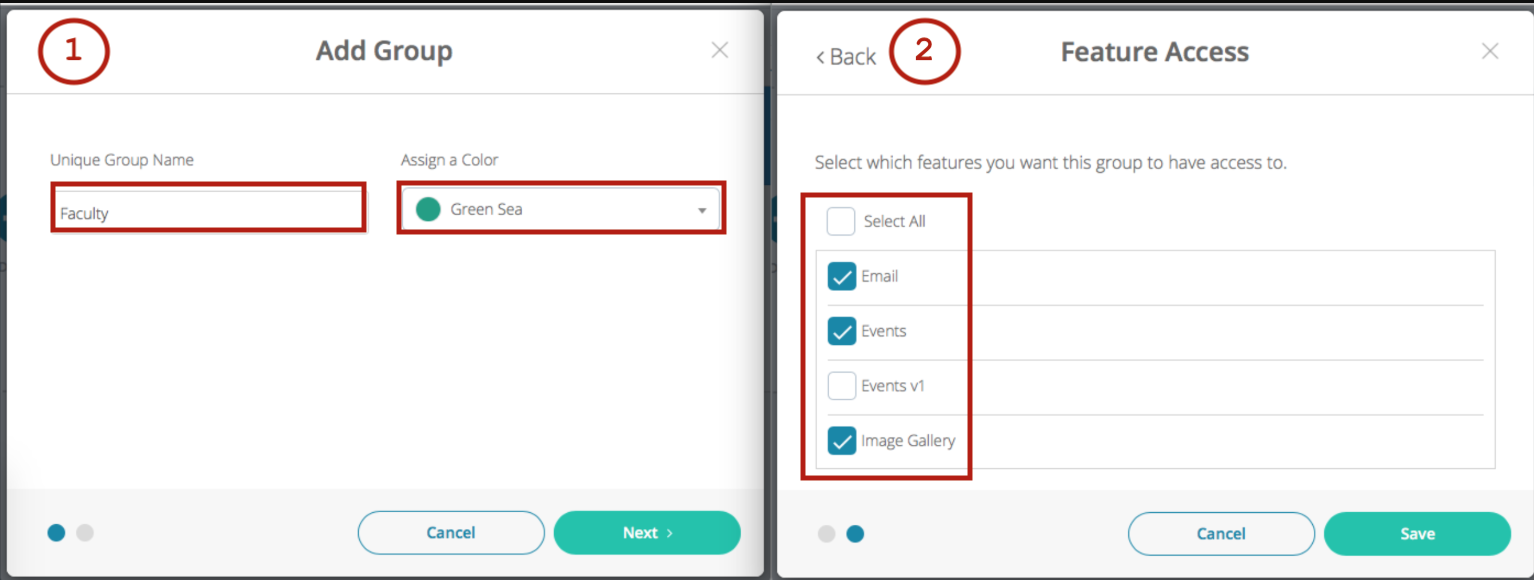
The first thing you will want to do is to configure your groups. Creating a group is easy. Simply follow the steps below:
- Head to the Groups section under Manage > Customers > Groups.
- Click the Add Group button (
 ) on the page.
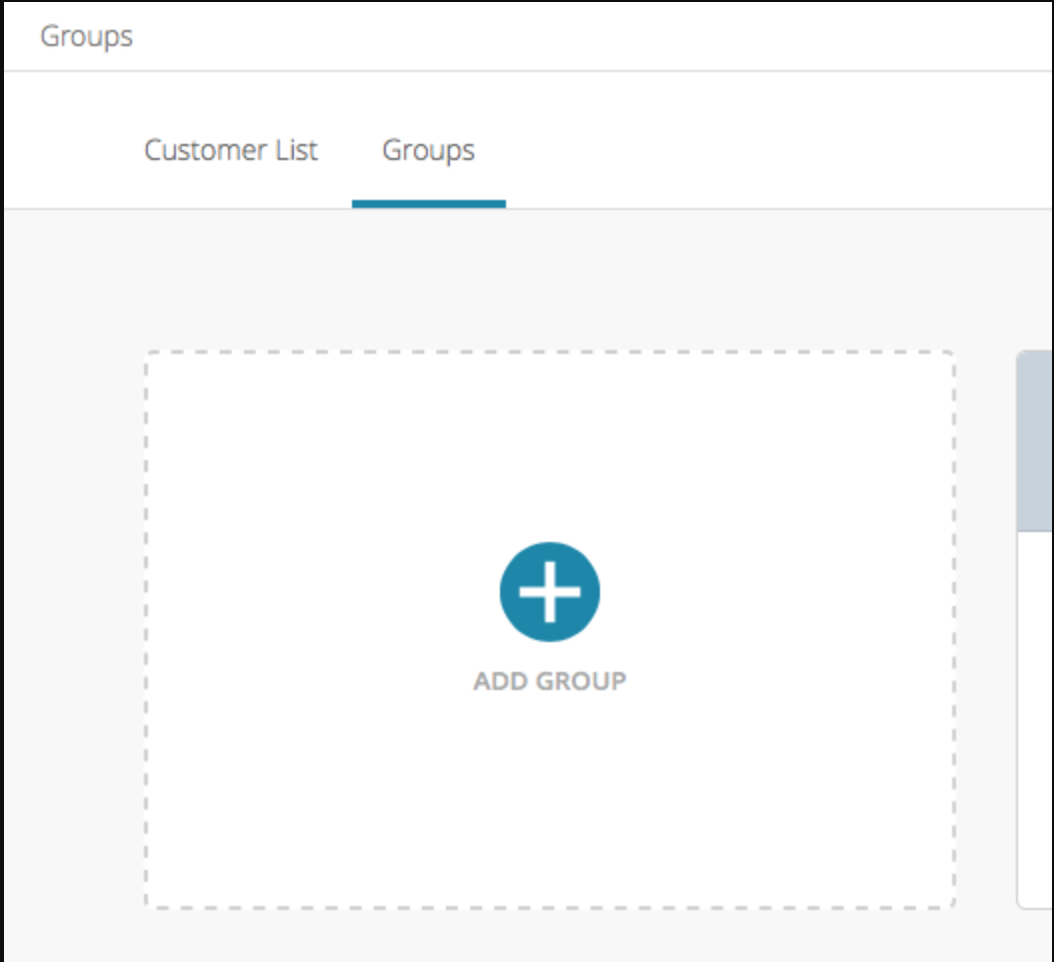
- This will bring you to a two-step process to create the group.
Group Log-in
- If you are coming from the Customers > Groups page, you can easily get to the Group Log-in settings by clicking the Login Settings link on the top right of the Groups page (it is also available at the top of your Build page).
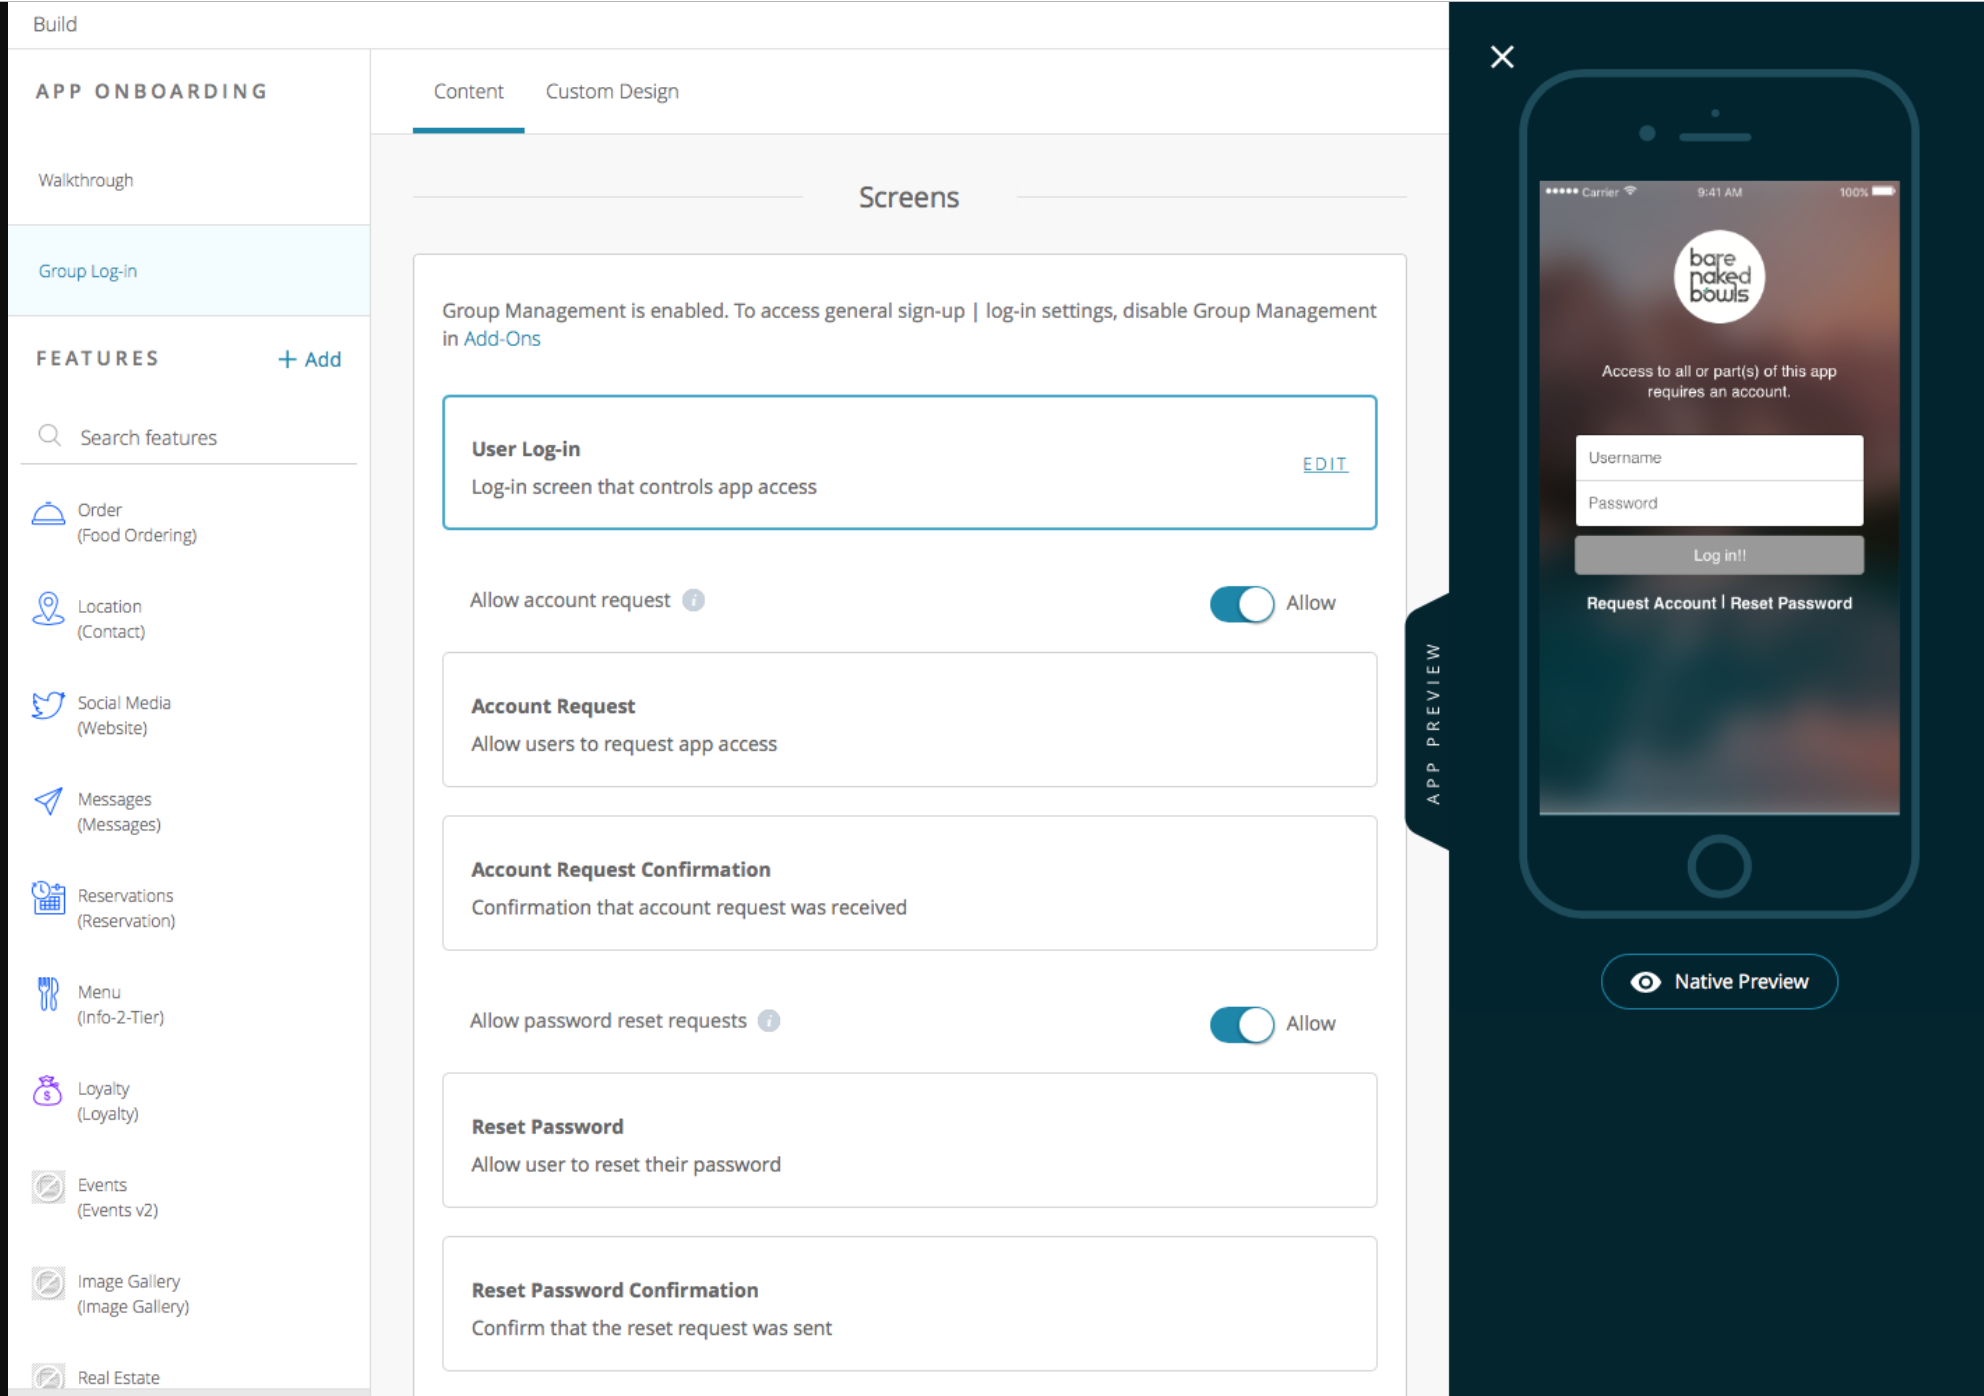
- You will notice that the Sign-up | Log-in settings have been replaced with Group Log-in now that you have the Groups Management add-on enabled.
- With our North Park release, we have updated the login screens for your apps. You will notice they share the general design theme as their cousin, the Sign-up feature.
User Log-in
- You can now add a custom message that will show on your Groups’ login page!
- Allow Guest Access toggle – If you enable this, you will be able to allow users to enter as a guest user.
- From the Groups page, you can configure which specific features those guest users have access to.
(New) Account Request and Confirmation
New with North Park source code, we now offer a self-sign up feature called Account Requests!
- This creates an all-new group on your Groups Management page.
- When a user requests an account, they will be brought into the app and can view the features that are assigned to this Requested Access group.
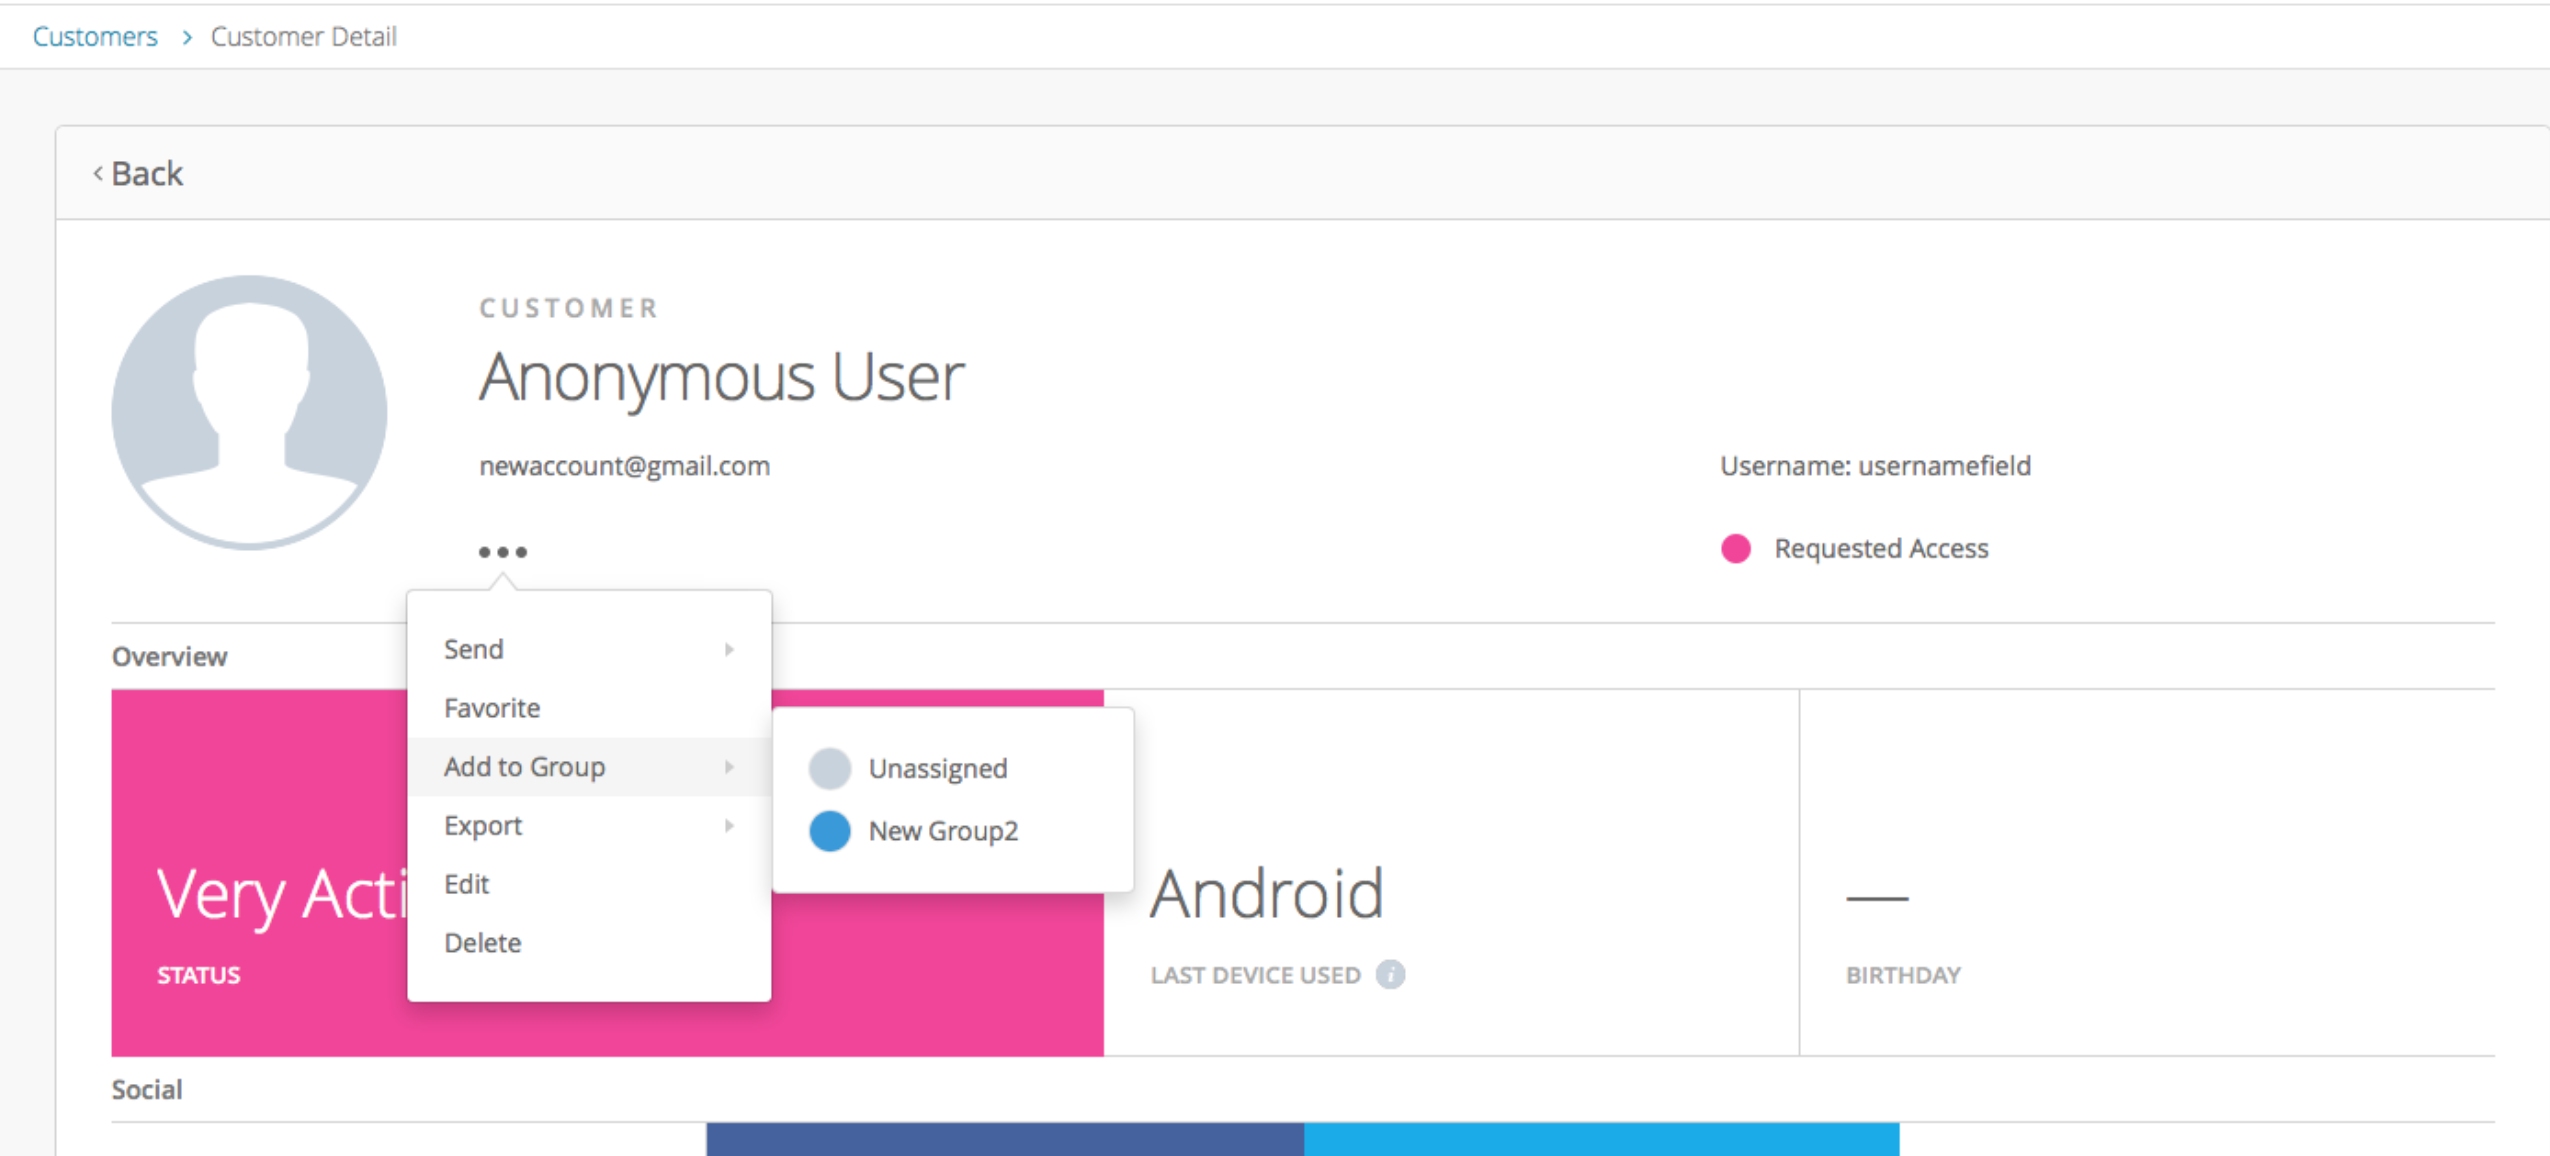
- That means all you have to do is reassign them to a different, more appropriate group at your leisure from the Groups Management page.
- Additionally, as the app admin, you will receive emails when a new user has requested an account, and the app users receive push notifications informing them that they have been moved into another group if you chose to do so.
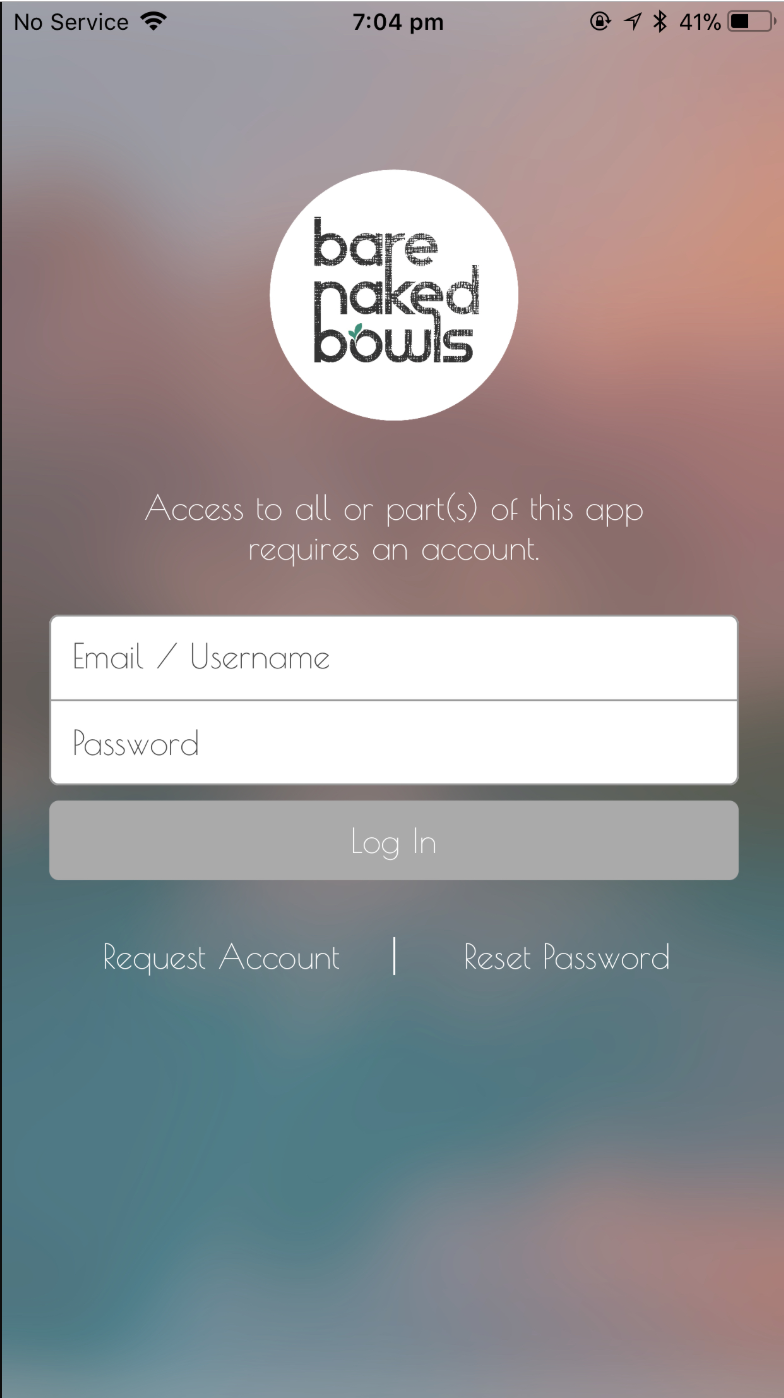
Here is an example of the Group Log-in Screen:
Adding a User
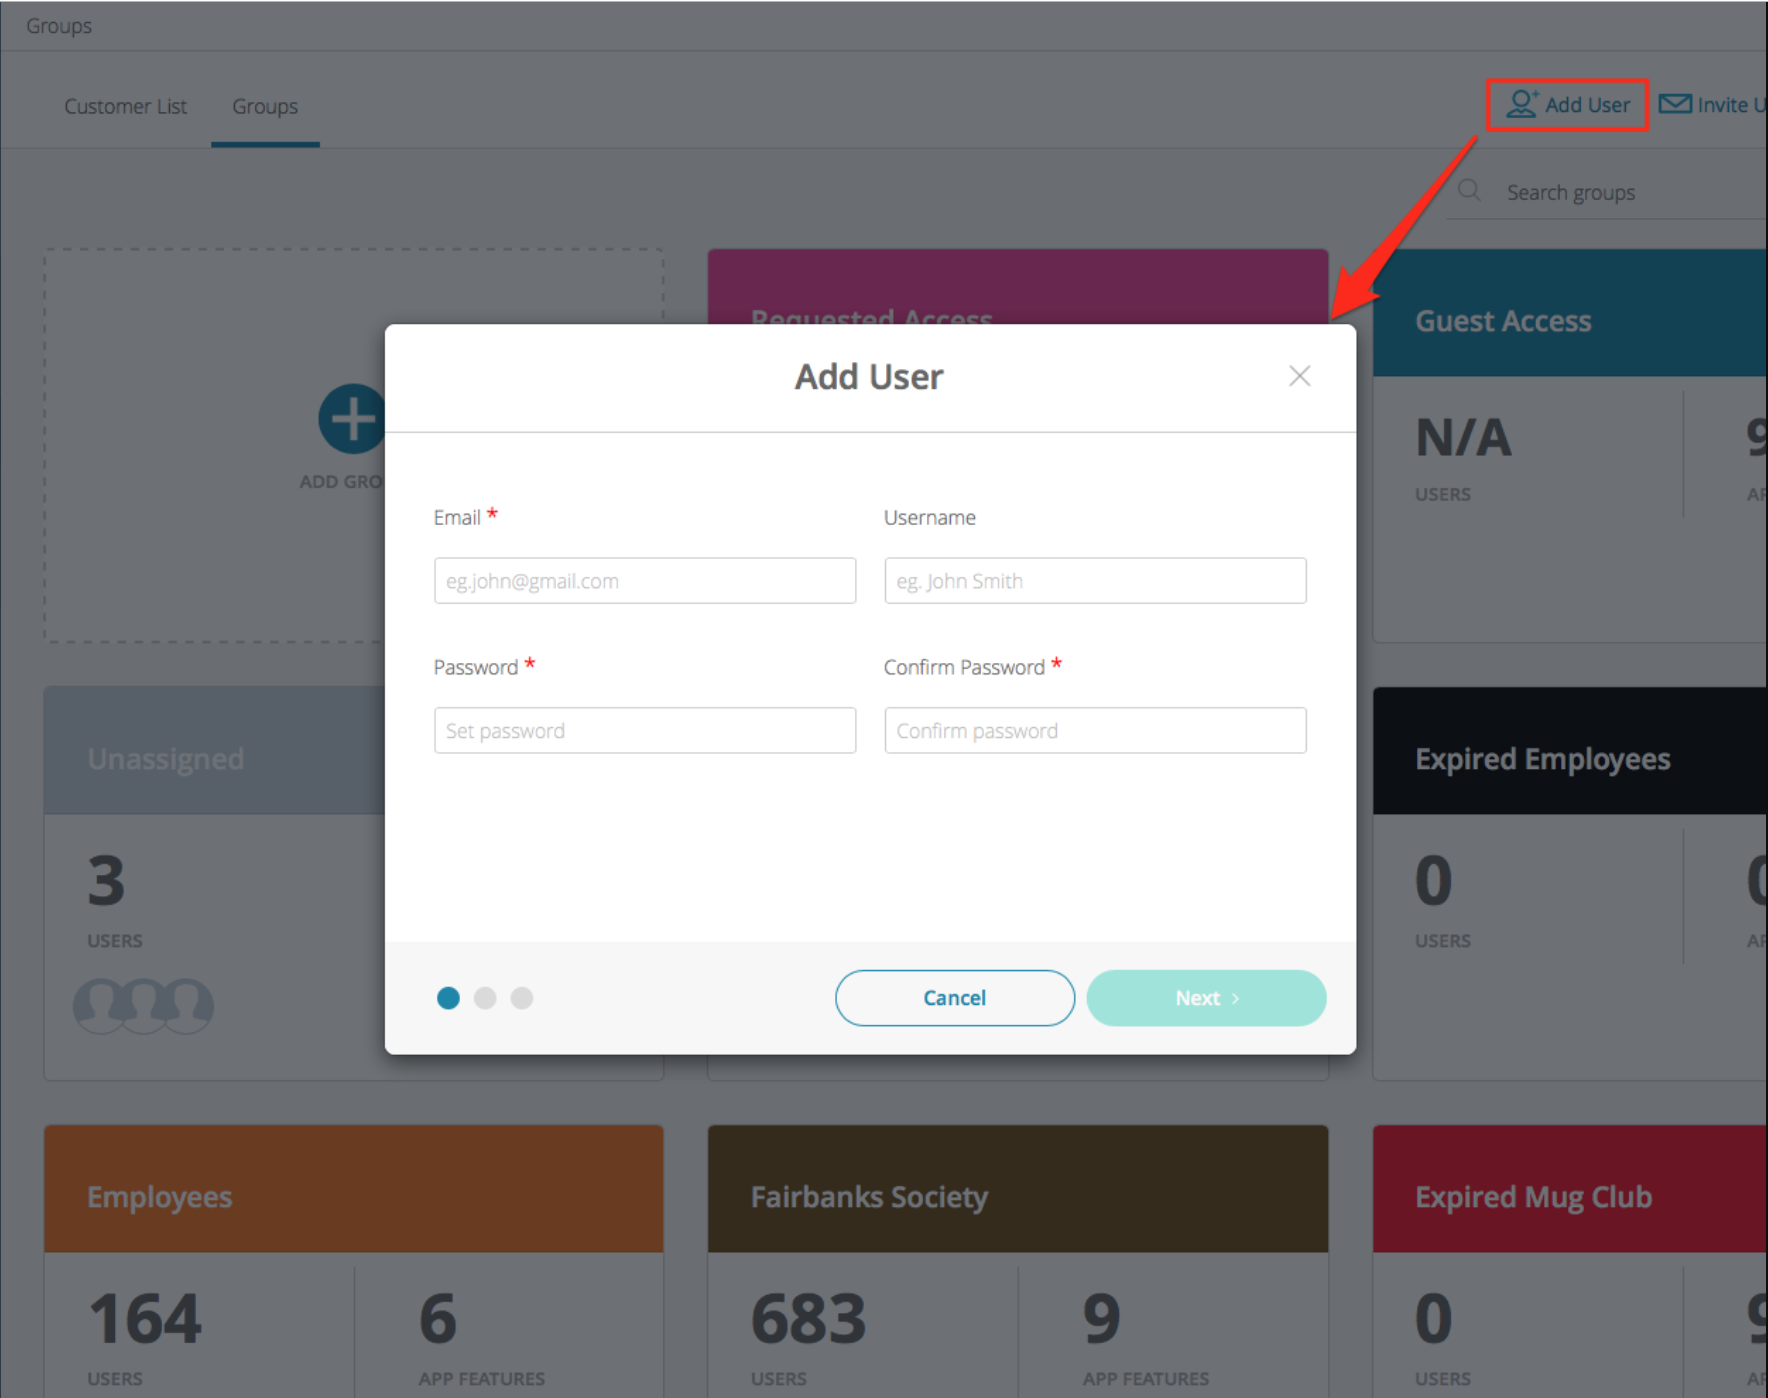
- To manually add a user, navigate to Customers > Groups, then click on Add User on the top right. You will be walked through a few simple steps to add a user.
- On the first screen, fill out at least the required fields.
- The next step will be assigning this user to one of the already created groups. That means this user will only be able to see the features assigned for that group.
- If you leave the group unassigned, you will have another available step to create custom feature access for that user.
- Once you save, share these credentials with the user. They will then be able to log in to your application.
Here is a screenshot of the Add User screen:
Inviting a User
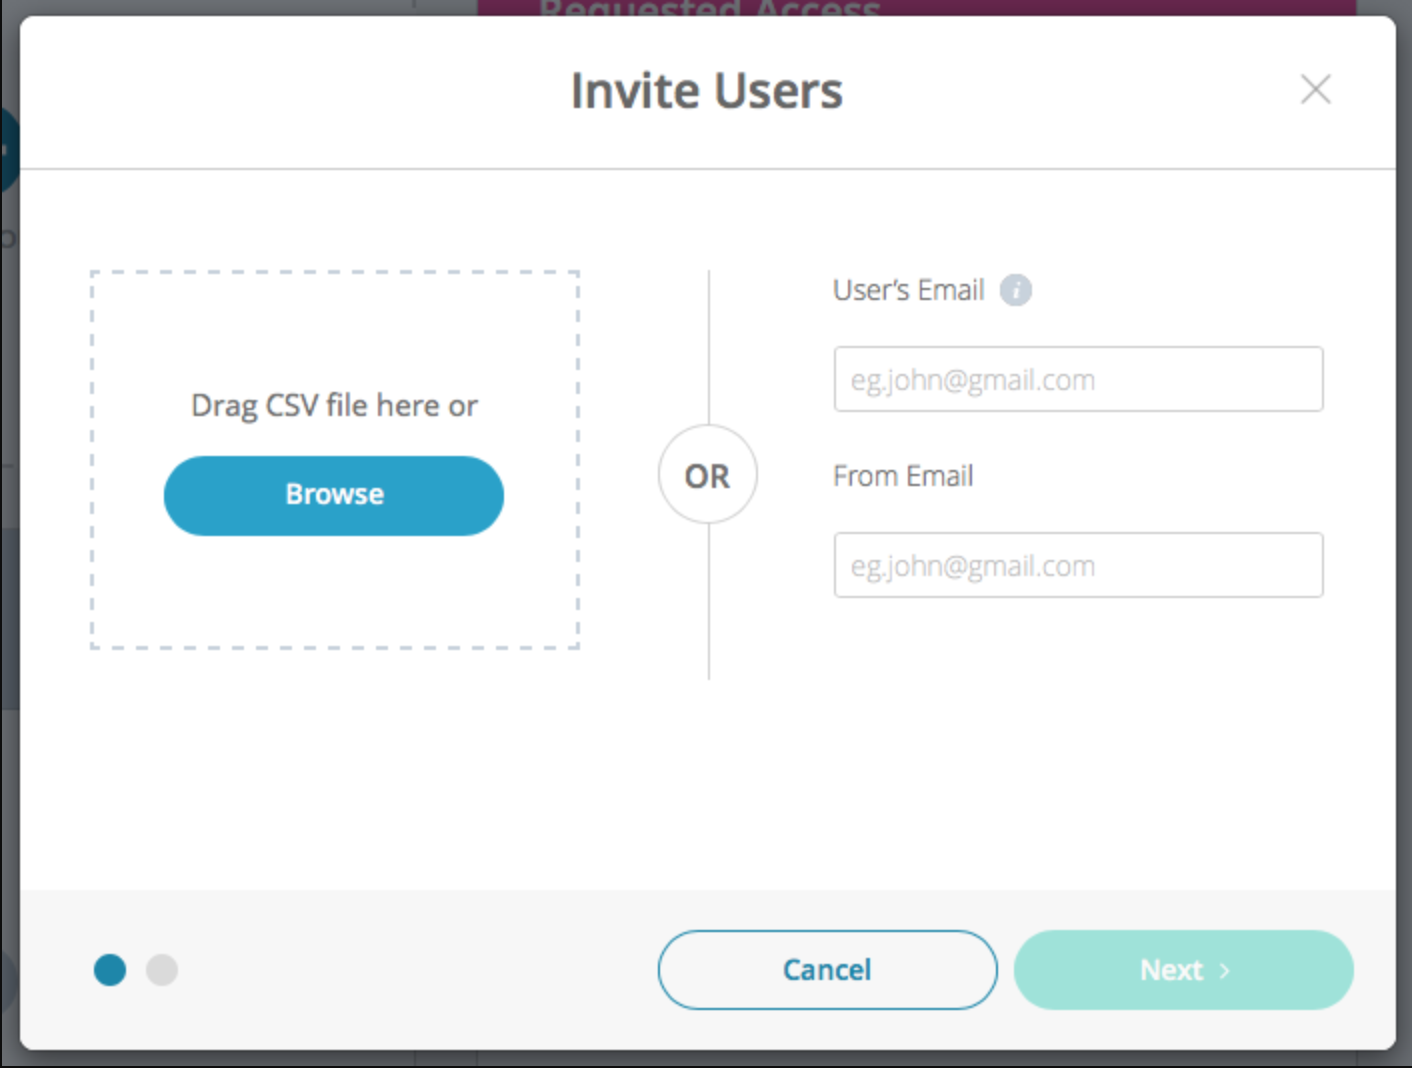
- Just next to the Add User button is the Invite Users option. This offers a more streamlined and efficient option to invite users and quickly assign them to a group.
- This option allows you to enter one email, a comma-separated list of emails, or even a .csv file to send account creation invite emails.
- You will notice you can also upload a .csv file of email addresses as well as modify the ‘from’ email address that is used.
- Be sure to not use a Yahoo, Hotmail or AOL email address in the from email as it will be blocked. You can leave this blank as well.
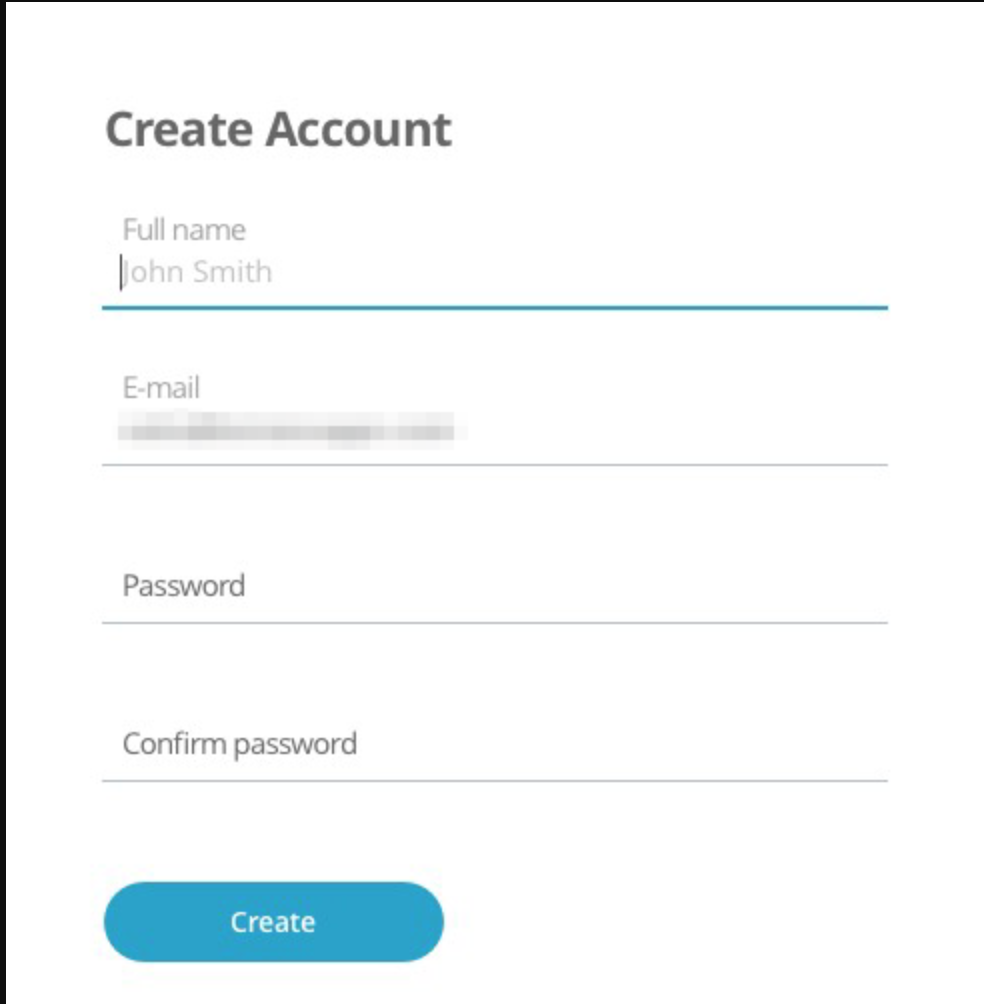
- The next step is to select the group that will be applied to all of these users once they follow the steps in the email to create their account.
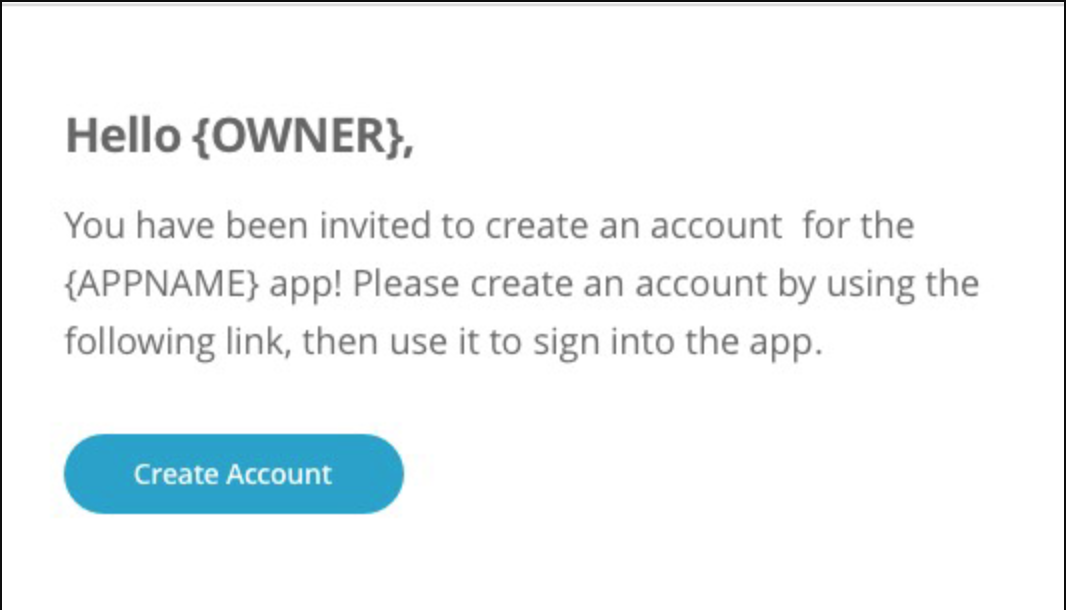
- Once the client receives the email and creates an account, they will be able to log in to your app!
See below for some screenshots of these screens and emails.
Requested Access
Already mentioned above, new with our North Park source code, we now offer a third way to bring users into your app and allow for improved group management.
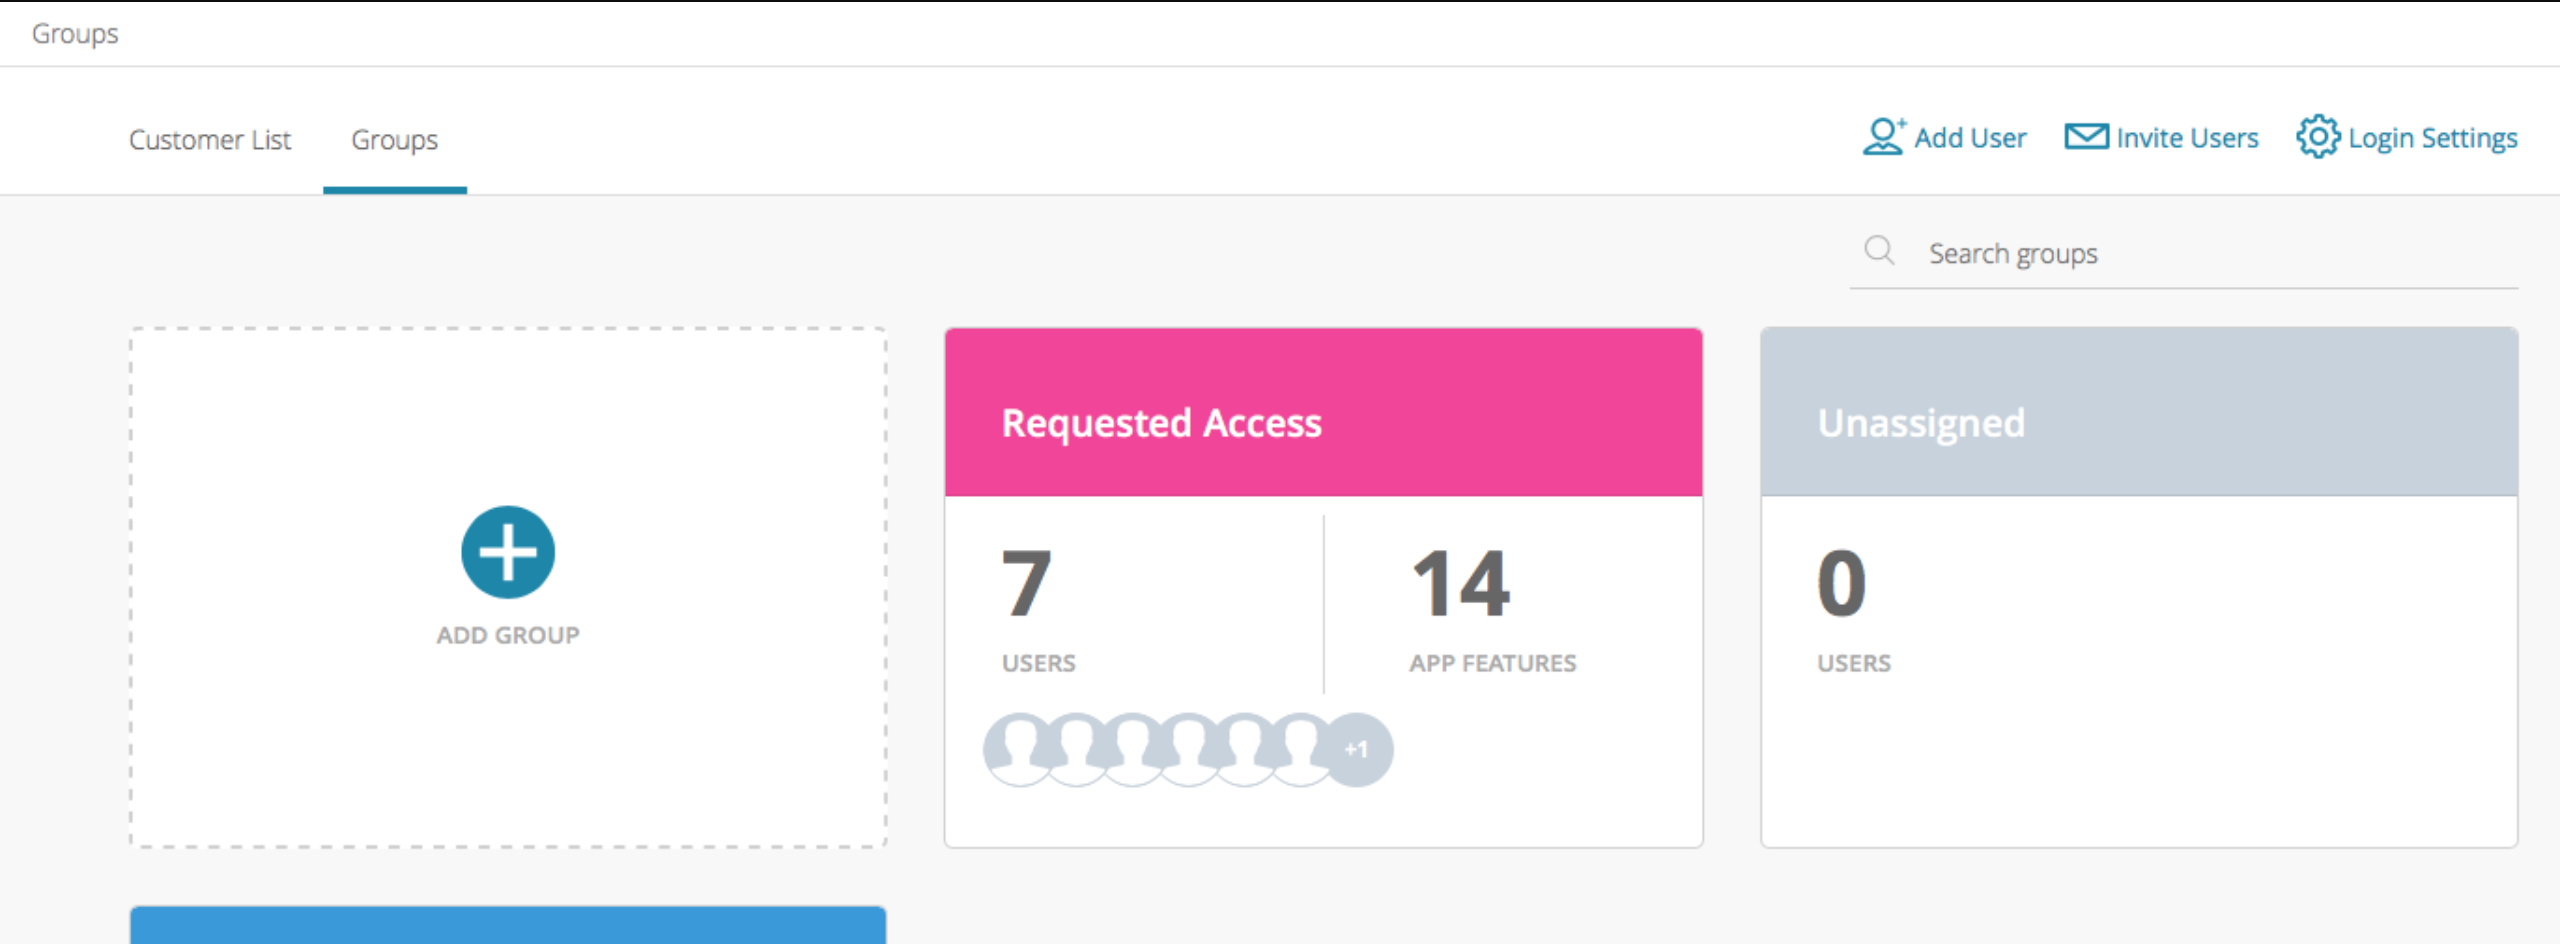
First, you will need to enable Requested Access from the Groups Log-in settings. Once enabled, you will see this new group display on your Groups page.
How it works:
- Your app login screen will now have an option for new users to Request Access.
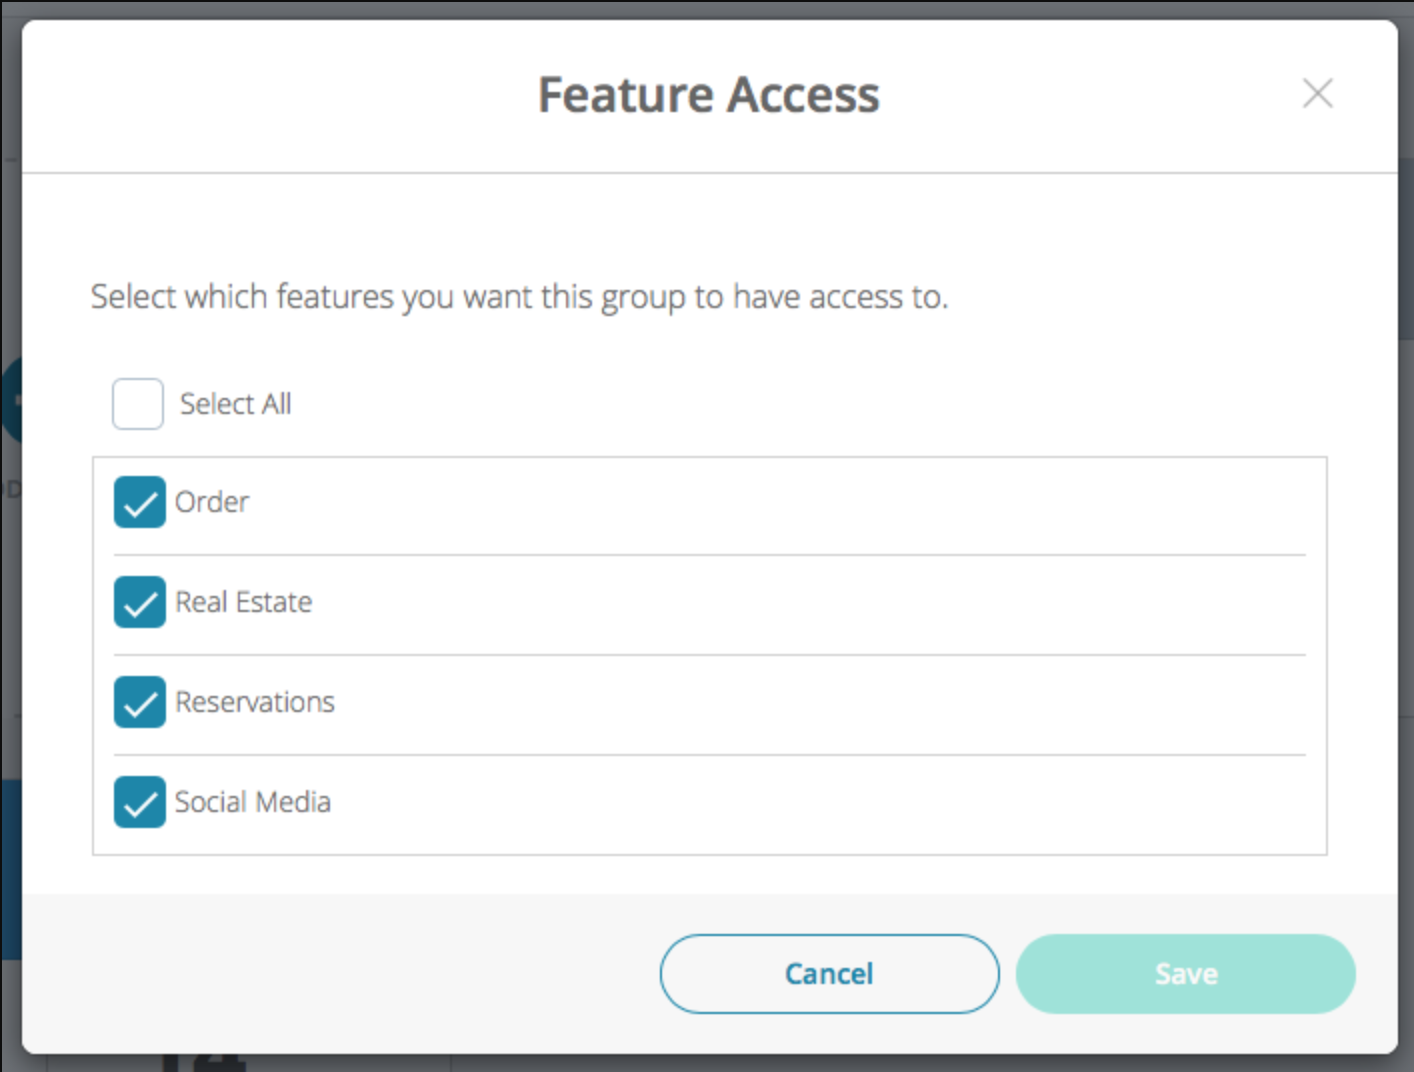
- You can edit the features this group has access to from the Groups page by hovering over the cell and clicking the more menu, or by viewing the group detail view and clicking the more menu there.
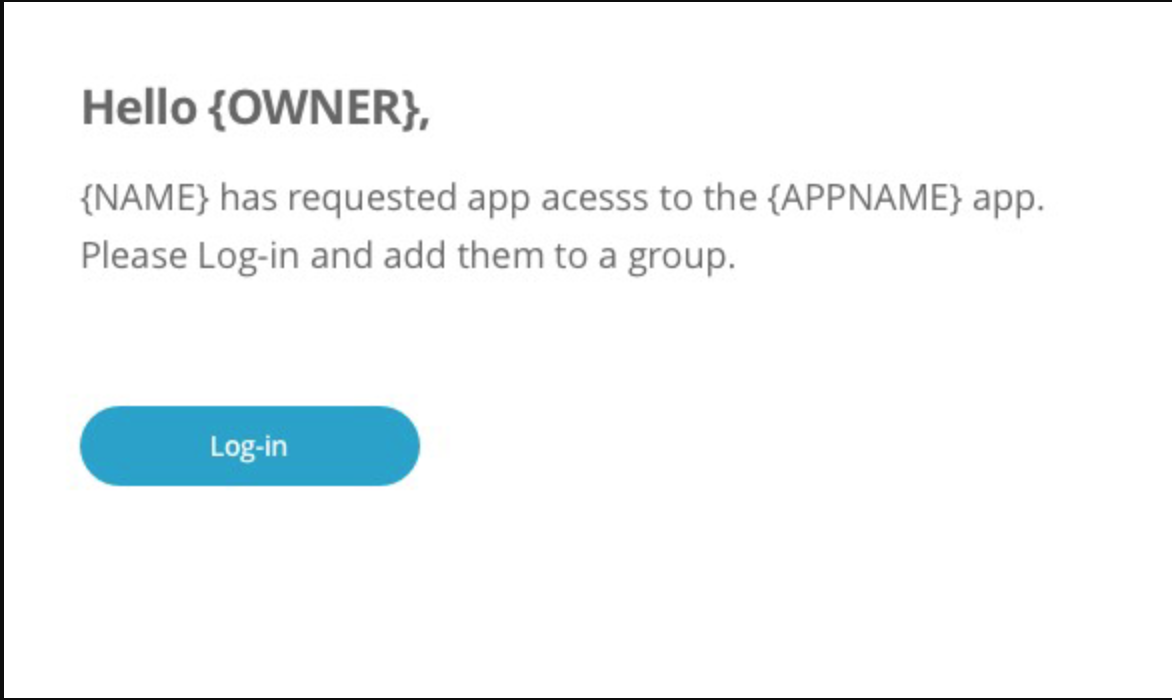
- Once you have users that request access through your app, you will receive emails as the app admin informing you that you have new requested users.
- To move these users into a more specific group, like a student into their grade level, or faculty member into the faculty group, do the following:
- Open the requested access group and navigate to one of those users.
- You can then use the Add to Group feature to move them to this appropriate group. Doing so will also send a push notification notifying the user that they have been assigned a group.
Design
Here is an example of the new Groups Log-in screen on mobile.
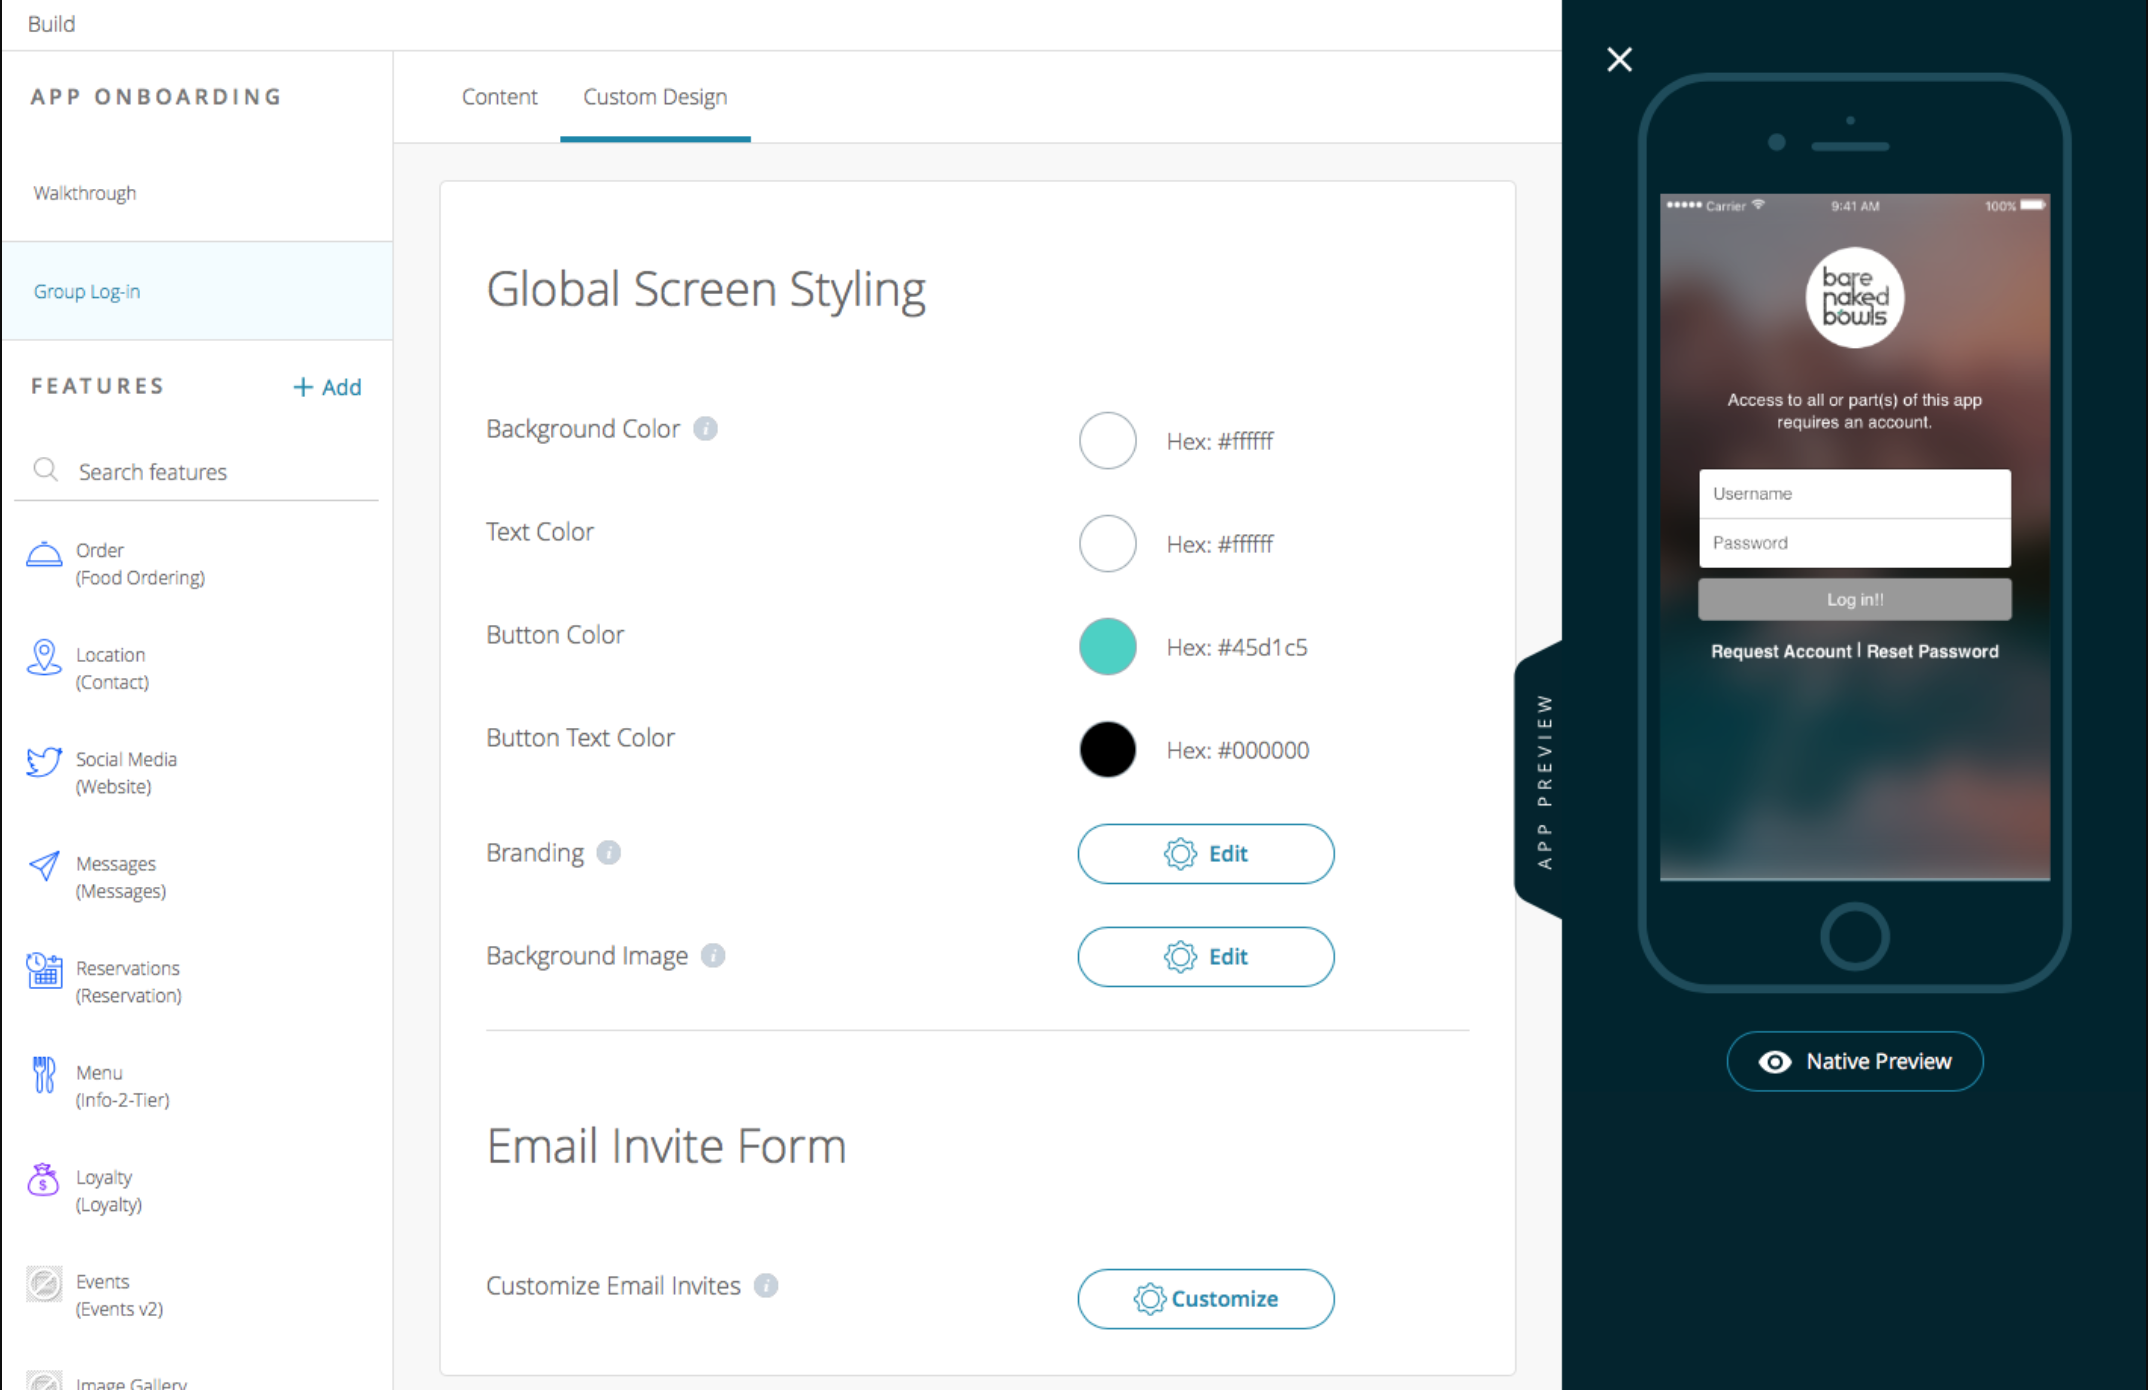
- The design settings will be imported from your Global Design. However, you have the opportunity to adjust these at any time.
- To make adjustments, head to the Build step, then to Group Log-in. You will see there is a Custom Design tab here.
Note: The background image will always be blurred to improve legibility on this page. It is recommended to use images and text color with appropriate contrast, so they are legible.
- You will also notice the Email Invite Form option here. This is where you will be able to customize the Invite Form that is emailed to your users through the Invite option.
- Be careful not to modify the Create Account button here or else the form will not work correctly.
Shared Account (Legacy)
If you were previously using the single-mode on the Membership option, you would now be seeing this screen on your Groups page.
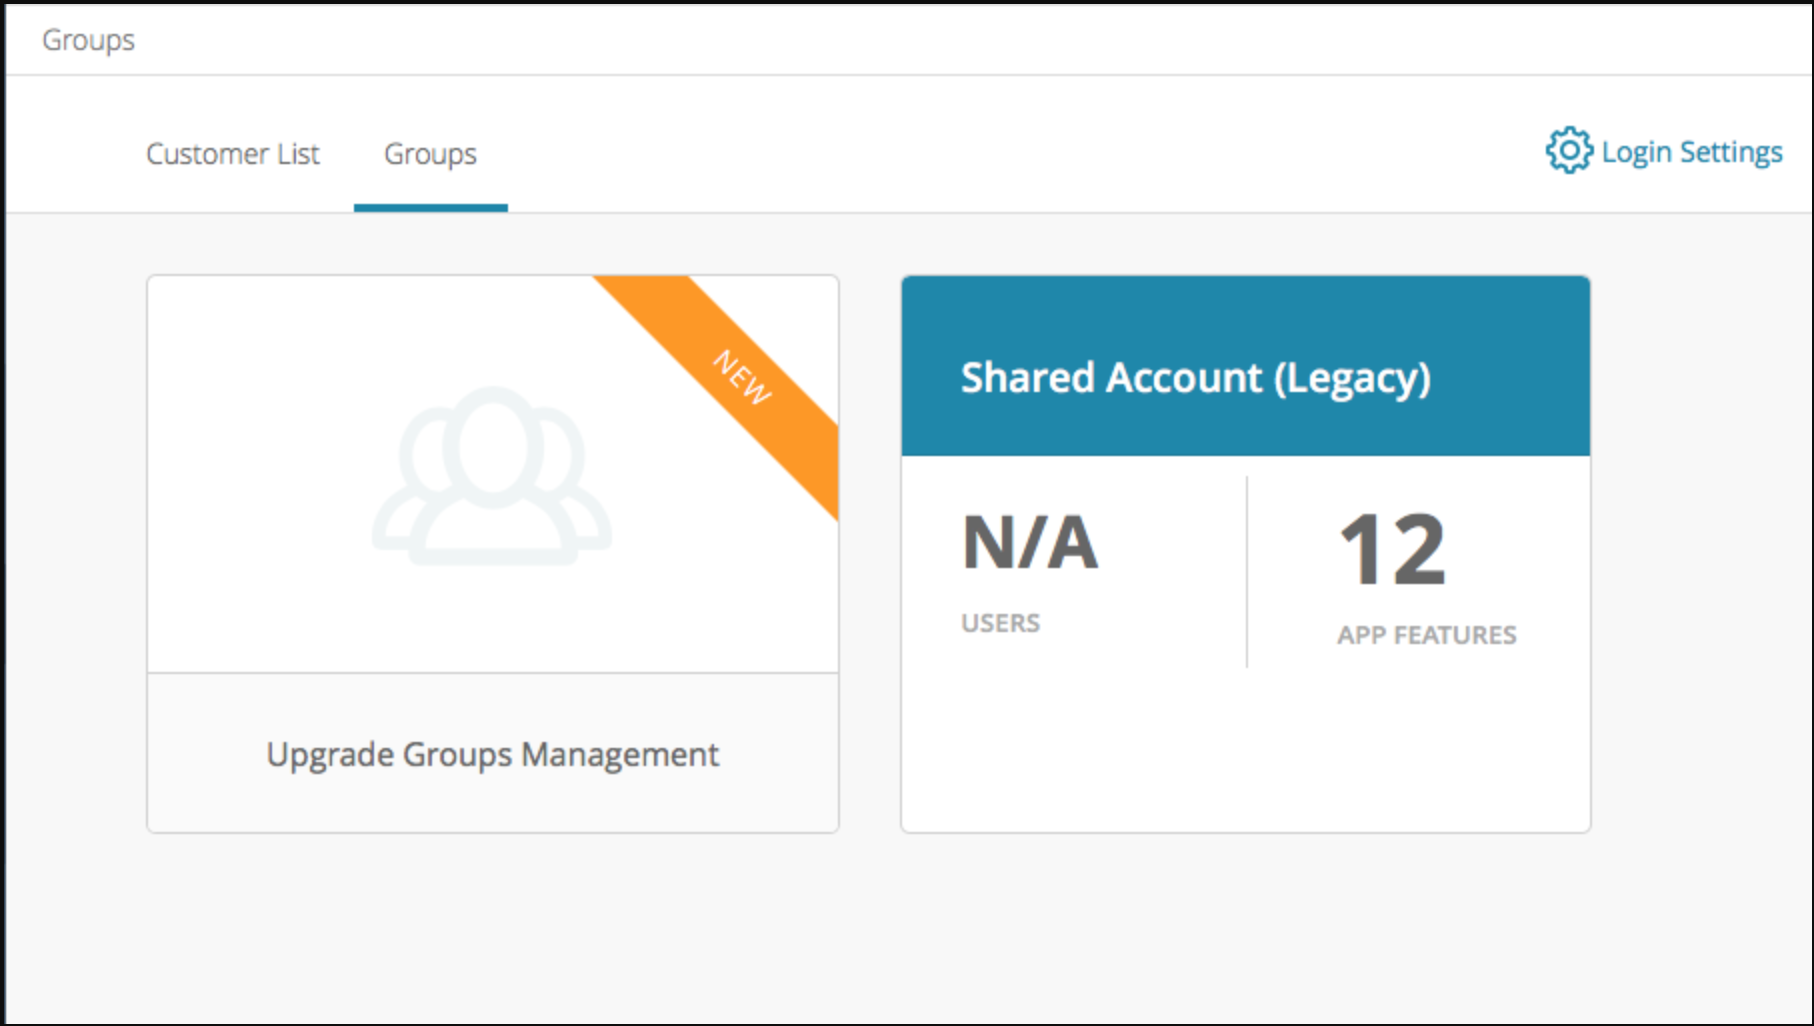
The Shared Account cell on the right will be how you can adjust the username and password for your application.
- If you wish to upgrade this feature to the full Groups Management, you can do so by clicking the upgrade button on the left.
- If you chose to upgrade, you would not be able to revert back to this legacy option. You will be able to continue to use this option, and we have no plan on stopping support for it.
Two things to take note of when upgrading:
- Your Customer Data will be reset.
- The data is not lost completely; once your users receive new accounts and log in, their old customer data will also return.
- Your users will be logged out and will require new accounts to access your app (this is nothing new, and it is what is happening with the old feature as well).
- This is a great opportunity to enable the Request Account feature in the new Groups Management as it will allow your users to self-sign up for access to your application.
